Wow Fina it sounds like you're doing a great job! See fusion is great huh?!? hehe
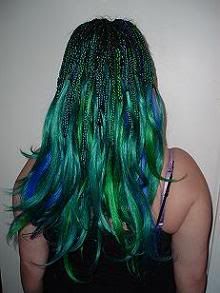
Yes, this fusion is even better! I have them in right now and I haven't had any shedding and the bonds are harder than the fusion sticks... I think I'm in love
I really love the X-10 glue; you're saying this is better ?? I've been making basically tips with chips on the ends of them. . .I make a flat pretip with latex, then go over it with a tiny bit of hot glue from the gun that I flatten out. These have been holding *so well*, AND they are also easy to remove.
I just emailed you to get my free samples!! How much will they sell for? ?
If you'd like the free sample just send me your mailing address and I'll get them out to you asap, no shipping required.
Sherrie- Just like any extensions method they take a couple tries to get the techinque down solid. The adhesive isn't too runny so it wans't too hard to get them in on the back of my head. Just send me your mailing info and I'll send you out some to try for yourself.
Club Salon: Thanks for the website advice, actually all of my pictures are JPEG or BMP but for some reasons certain computers have not been able to view them. This is a problem I was trying to have fixed with a new webdesigner who eventually flaked on me. I working on it again with a new designer and I'm meeting with him this weekend so the new site may be up as early as Monday. If you'd rather me send you a payment request for the protectors just drop me an email to Kristin@HairCandy.net
Kristin, I was just on your site..I need some finger protectors..and I noticed that your image file take a very long time to load even with my DSL, if you change the files to .jpg vice .bmp you will see a major decrease in the time it takes them to load.
Club Salon
http://www.clubsalonspa.com
sherrie215
Members Profile
Send Private Message
Find Members Posts
Add to Buddy List
Super Elite Member
Joined: December 21 2004
Status: Offline
Points: 4424
That looks really easy to do on someone else. But to do on my own head sounds impossible. By the time I would get the wand positioned right while looking in reverse in the mirror I think the melted glue would run off the tip of the wand. What do ya think?
jodie
Members Profile
Send Private Message
Find Members Posts
Add to Buddy List
Newbie
Joined: June 15 2005
Location: United Kingdom
Status: Offline
Points: 85
It's SUPER esay to take them out, I even took out a fresh one, which is typically the hardest to remove, and it came out with ease. Just follow the take out instructions.
I put in quite a few new extensions on myself a little while back with these chips and they are amazing! They are so good that I decided to give out free samples so you can see for yourself
Fusion Chips are the newest addition to the world of Hair Extensions. The bond is made from a new revolutionary adhesive designed specifically for hair extensions. You will not find this product sold other form or in any other shop, they are sold exclusively from HairCandy.net. This is not the same adhesive as the other fusion products I sell, it is far superior. If you had have difficulties applying extensions or having them shed or fall out too quickly in the past, these are the answer to your problem.
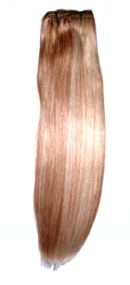
Fusion Chips
Fusion Chips can be use apply a full head of hair extensions or to reattach the hair extensions you've had.
Introducing:
HairCandy Fusion Chips
Step #1
Pin back the above layers of hair and isolate a small section of your natural hair using a hair template as shown.
Step #2
Cut a small strand of the extension weft to be applied.
If reapplying used extensions, simply snip the tip of the hair so that there is no adhesive residue from past applications.
Step #3
Place the extension strand over the small section of natural hair.
Step #4
Place a single fusion chip in the tip of your
fusion wand and let it melt. Next, tap the wand shut to get both sides coated with the adhesive
Step #5
Keep one hand holding the extension (my left hand is not pictured because I had to hold the camera) and use the other hand to apply the melted Fusion Chip to the hair.
Clamp down the fusion wand for just a few seconds until all of the hair gets saturated with the adhesive.
Make sure to leave about 1/4"-1/3" of space between the scalp and the bond so that it does not pull too tightly.
Step #6
Caution: the adhesive will be HOT
Quickly set down the Fusion wand and roll the bond between your fingers. I highly recommend using finger protectors for this so you do not burn your fingers.
Step #7
Congratulations, you just installed a fusion extension!
Fusion Removal
Step #1 Using a pair of pliers (with ridged teeth) crunch the bond a couple times with the pliers. Turn 1/4 of a turn and crunch the bond a few more times.
Step #2 Put one or two drops of acetone on the bond (acetone= nail polish remover).
Step #3 With the acetone going to work dissolving the bond, crunch the bond a few more times in the pliers. Turn 1/4 of a turn and crunch again.
Step #4 The bond should have begun to break down and crack off. Now pinch your natural hair between where the bond and the scalp are and use your other hand to lightly pull the very end of the extension. The bond should give way enough for the hair to be pulled out. There still may be some bond residue on your natural hair that can be picked at with your finger nail or a small comb.
*If the bond is stubborn, repeat steps 2-4 until it comes off*
You cannot post new topics in this forum You cannot reply to topics in this forum You cannot delete your posts in this forum You cannot edit your posts in this forum You cannot create polls in this forum You cannot vote in polls in this forum


 Topic Options

 Post Options
") Thanks(0)
Thanks(0)


 If you'd rather me send you a payment request for the protectors just drop me an email to Kristin@HairCandy.net