QuoteReplyTopic: Install Pics + Review of Celeste Clip in Method !! Posted: March 09 2010 at 10:01am
Hey Guys-
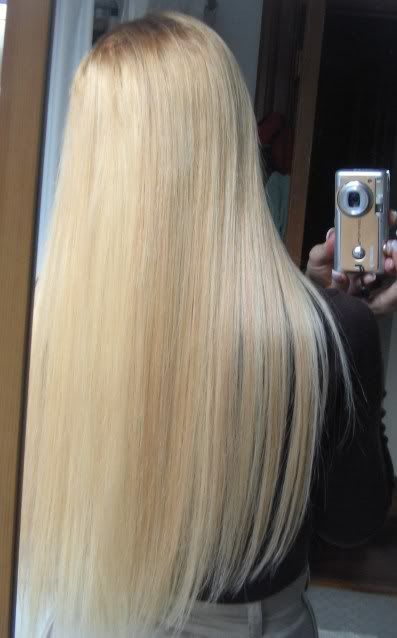
So here comes my long overdue report on Celesteĺs clip in method.
I have worn this method for almost 6 month really, and during these 6 months, I have learnt a lot, on hair, on this method, and what works for me.
The hair
So when I started, I decided to use brand new bohyme hair and some of my virgin russian hair from Gene ľnot 100% virgin because it had been lightened a bit to match my hair- .
The process of sewing clips on hair wefts was kind of a pain, because I am not very gifted when it comes to sewing, but I did it. It took me hours literally to do everything just right. All the pieces had been sealed with Sherrieĺs weft sealant I have to mention too.
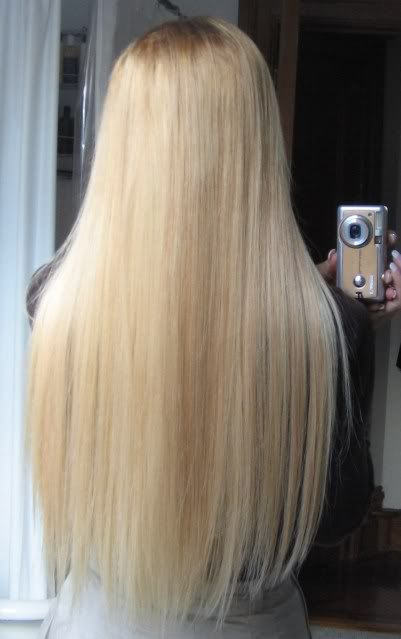
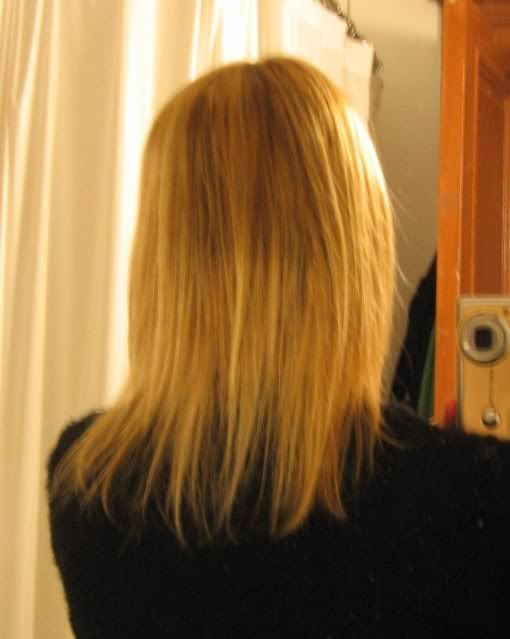
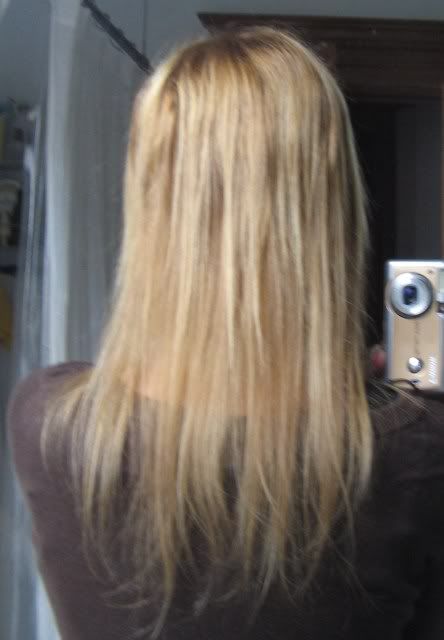
I had one big temple to temple piece, that measured 13 inches long, it was a double weft with some 18ĺ machine weft + a whole handtied weft from bohyme, glued together with LG. This ôbigö piece had 6 clips on it.
I had three extra pieces in the back, all of which were about 6 inches long. All doubled.
These pieces had 4 clips on.
I had two side pieces that were about 3 inches long too. These pieces had 2 clips on, smaller clips than in the back.
For a total of about 22 clips on these pieces, and 22 rings installed in my hair.
And then I added what I call my ôtop rowö which I installed in a traditional way, using my ôinvisible weftö technique, with a narrow piece of tape and LG.
This ôtop rowö, which was the only permanent part of my install, was composed of two side pieces, about 3 to 4 inches long, and another temple to temple handtied weft. Very flat and seamless.
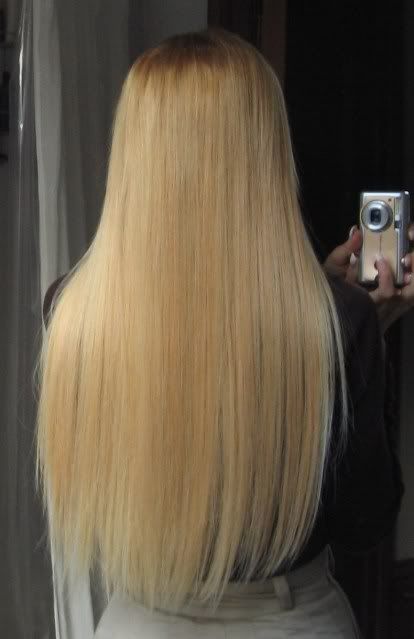
I really needed this ôpermanentö top row because there was no way I could have done a ôclip onlyö install without some major weft and clips showing through my own hair. No way.
So at night I would ľif I wanted to- unclip 90% of the hair I was wearing, keeping only 10% of the install in one low ponytail.
The downside was that the micro rings or the rubber bands used would show through though. So it was ok to walk around the house but thatĺs it. Plus the huge density difference would have made it odd for me to go out like that, and sport a big fat ponytail or install a few hours later.
The material you need
I got most of my stuff from the place recommended by Kristie:
The ômicro ring loop pullerö, the regular microrings (not lined with silicone), the red pliers (sold in combo with an install hook that I didnĺt use) andů yeah I think thatĺs it.
I ordered a bunch of clip ins first from Ebay, they were very cheap and came from Asia. So shipping took a bit longer. I ordered some small, medium and large clips in blonde color. I ended up using mostly the large ones, because they were easier to place when installing the clip-in wefts.
Itĺs a store based in New York, so the shipping was super fast and almost free, and their prices were very good. What I like the most is that they had a sort of bronze/golden color that matched my hair color (at the roots) much much better than the ôblonde colorö.
I think unless you have very light blonde at the roots, (like Valĺ or Sherrie) you might have better luck with a ôbronzeö or light brown clip. Youĺll find this color in Ebay stores too.
When you order clips in large quantities, be careful with a few things. The clips are covered with a thin transparent layer of something that looks like plastic. Itĺs just a layer that assures the clip is smooth and glides in your hair. I have had a few faulty clips whose ôteethö were not well coated, and the metal ended up scratching my scalp and ripping my own hair. It took me a while to figure out what it was. So watch out for that.
Also, Kristie was right, get the kind of clips that have straight teeth, not the ones that have a little bend in the end. They wonĺt insert in your microrings.
I bought the little transparent rubber bands from the same place, because I wanted to try the rubber band technique as well, not knowing which one Iĺd prefer in the end.
Allright, so when you have your clip-ins set done, which honestly takes a LONG freaking time, at least thatĺs how it felt to me, you have done most of the work. Good news.
I used my already measured clip in weft to get an idea of where I had to place the rings.
I would part my hair where I wanted to place the weft, place the piece against my scalp, and would get an idea of where the first ring would have to be. Once Iĺd be done with the first ring, Iĺd place the hairpiece again, and get an idea of where the second ring would have to go, and so onů Not super scientifically precise, but efficient enough.
Installing rings was kind of easy, like any thing kind of new (well I had already played with rings a few years ago) it takes a bit longer at first, but itĺs ok.
Heck after years of tape and LG, trying a new method is kind of exciting!
When you close the ring with the pliers, do it in two times. I noticed it allows the ring to close more tightly. I would close the ring a first time, try inserting the clip in the ring, and if it worked, I would apply pressure a second to really close the ring.
Sometimes, although rarely, the ring would be placed too close to the scalp, to the point where I could not insert the clip. I would have to undo the ring, which would be easier if the ring wasnĺt super tightly closed.
The rings would not bother me a bit; they were very easy to wear.
I had however HUGE problems removing some of them during the first month. It was mostly due to the fact that I wasnĺt totally used to microrings, and how to safely remove them. I have found that for me, it was essential to see what was doing, rather than to ôfeelö. I remember Kristie said she was totally fine removing the rings if she could feel the ring with her fingers, for me, I needed a visual.
The biggest common mistake for me was to try to re open the rings without getting a good visual and being 100% sure of what I was doing. I would end up bending and crushing the ring, instead of popping it open. The ring would take a weird shape, look all smushed into my hair, what a disaster! I had to literally cut my own hair a few times to take out a few rings. That really motivated me to try the rubber bands. I learnt afterwards how to be patient with the microrings though, get a clear visual, and be very conservative when using those pliers at removals. It really takes a little amount of pressure. So this part took me a while to master, but now Iĺm totally fine and comfortable with it.
So the rubber bandsů at first I thought they were impossible to put on. Again, new thing to play with, gotta learn how to use these babies. I learnt that I really had to play with them, ôwarmö them up, stretch them a bit, before I could do a little ponytail with them.
It took a little bit of practice at first but then I was totally ok with it. The rubber band ponytails would create little bumps, when done, which was usually fine with the clip-in pieces on top. It wasnĺt as flat as the microrings though. I loved how light theyĺd feel at first, and surprisingly very secure too.
However, after a few days, Iĺd often lose some of the rubber bands, during shampoo or after blowdrying my hair. I thought maybe the ponytail werenĺt tight enough. But after inspection, I realize the rubber band didnĺt stand the heat very well, I tried not be careful with the straightening iron etc. but the rubber bands would come off and look sort of ôwrinkledö.
I did some research to see if there were different kinds of qualities of rubber bands, but I realized they were all pretty much made with the same stuff. My rubber bands were supposed to be water and heat resistant, but stillů
So I decided to go back to microrings, really work on the removal process, and stuck with this technique.
The Pros of Celeste Clip ins method
Well the first thing I can think of is obviously the big time saving you get by not having to wash, dry and style 4 to 6 oz of hair every single day.
I used to take off all the pieces before shampooing and would put them back in after blow-drying.
Secondly, I really liked how my hair felt healthier while I was using this technique. I monitor the growth of my hair and saw a clear benefit. My hair grew thicker and a little longer than usual.
When I switched back to LG at the beginning of 2010, I immediately noticed how my hair got thinner and a tad shorter after the first take down. Itĺs also due to the fact that it was a rushed take down and the install was waaay too old!
The clip in method felt SO healthy. I felt like I was taking better care of myself, by not using so much chemicals and staying away from fumes.
I also get scalp problems, itĺs not exactly dandruff, itĺs more like psoriasis I think. It comes and goes, not a huge issue, I know how to deal with it. Not having any tape or glue except for the top row was helping me I think keeping this problem at bay or treating it faster.
I liked how the maintenance was not super time consuming. I didnĺt have to set up a whole day or two just for take down, cleaning and re installing the hair.
I learnt that I needed to change the rings every couple weeks. More than that and the rings were putting too much pressure on my hair or were just sliding out.
When I would change the rings, I would do one ring at a time. Iĺd take one ring out, then place a new one either in the same spot, or very close to that spot. This made it easier, and I didnĺt have to measure anything. Changing all the rings would take me less than an hour. No glue, no mess. Iĺd redo the top row every three weeks or so, and it would take me very little time as well. So it was great to be able to have a clean tight install done in a couple hours really. I liked how I didnĺt have to use chemicals, it wouldnĺt ruin my french manicure, or messed up my bathroom lol!
The cons of the Celeste Clip ins method
I think one thing that bothered me was that it didnĺt feel like I had long hair, on a permanent basis. It felt more like I had a kind of wig on, that I would take off and put back on every day. I didnĺt like how I felt without the clip ins in.
The install is secure, but not as secure as with LG or tape. If LG is 100% secure, the clip in method is 80%. On rare occasion a ring would slide out, or a clip would sort of ôlift upö from the ring.
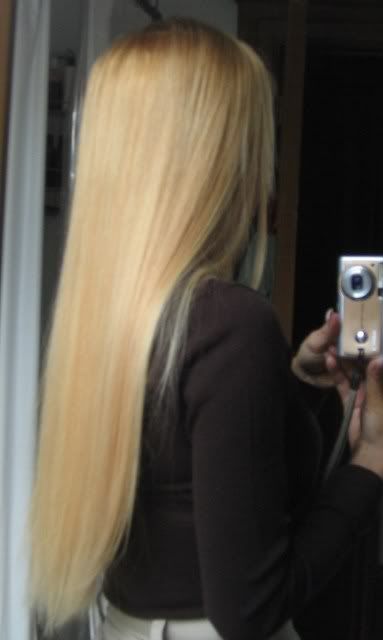
This hair extension method is not as discreet as LG, seamless, fusion or tape. If it gets windy out, you need to be careful with the wind uncovering a weft or a clip. Itĺs not like LG or tape where you have a layer of your own hair glued on top of the weft. With the clip in method, the weft is by itself, with a lose layer of your own hair on top.
Putting the clip ins on was much more time consuming than I originally imagined. You do need to lift your own hair, attach it on top of your head, before placing the different rows and side pieces. It wasnĺt a routine that I could do mindlessly either, otherwise the clips would show through. So even though I was saving some time every morning by not shampooing, conditioning and blow-drying my extensions, there was an additional 10-15 minutes spent on putting on the pieces every day.
This was ok at home where I have good mirrors, but would become tricky when I was staying at some friendsĺ house, or at a hotel.
Sometimes Iĺd have a clip that wouldnĺt come out, the ring was stuck in the clip. In that case, I learnt to try to gently open up the teeth of the clip with my thumb, to let the micro ring slide out of the clip.
Another thing is, you need some kind of ôlogisticsö in your bathroom and figure where to put your clip ins once you take them off at night. I donĺt particularly like the idea of having hair hanging in my bathroom every day, my BF knows about it, but still, I try to spare him ů I used to place the clip ins in a basket with a towel on it, so it wouldnĺt look too freaky. It still felt weird, I didnĺt get used to it. Again, it gets trickier when youĺre not at home!
The clips are just a lot bulkier than tape or LG. When I wear an LG install, you can barely feel the bumps of the tracks on my head, but when wearing clip ins, itĺs quite a lot of metal, and the metal clips sewn to the weft inevitably create thicker rows.
It can get a little complicated if you exercise a lot, with this extensions method. At least for me. I love running, I run on a regular basis, rain or shine. I couldnĺt go out with no hair on my head, so Iĺd have to put on my clip ins. I couldnĺt really keep the set of hair I had worn during my run for the rest of the day without washing it, conditioning + styling it, which kind of defeated the purpose of this technique. So I created a set of hair for morning runs and a set of clip ins for the rest of the day. Again, I kind of felt weird about the whole thing, like I was switching wigs or something.
One other inconvenience was thatů well, you have metal on your head. Not good when you have a last minute plan MRI and you canĺt wear any metal whatsoever in the room. And Iĺm thinking airport security check must be fun with a clip in set, actually Iĺd love to hear stories if some of you guys have done it!
What I learnt with this technique
One big lesson I learnt, if not the biggest lesson I learnt, was about hair longevity.
I wore my virgin russian + bohyme, so it was interesting to compare how both this hair types evolved through time.
The only styling I would do was minor ironing (about a couple minutes) every day and some brushing.
Surprisingly enough, both the Bohyme and the russian did NOT like the method. Especially the russian. I got a ton of split ends and breakage on the russian. It became quite dull after a couple months. Bohyme kept some of its luster, and seemed to do a little better, but also, split ends and breakage around month 3/4. I had to do a new set of clip ins.
I used to think that the whole shampooing/conditioning/blow-drying/ironing routine was the worst for hair extensions, well apparently not.
I realized that russian & Bohyme do need to be shampooed regularly or they become limp and lose their bounce and shine, every week or every two weeks max. When shampooing rarely like that, it was essential to use a clarifying shampoo, because we donĺt realize it, but our hair extensions collect a lot of dirt and oils from day to day life, like perfume, lotions, cooking vapors, sweat etc.
I used to think washing daily was speeding up the aging process of my hair extensions like nothing else, now I think shampooing my extensions too rarely is actually the worst.
Also, when I wash my extensions daily as I do with an LG install, I also condition the extensions daily.
That little dose of moisture every day must make a big difference in the long run.
I also learnt that when you wear clip ins, you need to simplify your install. You canĺt have a bunch of little pieces everywhere, you canĺt ôstackö up layers, as you would with Liquid Gold, the clips need some space. So you need to be smart about how to organize the back rows/ temple to temple rows and side pieces, so everything fits together and you still have the volume you want where you need it.
Finally, because the metal clips create extra bulk and thicker wefts, your install needs to be very tight. If the clips become too lose, the wefts wonĺt hang the same way, and your install wonĺt look natural and smooth anymore. That is why I learnt to change the rings every two weeks.
Conclusion:
Itĺs not all black and white. To me the big plus of this install method wasnĺt the one I expected.
I felt it was a MUCH healthier way to wear hair extensions. It wasnĺt necessarily more economical, as I envisioned.
And even though I would save a little bit of time in the morning, it was definitely a trade off because this method did require a good organization and didnĺt necessarily make my life much easier.
I can say for sure that I will return to this method, however. It will be good to alternate this clip in method with a ôpermanentö LG method.
You cannot post new topics in this forum You cannot reply to topics in this forum You cannot delete your posts in this forum You cannot edit your posts in this forum You cannot create polls in this forum You cannot vote in polls in this forum


 Topic Options


 Post Options
") Thanks(0)
Thanks(0)