Lace Front Newbie Information Thread
Printed From: HairBoutique.com
Category: Lace Front Wigs
Forum Name: Lace Front Wig Talk
Forum Description: Lace Front Wig Talk
URL: https://talk.hairboutique.com/forum_posts.asp?TID=59553
Printed Date: February 05 2026 at 5:24am
Topic: Lace Front Newbie Information Thread
Posted By: sexibeach
Subject: Lace Front Newbie Information Thread
Date Posted: March 07 2008 at 9:25pm
|
Rather you realize this are not american lf vendors are purchasing from chinese vendors...and its very easy for you to have this information so that you can purchase lf's and bypass the middle man and spend less money than buying from an american vendor..the american vendors DO NOT venilate their own wigs but the chinese do, that's why they order from them just like you can.. all you need to do is learn about measuring and densities and how to take care of the units.. but this is a list of chinese vendors that make lf wigs and they are reliable vendors: Here's the vendor contact information that ladies can purchase lf. CHINESE VENDORS KevinCN: mailto:Ribzhangcn@yahoo.com.cn - or mailto:kevincn0532@yahoo.com.cn - Kevin Yan: kevinfreedelee (3 order minimum) mailto:freedelee@yahoo.com - Qingdao Hioh Hair Products Co., Ltd. Mr Kevin Yan Unit One, No.20, Tel: 0086 532 83675381 <ST1:COUNTRY-REGIoN> mailto:gaojing2003a@yahoo.com.cn - or mailto:lydia2003a@yahoo.com.cn - 31# Dayao, 266316 Tel : 86 532 88295339 Fax : 86 532 88295339 http://public.fotki.com/lydiagao/ - Longfei L/F wig Password: longfei Capbase Password: capbase Website : http://www.shuangyehair.com/ - Fotki: http://public.fotki.com/jacksun - Email: sy_hair2006 @ yahoo.com Rex mailto:Rex7197@yahoo.com.cn - http://public.fotki.com/rex7197/ - Junjie Lace Front Wig: mailto:ludi8899@hotmail.com - Sales Manager Company: Yiweidu Industry Group Co.,Ltd MSN: wayne.ho@yiweidu.com
Things to Know about hair: Once hair is stripped of the cuticle, it's lost it's protective coating, and you will have to work to keep the hair together.. Most BSS and some vendor's hair is acid washed to strip the cuticles off the hair. The hair is hten coated with silicone to give it a shiny appearance. Once the silicone wears off the hair shows its true (damaged) nature, and will begin to tangle and mat..especially when the cuticles of the hair are not venilated in the same direction..therefore a bleach bath is necessary..
BLEACH TIP TO DETANGLE YOUR UNIT 1. Mix one gallon of very hot water (hottest available from the tap) with 1/4 cup of Clorox bleach. (Do not use old Clorox or a generic brand, it won’t work) 2. Totally submerge the human hair unit into the water for approximately 2 or 3 minutes.Do not leave longer than 3 minutes Small bubbles will normally appear durring the process. Comb or brush very gently when submerged. 3. Remove hair unit and submerge in a 4. Mix 1/4 cup of ammonia to 3 cups of warm water. Dip hair unit in and out twice. 5. Repeat step 3 6.Apply conditioner, rinse and style. Your wig will look brand new and be tangle free So is the bleach method not to be used that often because it will eventually change the hair color, also you can saturate the unit with nexxus or a deep conditioner on the unit place in a plastic bag, nuke in the microwave for 30 seconds, and then put back in again for another 15 seconds. Most of the bleach/ammonia solutions work on hair that has already been damaged. High quality cuticle aligned, cuticle intact quality hair on the other hand will last for years with proper care. That's the difference in ordering from a higher quality vendor with high quality aligned cuticle hair, than you might get from some (not all) of the chinese vendors when your taking the lesser expensive road. Thats why the bleach bath is necessary when you begin to experience tangling..If your unit has tangled and matted then use the professional strength bleach bath.. the ammonia doesn't have to be a name brand any brand will do..Some have used generic brands of the bleach and have been satisfied with the results. This really is temporay fix to cuticles that have not been aligned, and may have to be done again... Hair Care and Washing to Keep Hair fresh and tangle Free Don't treat your Lf hair like African American hair. Embrace your inner "white girl". Use high products designed for caucasion hair like Aveda and Nexxus etc. African American products cause build up which causes frizz and tangle. Even yaki textured hair is still closer in composition to caucasion/asian hair b/c that's what it is, its not coarse AA hair. I wash my unit underneath the water sprout with cool water not hot, that's a no, no..while still on the wig head, I don’t recommend the swishing the unit in a bowl wash. I find keeping it on the wig head and running my fingers thru as I shampoo and condition is best to keep it from tangling while washing. I then put the hair under the water, put some shampoo in the hair, and gently run my fingers thru the unit onto the hair. I rinse the hair, press with a the towel to get some of the water out. Put some leave in conditioner, comb thru the hair with a wide-tooth comb. Let air dry. If additional conditioning is needed, I then take the hair off the foam head, put on deep conditioner put it in a ziplock bag, put it in the microwave for 30 sec.’s, once the microwave stops you then take it out and put it back in for another 15 sec.’s. Once it's done take the hair out of the bag and oh my god the hair is sooooo soft and silky. Put some biosilk oil on it, comb thru it with a wide toothcomb again, and let the hair air-dry. Apply Fray Block to lace (to stop it from fraying) and spray Fast Tract Knot sealer to knots (to avoid shedding) I think that might be of some help also. Step by Step application by Hairitage: Supply List: Choose between the items below the ones that suit your needs. Goo Gone 91 or 99% Alcohol (from the drugstore) * = from Coolpiece Other items I frequently use: Shampoo: Creme of Nature, or Dove Moisture Intense, or Silk Elements Luxury Moisturizing Conditioner: Mane n'Tail, or Thermasilk Moisture Infusing, any Dove conditioner, or Kerasilk, or Marc Anthony's Strictly Curls - Frizz sealing conditioner For maintaining curls: John Frieda's Frizz-Ease Dream Curls-Curl Perfecter, Sebastian's Wet Liquid Gel, Marc Anthony's Strictly Curls - Curls defining lotion, Ion Curl defining styling creme, Nexxus Curl Energee-Curl enhancing styler, IC Leave-In Moisturizer with Aloe Vera. For lustre: Proclaim Glossing Polish Applying your lace front:
I use Ultra Hold (UH) and/or Mighty Tite (MT) as glue..I do not use tape and I hate Vapon Notape.. But I use it in extreme cases at the nape only…Now I am trying the combo ORWG/UH and it gives me a hold similar to EB but without the crustiness.
5. Wash your lace front for the next time.
If your hair color is dark, then knots that hold the hair onto the base will be changed from dark to a light brown and will appear much less visible. Single knots such as those used at the front edge will be less detectable. If your hair color is medium brown, the knots will be even less detectable, but with lighter brown hair, bleaching will make very little difference. Bleaching knots with blonde hair in not necessary. With all-lace systems, where the hair density is such that there isn't enough room on the lace for all single knots, you will inevitably be able to spot some knotting upon close inspection from a top view perspective. For extra light and light density systems, the all lace base is less detectable because there is enough room on the lace to use all single knots and still arrive at a medium to light hair density. Knots cannot be bleached in areas of a lace or monofilament system that has a polyurethane tape tab system.
Other FAQS What is the difference between a lace front and full lace wig?
How long can I wear the unit? How long will the wig last? Density (ultra light, light, light-medium or medium) you can have one density or different densities throughout the wig. The amount of hair in a style; may also be referred to as thickness or volume. This choice is definitely up to the customer. Choose a density for the hairline, front of wig and then the base of wig.
Length and make of hair pieces
I just thought that I would post this here since there is confusion about the differences between a lacefront and a full lace wig. The only criteria for a lacefront wig is that the front hairline (temple to temple or the entire hairline) is ventilated with a lace material. The area ventilated can be just the hairline or up to half of the wig (ear to ear). The remainder of the wig can be wefted or ventilated on a net material that isn't technically lace. I think that we are using the terms handtied and lacefront interchangebly. A lacefront does not have to be 100% handtied but a fully ventilated lace unit does. Hope that I didn't confuse anyone. A lacefront is a good choice for newbies or anyone who wears their hair down or in low ponytails. The lace area is limited and thus the styles are limited. Depending on how large the lace area is, you may be able to do a half pony or flat twists. The back may be elastic with adjustment hooks or it may have a small nape area that can be adhered to the skin. A full lace unit is a good choice for those experienced with lace wigs and those wanting full styling freedom. Now, there are vendors who are selling units that have elastic or stretch net and passing them off as full lace. I do not agree with this phrasing but it is common for the vendors used on BHM so be aware. Depending on the color of the stretch/elastic you can part all the way down the unit or the color may prevent you from doing that. Full lace units can be made from any of the lace materials but the most commonly ordered here are French and Swiss. Different vendors are using different laces for these so be careful. One vendors' French is another's Swiss because they know that most people don't know the difference. |
Replies:
Posted By: Divavocals
Date Posted: March 07 2008 at 9:30pm
She's baaaaaaaaaack!!!!!!! Now where's the rest of your crew girl?? |
Posted By: sexibeach
Date Posted: March 07 2008 at 9:39pm
LACE UNIT HAIR COMPOUND AND MANUFACTURER’S RESEARCH AND INFORMATION
· The acidic-based permanents will swell the hair in a moderate 15%-25%. · The alkali-based permanents will swell the hair in a whopping 300%! · On our own normal hair there is a microscopic layer of natural oil. It keeps the hair’s moisture at the usual levels (10-11.5%), even though the relative humidity in the air (25-90%) is much higher. The layer of oil guards the hair from swelling. · When chemically stripping the cuticles, the oily layer is stripped from the hair and it loses the natural protection. Swelling occurs on a regular basis and is one of the main reasons the hair is so vulnerable to breakage.
· One major reason for hair breakage is the combing forces applied. While shampooing, towel drying and conditioning the hair, one must stroke the hair in one direction. · During combing, the hair is stretched and will break when stretched 30%-35% more than its original length. After the hair is stretched 17%-20% longer than the original length, there will be irreversible damage and it cannot bounce back to it’s natural length. For non-cuticle hair, the numbers are much scarier. · The ammonium within semi-permanent dyes and similar products do not damage the hair as much as the peroxide, although the experts claim otherwise for their product’s safety campaign.
Moisture and how it affects the hair’s appearance and the individual fiber’s strength. Moisture, why it matters:
The critical moisture level is the difference between a fresh slice of bread and one left on the counter for 3 days. In the example of the straw or the stale slice of bread, if we apply the slightest pressure, they will break. The same pressure on the fresh slice of bread or the green grass shows us how malleable these materials could be. Likewise, any pressure put on dry human hair, as opposed to well-moisturized hair, will result in breakage.
The important lesson here is that moisture - any type of moisture - will increase the strength of the hair by up to 300%! Every test I have conducted has shown me that plain water is as effective as any conditioner or leave-in moisturizer. For example, try wearing your jeans after washing them, while they are still soaking wet and feel the roughness of the fabric. This has to do with the swelling and increased strength of the fabric when wet. Until the water evaporates, the denim will be significantly stronger. The same goes for hair. All the stories written by marketing departments about conditioners that add strength and elasticity to hair are about as good as the stories your parents used to tell you to calm you before going to sleep – It’s all placebo effect.
In hot desert climates such as in Turning to conditioners, most of those sold to the public are not appropriate for the hair used in hair systems because of a marked difference in the surface energy of hair that no longer has its cuticle. Using the wrong conditioner will coat and weigh down the hair without delivering the expected benefits. Contrary to popular belief, the key function of a conditioner is to reduce friction between adjacent hairs, preventing the loss of vital hair cells, the generation of electricity both of which impact the hair's longevity and manageability. Moisture retention is a benefit that was added at a later stage in the development of conditioners as scientists came to understand the physics of hair growth. Even today's best conditioner can only retain moisture in top quality hair for 2 to 3 hours. Damaged hair, or over-processed hair may lose its moisture in half that time. However there are a few conditioners specifically formulated for processed hair, but without your advice, your clients are unlikely to be able to find them. If your client plans to buy a conditioner in his or her local drug store or supermarket, encourage them to select one that states on the label that it is for "Light blond hair" or for "Damaged hair”. The surface energy of light blonde hair at 36-38 mega neutrons approximates the surface energy of processed hair (42 mega neutrons). For comparison, the surface energy of regular, growing hair is 30-32 mega neutrons. A sophisticated (obsessional?) client might try calling his or her cosmetic company to request the surface energy range of the hair their shampoo or conditioner is designed to react with. Alternatively, they could request the surface tension of the shampoo or conditioner itself to determine its compatibility with their own hair type. Unfortunately most of the time, they will find that the manufacturer does not have this information and probably does not even understand the question. This reflects the fact that most research dollars today go into fragrance, color and other cosmetic attributes, not the science of hair care. more information on the scientific research: Most of the hair ventilated into custom-made hairpieces sold in the During the collecting and sorting of the donated hair it is divided into two groups: · Remy hair: Hair that has been cut, and maintained with the roots aligned and bound together at the top of the bundle. These bundles are carefully preserved throughout the export process and arrive at the factory still intact. · Non-Remy hair: Hair that does not have its roots aligned. It may have been collected off the floor, or there may be some other reason they were unable to keep the roots together and running in the same direction. This hair is sold at a much cheaper price than remy hair.
We have to understand that non-cuticle human hair means hair that has been fundamentally damaged. I compare it to my hand losing its protective layer of skin. I know this sound brutal, but mechanically it’s similar. If your hand were damaged in this way, you would run to the hospital where they would apply bandages and oil-based ointments not just isolate the pain but to prevent chaffing that could cause additional damage. Well, the same logic applies to non-cuticle hair - except it will never heal. Just like the hospital, we try to isolate and protect the hair by applying special oil-based liquids such as conditioners that (should be) designed specifically for non-cuticle hair. If you use hair care products made for normal hair, you will be doing your client a major disservice. The lack of a protective cuticle layer has other consequences. It allows everything to be easily absorbed into the hair – and lets vital moisture out again. Non-remy hair dries at a much more rapid rate and quickly loses its luster and body. You would never consider cleaning your favorite fine Italian cotton shirt with same detergent you use to clean your old cast iron pot. And you would not clean your carpet with the same detergent you use to clean your wood table. And yet many people do precisely this when it comes to human hair. Let me repeat - cuticle and non-cuticle hair are different product types with different maintenance needs. Each one requires its own specialist product. We are going to classify human hair as follows. I will describe the characteristics of each variety and summarize its pros and cons. Origin: Grade: Cuticle, Non-Cuticle, Virgin, Processed, Single Drawn, Double Drawn, Remy and Non-Remy · Type: Caucasian, Asian Chinese Hair (aka Asian Hair): A thick and coarse fiber that is naturally straight and dark brown to black in color. Advantages: High Quantity, Durability and Low Cost. It is the strongest human hair and is able to withstand multiple chemical and mechanical processes. It is easily mass-produced making it a low cost item. It is the most popular hair in the industry because it is comfortable to process at the manufacturing level and there is no shortage of supply. Ventilating a hairpiece does not require as much skill or care as with cuticle hair. Disadvantages: Poor Quality. Chinese hair requires extensive chemical processing to output hair that simulates European texture, color and body. The majority of the hair is collected and processed as double drawn, non-remy hair that requires heavy-duty chemicals to remove cuticle layers. It is still at a high risk for severe tangling problems because the cuticles are large and the layers are dense. The thick strands reflect light differently and appear 3 times as large next to Caucasian hair. Common Use: Inexpensive off-shelf wigs, hairpieces and machine made hair extensions. Indian Hair (aka Asian Hair, Italian Hair): A variety of fiber types from fine and straight, medium thick with bodywave and curly to thick coarse hair. “Italian hair” is actually Indian hair that has been processed in Advantages: High Quantity, Good Quality, Variety and Low Manufacturing Cost. Indian hair is popular to use for custom made hairpieces because it can be made to resemble European hair. Although prices for remy Indian hair increase every 2-3 months, it is still available in the less expensive non-remy form. The Indian hair fiber is small in diameter compared to Chinese hair and after chemical processing can feel and look just like European hair. Finally, a great attribute of Indian hair is that it comes in a full range of textures and body. Disadvantages: Low Quality and Higher Retail Cost. Indian hair still requires quite a lot of chemical processing to make it appear as European hair. And the efforts to maintain the integrity of remy hair and/or buy the best quality in Common Use: The remy hair is often produced as European or Italian hair for custom-made wigs and hair extensions. The non-remy hair is processed for custom-made hairpieces and less expensive wigs and machine and hand made hair extensions. European Hair (aka Russian Hair, Caucasian Hair): A fine to medium density fiber that is naturally straight to slight wave and available in a variety of natural colors, most commonly dark blonds to medium browns. The Virgin colors will often be streaked with lighter shades or the ends will be much lighter than the roots due to weathering. Advantages: High Quality. True Caucasian hair, whether originating from Disadvantages: Low Quantity and High Cost. It has always been an availability problem and is becoming more difficult to source lengths longer than 15 inches and of a good quality. Limited availability makes the European hair a valuable item. The care that must be taken at the manufacturing level, as the fiber is fragile in comparison to Indian and Chinese hair, adds to the overall cost of working with European hair. Usually those that choose to work with this hair want it as close to its virgin state as possible, so much care and skill must be taken when ventilating a wig or hairpiece to keep the roots in one direction and properly trimmed to avoid tangles. Common Use: High priced custom wigs, hairpieces and hand made hair extensions. Preferred hair type by production companies for the film industry. GRADE Cuticle Hair (aka Remy Hair, Virgin Hair): Cuticle hair can refer to all hair, no matter the origin. It defines the state of the fiber and quality. The cuticle layers have not been chemically altered and care must be taken to keep roots and tips from running opposite directions. Advantages: High Quality. Hair with cuticles usually has the feel and look of natural hair. It retains dye colors and perms better than processed hair and lasts longer through normal wear and tear because the cuticles act as a protective layer for the rest of the fiber. Disadvantages: High Cost and Tangles. Cuticle hair is considered a higher grade of hair and the time and care during production make it a more expensive hair. If not properly handled or cared for before and during the life of the hair replacement or extension, it is prone to tangle. (Although it costs the manufacturer more to process hair to non-cuticle, many have the opinion that cuticle hair is more expensive. They are confusing the cost of ventilating cuticle hair with the hair process cost. Non-cuticle hair is a more expensive hair but easier to ventilate. Cuticle hair is a less expensive hair but requires greater skill to ventilate.) Common Use: High priced custom wigs, hairpieces and hand made hair extensions. Can only be manufactured by factories that know how to work with cuticle hair. Non-Cuticle Hair (aka Processed Hair): This hair type can also refer to all hair no matter the origin, including European. The cuticles have been chemically processed to remove the first few layers and fuse the remaining layers. The roots and tips can be mixed in opposite directions. Advantages: Low Hairpiece Manufacturing Cost and No Tangles. Less labor time when making hairpieces or wigs and less hair required per unit. If cuticle process is done correctly, this is a permanent process and used to prevent tangles even if the roots and tips are mixed in opposite directions. Disadvantages: High Hair Manufacturing Cost and Poor Quality. Unfortunately, this type of hair is usually mass-produced in large factories using harsh chemicals that greatly degrade the hair. Also the hair purchased for non-cuticle hair is usually non-remy hair. When the chemical process is applied poorly and the hair starts to tangle, it tangles severely. Dye colors and perms do not last and the overall damage to the hair creates a very short life for this type of hair. Common Use: Low to medium priced hairpieces, machine-made extensions and wigs. Virgin Hair (aka European Hair, Cuticle Hair): All hair types no matter the origin. Usually refers to European hair as Chinese and Indian hair is rarely sold in their original colors and textures. This is hair that has not been chemically altered at any time and care must be taken to keep roots and tips from running in opposite directions. Advantages: High Availability and Low Hair Manufacturing Costs. When it is truly virgin hair, the manufacture has very little preparation to perform before selling it. The lack of chemical processing leaves the hair in a healthy and natural state resulting in a longer life for the finished unit. Disadvantages: Low Availability and High Cost. The dwindling availability of good virgin European hair, especially in lengths longer than 15” has made it an expensive commodity. There is still quite a bit of hair to find, but most of it is very old hair that has a musty odor and tangles very easily. Unfortunately, most Russian exporters are selling this type of hair. Common Use: High priced custom wigs, hairpieces and hand made hair extensions. Processed Hair (aka Non-Cuticle Hair, Non-Remy Hair, Asian Hair): All hair types can be chemically processed (cuticles, color, texture). Usually the term processed refers to non-cuticle hair and its most common form is non-remy hair. If handled well by the hair manufacturer, processed hair can retain much of its original quality properties. Advantages: Variety. The hair manufacturer is able to chemically alter the cuticles, color and texture of the hair to simulate European grade hair and offer multiple color and textures to the customer. Disadvantages: High Manufacturing Costs and Low Quality. The hair manufacturer must apply multiple chemical processes to the hair. Each process lowers the quality of the hair and shortens the life of the finished piece. Common Use: All types of wigs, hairpieces and extensions. Single Drawn Hair (aka Cuticle Hair, Virgin Hair, Remy Hair): A bundle of hair, no matter its origin or grade that appears like a ponytail because all the short lengths of regrowth hair are kept in the bundle. Many a novice buyer thinks the shorter lengths are split ends. Different manufacturers sell bundles of hair in single drawn form, but sometimes split the percentage of short hair and sell at a higher rate. They may decide to take out perhaps 50% of the shortest lengths and leave the rest in the bundle. Advantages: High Availability, High Quality and Low Manufacturing Cost. Single Drawn Remy hair is much easier to process the cuticles than Double Drawn Non-Remy hair because it requires less chemicals and processing time. This leads to a higher quality type of hair. The shorter lengths make the bundles appear tapered, therefore more natural. (Many prefer this type of hair. For example, one famous actress insisted that her wig be made with single drawn hair because the shorter lengths give it the perfect look.) Disadvantages: High Manufacturing Cost. The ratio of short hairs to longer hair within a bundle is usually greater, which causes a high amount of loss and waste. The manufacturer must purchase higher quantities to account for the wastage. Common Use: Medium to high quality hairpieces, wigs and hair extensions. Double Drawn Hair (aka Non-Cuticle Hair, Processed Hair, Non-Remy Hair): A bundle of hair, no matter its origin or grade that is all one length. There are no shorter lengths of hair present, which creates a very smooth and polished look. Due to expense and availability with Remy hair, Non-Remy Processed hair is usually sold double drawn. The term refers to a mechanical process that draws out all the shorter lengths from a bundle, and then draws again to realign the top of the bundle. Advantages: High Quality for Remy Hair, Low Cost and High Availability for Non-Remy Hair. One length creates a seamless silky curtain of hair that looks picture perfect. It gives the illusion of very healthy hair that has never suffered normal wear and tear. Disadvantages: High Cost and Low Availability for Remy Hair. Hair grows and breaks and regrows so that a natural head of hair contains several different lengths of hair. When a ponytail of hair is donated or sold, the bundle tapers down to a point. If the bundle is 18” in length and you draw out only the strands that are 18”, you are left with only a few strands of hair that represent maybe 10-15% of the bundle. The rest of the bundle contains the shorter regrowth hair. It would take 10 kilos of single drawn 18” hair to make 1 kilo of double drawn 18” hair. This makes it very expensive and undesirable for the manufacturer who is now left with 9 kilos of shorter hair. It is much more cost effective to offer double drawn non-remy hair, but the blunt one length look makes the hair appear synthetic. Common Use: From Non-Remy hair: Low cost, off the shelf hairpieces and wigs. From Remy hair: High priced custom wigs and hairpieces. Remy Hair (aka Cuticle Hair): Hair that was carefully bundled at the roots from the moment it is cut from donor and maintained throughout production – the cuticles run in same direction. This hair is usually processed to non-cuticle, but the root direction is maintained. Advantages: Low Hair Manufacturing Cost, High Quality. The cuticles are not always removed for remy hair, therefore lowering productions costs and time. If the cuticles are processed, it is much easier than non-remy hair due to less chemicals and processing time. The reduced chemical processing reduces the level of damage that leads to a relatively higher percentage of moisture, as opposed to other types of chemically treated hair. This prevents the straw-like appearance that happens with processed non-remy hair within the first few months. Disadvantages: High Cost, Low Availability and High Hair Manufacturing Costs. For unknown reasons, the temples that collect the hair do not take care to keep the roots and ends sorted correctly; therefore the resource of non-remy is much more than remy hair. Remy hair with cuticles require smaller batches and careful processing during production to avoid matting and tangling the hair during bath circulations. Common Use: High Quality, custom-made hairpieces, wigs and hair extensions. (Our lab tests on many hairpieces submitted to us by customers have shown that the units were actually made with non-cuticle non-remy hair, although they were told that it was remy hair.) Non-Remy Hair (aka Non-Cuticle Hair, Processed Hair, Asian Hair): Hair that was cut and collected from the floor so that roots and ends are mixed. To solve the inevitable tangling, the cuticles must be chemically removed. Non-Remy hair is sold in Double Drawn form. Advantages: Low Cost. The reasons factories in the Orient prefer to buy this type of hair are for two reasons: 1) It is much cheaper than Remy hair, 2) you can bleach and dye several kilos of hair in one batch without worrying about matting during circulation, thereby lowering the manufacturing costs significantly. Disadvantages: Low Quality. The hair must undergo heavy chemical processes to remove cuticles. As a result the hair becomes very dry over a short period of time. The proceeding bleaching and dyeing reduces the diameter of the hair, creates dry course hair that eventually splits and cracks along the fiber. The tips are already vulnerable naturally due to years of growth and weathering. In Non-Remy hair the tips are running both directions so the entire bundle suffers split ends and breakage. There is also uneven distribution of fiber thickness since some roots are at the top and some at the bottom of the bundle, which makes it resistant to combing. Common Use: Medium to low priced hairpieces, wigs and extensions. Caucasian: Russian Hair. Very small resources in Asian: Chinese and Indian Hair. Very small resources in It is important to analyze the benefits of frequent hair rotation versus the possible loss in hair quality before you make a recommendation to your client. Could it be that today's new service plans have your clients wearing hair that is no better than yesterday's hair systems after six months of wear? To understand the dilemma, you must to see it through the eyes of a hair factory manager. Hair factories have a choice of many different grades and sources of human hair. The highest grade is of European origin, usually from Top quality European hair can cost up to 10 or 15 times as much as the cheapest Chinese hair. Expectedly, the price differences are most dramatic in the longer lengths. Price variations for short hair are much closer. However, when you multiply those price differentials by the number of systems manufactured, the impact becomes dramatic. A client who is replacing his hair system every 4 to 12 weeks is unlikely to receive exactly the same hair he got in the past. Professionals should be aware of those differences even if their client is not. If the client used to wear European or Indian hair, the first point of difference may be the diameter (denier) of their new hair. The hair that is most likely to be used in high-turnover system comes from Furthermore, it is likely that the color palette has had to be changed and this means removing much of the original, dark hair pigmentation and re-dyeing the hair, usually with a fabric die, to the desired shade. While most factories have perfected this technology, it is nonetheless an assault on the hair, and it becomes more vulnerable no matter how gentle the color correction process may have been. Chinese Vendors: you can find their information on page one of this thread with their fokti's and/or websites. US Vendors with Stock Units: http://www.mywigsandweaves.com/ - www.mywigsandweaves.com http://www.allaboutmyhair.com/ - www.allaboutmyhair.com http://stores.ladydislocks.com/StoreFront.bok - http://stores.ladydislocks.com/StoreFront.bok http://www.zarawigs.com/ - http://www.zarawigs.com/ |
Posted By: sexibeach
Date Posted: March 07 2008 at 9:57pm
CUSTOM FULL LACE MEASUREMENTS
For Full Lace Wigs –all six (6) measurements are required
1) Measure your head Circumference with a tape measure around your hairline.
|
Posted By: mochamom
Date Posted: March 08 2008 at 4:17pm
Some of us are already here DV
|
 Divavocals wrote:
Posted By: TooBlessed
Date Posted: March 09 2008 at 10:00am
|
Checking in! That's right Sexi, that's YOUR work and no one else have the rights to it.  |
Posted By: sexibeach
Date Posted: March 09 2008 at 2:36pm
|
Types of Hair Pattern's for a Lace Front:
Light Yaki - Like freshly permed AA hair
Kinky Straight - Just like AA hair that might be natural needing a perm
Curly Kinky - A curly unit that a more bushy like curly hair
curly - smooth texture but curly loc's
Wavy - there are Deep Waves, Body Waves and Water Waves the body and Water waves are loose waves
Straight Virgin - Unprocessed Hair that has not been Chemcially treated
Remy hair: all cuticles aligned going in the same direction
Lace:
The lace comes in difference color's.. there's transparent, beige, light brown, brown and dark brown and some vendors have black lace
there are a couple types of lace:
the lace varies from vendor to vendor's some are thinner than others, its takes a little bit to know which vendor's and how their lace is..
French lace which is highly recommended for first timer's it can be undetecable if you learn a good application.
Swiss lace which is more delicate and recommended for more advance wear'ers that have experience in applying their lf. more undetectable than french..
Extra Thin Swiss Lace if extra thin and tears very very easy, the more experience Lf wearer should use this.. this is the most undetectable lace but also will tear with the quickness you better have skills..
|
Posted By: sexibeach
Date Posted: March 09 2008 at 2:42pm
Posted By: sexibeach
Date Posted: March 09 2008 at 2:43pm
|
Baking Soda You do a BS bath the same way you do a BA bath, with the exception of this: Fill a large 3qt container with hot water. Pour 1/2 to 3/4 cups of baking soda into the water and mix until completely dissolved. After brushing out the unit, place it into the mixture making sure it is completely submerged. allow the unit to soak over night or a minimum of 4 hours. (The hair will begin to float to the top of the mixture.) Remove it and rinse with warm water. Wash with a clarifying shampoo thoroughly. Deep condition , rinse and allow to dry. Style as usual. The baking soda bath is NOT for conditioning the hair; it is used to remove styling and conditioning product build-up. It is also extremely important to rinse out the baking soda solution prior to shampooing because if you leave it in and the hair dries, it will feel "chalky" and stiff, but this is only because you didn't rinse the unit thoroughly. Once you have done the baking soda bath, then use a clairfying shampoo and do a deep conditioning and the hair should be soft and silky. Keep in mind, too, that if you don't thoroughly rinse out shampoo, the hair will stiffen up when it's dried.
|
Posted By: sexibeach
Date Posted: March 09 2008 at 2:49pm
|
HOW TO DYE A LF: seal your knots Rub some vaseline and/or some olive oil a light coat, not to thick across the a inside out lf with the cap side up it protects the lace from being dyed
section hair in 4 and clip each section / braid ...
using a fine toothed comb create a part in the hair and smooth the dye into the hair enough to make it damp ... keep repeating this until the section is completely covered ...
follow hair color instructions for rinsing
deep condition
rinse & air dry
i use vaseline all the time as a light coating, this ensures you don't not only dye the knots but you also must protect the lace so it won't get colored as well.. I use a cream base like loreal so it doesn't run onto the lace, plus it has a root applicator.. you can always use goo gone to spray up in there b4 you wash it removes all the vaseline.. |
Posted By: sexibeach
Date Posted: March 09 2008 at 2:58pm
|
and step by step instructions on cleaning a lf: a video and a step by step: Invisi Bond Application Back Hair line
http://youtube.com/watch?v=rcT0RJhPW8g%20 - - http://youtube.com/watch?v=T6RzssWbfAM (Step 2) Invisi Bond Application Front Hairline
http://youtube.com/watch?v=OKcB3VYu9ps - - http://youtube.com/watch?v=zRXCX2x99HU (Step 2) how to apply your unit: http://www.youtube.com/watch?v=tVv0AfJQzQU&NR - http://www.youtube.com/watch?v=tVv0AfJQzQU&NR
|
Posted By: sexibeach
Date Posted: March 09 2008 at 3:10pm
|
HOW TO BLEACH KNOTS WITHOUT CHEMICALS:
a lot of women are afraid to bleach knots with chemicals, so i've come up with a way to do it without using chemicals. what i do to ehance a look on the knots is i use the 3M 77 spray which leaves a white residue, then i take the jerome russell temporary color spray natural blonda and follow up with that, then seal it with a sally hansen spray which is use for suntanning..you make the coverage down to the point of where you would attach the lace to the skin.. and leave the edges out, you can't go any further than that otherwise it won't stick..
if that's not enough then you need to try your luck at it with chemicals..the sally hansen is the sun tanning spray you can usually find in the drug store.. i use the nude color, the other colors can be orangish in color so you can mix them up and make the color that's right for you.. . apply it to the cap of the lf, and with that being said.. you must turn the wig inside out and stuff the hair up into the inside out wig cap, then put it down into a shower cap so that you can cover the edges of the lace where you would be applying to the skin.. you don't want to spray the edges of the lace b/c it with hinder your ability to make the lace stick to your skin... spray the 3M77 at a distance and one light coating will do, and then follow with hair spray to remove the tackyness.. and then you can apply the jerome russell natural blonde temporary spray and then follow with the sally hansen spray.. let it sit and dry and then remove it from the shower cap and its ready to apply.. i let mine's sit in front of a fan so that it dries.. .
HOW TO MAKE A NATURAL LOOKING SCALP WITHOUT A WIG CAP:
the sally hansen has different sprays that airbrush a tan on the legs of women, well i use this to make a natural looking cap by spraying it on the cap of the wig..sometimes you might need to mix the different colors to get the right one for your complexion..I start with Sally hansen Med Tan glow leg spray, and sponge brush (like you used as a kid in art class) and a paper plate (or anything to spray the spray on). I turned my lf inside-out and sprayed the tanner on the plate. Using the brush I dabbed it in the spray and did a small test area on the wig. But when I turn it over I notice the spray had leaked onto the hair. So after wiping off the tanner from the hair I tryed it again, but this time I wiped off the excess spray that was on the brush using the plate. I made sure there was no wet spots and I lightly brushed the tanner onto the wig; just enough to get the lace the color of the tanner but not in the little ones of the lace...
for me i just use the nude color b/c that's close to my skin color and afterwards i would use my bare minerals makeup and dab the color i use on my face in the part so that it looks like my skin..
|
Posted By: sexibeach
Date Posted: March 09 2008 at 4:08pm
|
MORE VENDORS: COMPANY NAME: QINGDAO BEAUTY WIGS CO., LTD TEL: 0086-532-83813430 FAX: 0086-532-83813430 EMAIL: mailto:ada7773@hotmail.com - CONTACT PERSON: MS. ADA HAN WEBSITE: http://www.beautywigs.com/ - Cool! and Thanks! I just got a quote from Qingdao Fulide, also known as the company Qingdao Freede. I say this because its the same contact info. as the Qingdao Fulide you just mentioned....This is the Original Kevin by the way ladies! I contacted the mailto:kevincn0532@yahoo.com.cn - kevincn0532@yahoo.com.cn address. Here are some other names that belong to this company: Peng Zhang....Bin Yan...Rib Zhang. Tel:+86-532-85718620 Fax:+86-532-85721780 COMPANY NAME: QINGDAO WINHEALTH INTERNATIONAL CO., LTD TEL: 0086-532-88653200 FAX: 0086-532-82100050 EMAIL: mailto:sales@qdwinhealth.com - CONTACT PERSON: BING ZHANG WEBSITE: http://www.qdwinhealth.com/ - I have an order out with Qingdao Freede Industry &Trading Co.,Ltd Tel:+86-532-85718620 Fax:+86-532-85721780 SUNWAY HUMAN HAIR WIG TELE: 0086-530-5386898 FAX: 0086-530-5332556 EMAIL: mailto:sunwayhair@gmail.com - CONTACT PERSON: ECHO WEBSITE: http://www.peonytrading.com/ - |
Posted By: sexibeach
Date Posted: March 09 2008 at 4:18pm
|
ADHESIVES AND TAPES: http://store.adventhair.com/pebo.html - http://store.adventhair.com/pebo.html http://www.mhrw.com/a-adhesiveDEW.html - http://www.mhrw.com/a-adhesiveDEW.html
http://www.truetape.com/ - http://www.truetape.com/
http://www.beansbeauty.com/search/index.php?control=&q=liquid+adhesive - http://www.beansbeauty.com/search/index.php?control=&q=liquid+adhesive Mr. C's Adhesive
http://www.splitendshairreplacement.com/splitends_005.htm - http://www.splitendshairreplacement.com/splitends_005.htm full service store and ships international
http://www.mallatts.com/commerce/productsearch.jsp - http://www.mallatts.com/commerce/productsearch.jsp
http://forgirlslikeus.com/adhesives.html - http://forgirlslikeus.com/adhesives.html
|
||||||||||||||||||
Posted By: sexibeach
Date Posted: March 09 2008 at 4:35pm
|
A Step-by-step for Detangling Your Hair System: http://www.youtube.com/watch?v=PYx_HQVyxXg - http://www.youtube.com/watch?v=PYx_HQVyxXg http://www.youtube.com/watch?v=dEKEMBp9xCI - http://www.youtube.com/watch?v=dEKEMBp9xCI Mirror Slide for Hair Systems from The http://www.youtube.com/watch?v=PdiCp43WLM0 - http://www.youtube.com/watch?v=PdiCp43WLM0 Cleaning the Front Hairline of your Hair Replacement System : http://www.youtube.com/watch?v=OPWOzOfB4iE - http://www.youtube.com/watch?v=OPWOzOfB4iE |
Posted By: sexibeach
Date Posted: March 09 2008 at 4:53pm
|
When Removing my Lf:
i put my alcohol that is 99% or 91%, and goo gone as my remover in two spray bottles that helps with everythang.. especially when my hands get sticky i spray them off. i also use both to spray on my lace to clean off the glue when removing, and it makes it pretty much roll off and use a soft toothbrush to remove the glue.. when i remove my unit and do my hair treatment and let my hair air dry over night, i use A & D Zinc Oxide cream on my skin where my unit is usually applied to keep my skin healthy and not chapped from wearing my unit it heals anything overnight.. http://site.denovohair.com/images/Making-a-Head-Template.pdf - http://site.denovohair.com/images/Making-a-Head-Template.pdf When applying my Lf:
this is what i do to apply my lf...i apply one layer of Mr. C's in the front and the back around the circumference, first let it dry for 2 minutes, then i apply a coat of the mity tite .. (sometimes while i'm waiting i got my unit prep with the tape on the unit at the nape and sides to apply once i get all the glue on, lately i've not needed any tape..) then after a coat of base bond or Oil Resistant White Glue (ORWG http://www.coolpiece.com - www.coolpiece.com ) dries until its clear, which only takes a minutes, i apply the base bond or ORWG as the final and last glue..
(i make my wig cap out of sheer nylon stockings, while my glue is getting tacky i apply the wig cap infront of my natural hairline on the skin of my forehead, b/c it has to look like continual skin meeting skin.. i take a couple of small pieces of tape and apply to the sides in front of my hairline edges and that way the cap can stick to the tape on the sides.. then i take and apply another thin coat of basebond in front the wig cap b/c thats where i'm going to place the hairline of the unit..every thing goes in front of my natural hairline, first the wig cap and then the units is placed in front of the wig cap.. ) now i just use the Sally Hansen Spray and not the Wig Cap.
then i pin the baby hairs back with hair clips, apply the front of the unit first around my face area, tie it down with the back clipped upwards not to touch the nape of my neck with tape still in the paper on the back of the tape b/c i'm not ready to apply it yet..then i wait about 5 min. tied down..while i'm waiting for the front that's tied down to dry some, i apply a coat of ORWG to the nape on top of the Mity Tite, and let that dry for that 3 min period while the front is tied down.. once i remove my scaf then i start to peel off the paper from the back tapes, b/c now the Mr. C's and ORWG at the nape is dry, then i can pull down the back and stick it to the tape and the glue is holding like heeck.. tie the whole circumference of my hairline down once again, wait another 20 to 30 minutes and then i'm all set to go.. my application time is less than 10 min.. in the beginning it takes a while to learn and sometimes hours to apply but take your time you'll learn and get it perfected with each application..
|
Posted By: sexibeach
Date Posted: March 10 2008 at 2:22pm
|
PREPARE YOUR SCALP BEFORE ATTACHING YOUR WIG:
It is important that your scalp stay clean and free of oily buildup while you're wearing a hair system. This way, your scalp stays healthy and there is less chance of an oder problem, caused by perspiration, while you are wearing the unit.
Before you put your hair system on, cleanse your scalp using an astringent of approximately 70%-75% isopropyl alcohol. This should cleanse the pores and eliminate oil and perspiration.
If you use tape or a liquid adhesive to atach your unit, it can irritate your scalp over a prolonged period of time. I recommend using a product by Smith + Nephew called Skin Prep which will protect your skin from irritation caused by the adhesives. By applying it to your skin first, it forms an invisible barrier between your skin and the tape or adhesive. This way all of the pull stress is on the barrier, and not your scalp.
If you experience any irritation or prolonged redness even while using Skin Prep, you should try using a different adhesive or attachment method to prevent infection
USING FOUNDATION TAPE IN CONJUNCTION WITH NORMAL TAPE ATTACHMENT:
When using tape to attach your hair system, the foundation material has to absorb a lot of stress each time you pull the tape off and reapply it. Over time, this can cause the material to tear and the knots of the hair to unravel.
By using foundation tape you can protect the foundation materiel from excessive stress. Here's how it works:
You start by cleaning your tape patch areas with isopropyl alcohol to remove any oil or residue. Then you apply a strip of foundation tape to the patch area. This foundation tape stays on the unit for a month or more of constant wear. Your regular double-sided tape is applied on top of the layer of foundation tape. This way, each time you change your tape through the normal course of wear, the stress of changing it is put on the foundation tape and not the foundation material or tape patch. It also prevents tape residue from building up in the knots of the hair.
TIP: To keep the foundation attached through shampooing and longer wear, apply a smal piece of lace front support tape under it. This will keep the foundation tape secure even longer.
ATTACHING OUR WIG USING A DOUBLE-SIDED TAPE:
There are several different types of double-sided tape on the market today, but they really boil down to three types.
1) Standard double-sided transparent
2) Red Liner (used for bonding and extended situations)
3) Blue Liner (Lace Front Support tape)
The following are a few tips on how to use each type of tape. The applicaton for each is more or less the same, but each type has its advantages and disadvantages, so think carefully about which type of tape is best for your lifestyle.
STANDARD DOUBLE-SIDED TRANSPARENT TAPE:
To use the standard transparent tape, always start by first using foundation tape as mentioned earlier. Standard transparent tape only lasts about three days, so it will be changed often. This will put a lot of stress on the foundation material if you don't use foundation tape. Once you have the foundation tape in place, now you can appiet he double-sided tape and position the unit on your head.
Special tips: Once you press the tape down onto your scalp it will be difficult to reposition the unit. To alleviate this problem, just slightly dampen your scalp with water wherever the tape will make contact. This will give you a few seconds to adjust the position of the unit on your head before the tape starts to stick.
After putting the foundation tape o the base material apply the double-sided tape to the patch areas. It will be easier to apply if you remove only one side of the tape backing until after the tape is in place.
RED LINER TAPE:
Red Liner tape is most commonly used for bonding a unit ffor extended wear. It is applied around the perimeter of the unit and a liquid bonding adhesive is then applied on top of the tape to bond the unit to your head. There are many types of bonding adhesives out there, and most of them are better left to the professionals. You should only bond your unit if yourself if you completely understand the process and have worn a bonded hair replacement system before.
Red Liner Tape can also be used by itself to attach your unit. It is stronger than standard transparent tape, and will usually last about one week before it needs to be changed.
BLUE LINER (LACE FRONT SUPPORT TAPE):
Lace front support tape is the strongest double-sided tape available for wigs and hair pieces. It can easily be recognized by the blue backing and the words "lace front support tape" printed on the opposite side. The tape itself is transparent like the others.
This tape will generally last about two weeks before it needs to be replaced, and it will stick to any type of foundation material.
Lace front support tape can be used on all lace foundations but should only be used in specific areas where, such as the temples and the hairline. These are the areas where it is most important that the lace lay perfectly flat against your skin. Small pieces of tape the size of a postage stamp are all that is needed. Position the tape around the front and back hairline and on the temples.
Special Tips: To remove the hair system when using lace front support tape, dab 99% alcohol at the hairline while slowly peeliong back the lace. As the lace begins to lift, dab the alcohol under the tape so that it releases from your scvalp but stays attached to the lace. If you use alcohol, you will notice that once the alcohol evaporates, the lace front support tape will reactive and be sticky again.
When positioning your hairsystem wet your fingertips to prevent the tape from sticking to them as you lay down the front lace.
REMOVING OLD TAPE BEFORE CLEANING:
Before shampooing your hair system, you should remove all of the tape and residue from the lace of your hair system. This is expecially important when you use lace front support tape.
Start by applying Adhesive Release or 99% isopropyl alcohol to all areas of the unit where the tape is applied. The best way to do this is by using a sponge tip swab, swabbing through the top of the lace onto the tape. It should only tape a minute or two for the tape to release its grip so that you can pull it away.
At the hairline, you should be extra careful, so the best method is to soak the front portion of the hair system in a shallow dish of adhesive release for 15 minutes. After that the tape should come right off.
If using an adhesive release other than alcohol be sure to flush out the lace with alcohol once you've removed the unit. This will eliminate the oily residue left by the release liquid. If you don't flush it out the tape won't stick when it is time to put your unit back on.
ATTACHING A HAIR SYSTEM USING CLIPS: If you only have partial hair loss or if your hair has begun to grow back, tape may not be a practical method of attachment for you. In such cases, comb (wig) clips are an option. These are small clips that clip into your existing hair and snap shut to hold the wig in place.
Once you have clipped in your hair system, you should not feel the clip pulling your hair. If you feel it pulling, open the clip and snap it shut again. The clip is meant to bite the hair, not pull it tight.
Special Tip:
1) Every three months you should have your clips repositioned slightly so that they are not constantly putting stress on the same areas.
HOW TO POSITION YOUR WIG TO LOOK MOST NATURAL:
Keeping your unit properly positioned on your head each day is key. Here is a way to make sure the unit is positioned correctly on your head each time you put it on:
In order to determin how far back or forward it should be positioned on your head, always use the first four fingers of your hand as a guide. Place them against your forehead with your little finger right at your brow line. The hairline of the wig should touch the edge of your index finger.
For wilgs, it will be easy to tell if the wig needs to be adjusted to the right or left by placing one finger at the bottom of the sideburns of the wig once you've put it on. When you look in a mirror your fingers should be directly across from one another. If not, adjust the wig accordingly.
As a final check, place the first three fingers of your hand on your temples with your little finger at the corner of your eye. The hairline of the wig should be equal distance from the corner of your eye on both sides, and your three fingers will should whether to adjust it further.
USING LACE FRONT ADHESIVES: If your wig has a lace front hairline, you can use a liquid adhesive to attach the lace to the skin. Liquid adhesives work better than tape n a lace front, because they make the lace lay completely flat against your scalp. Different adhesives react differently when applied to a person's skin and you should never continue to use a liquid adhesive that causes prolonged irritation to your scalp.
To properly apply a liquid adhesive to your lace front, first make sure that the wig or hair system is properly positioned on your head. Starting in the center of your hairline, gently lift the lace and apply a thin coating of the adhesive to your scalp front the front of the hairline to about an inch back. WOrk your way along the hairline in both directions until the entire hairline has a thin layer of glue under it.
Never press the lace down into the glue with your fingers. This will cause the hair to get matted up in the adhesive and it will look unnatural. Instead use the teeth of a wide toothed comb and press the lace flat against your scalp. Make sure that there are no ripples or edges of the lace sticking up when you're finished, and dab a little adhesive on those areas where neccessary.
REMOVING YOUR HAIR SYSTEM:
Using a cotton pad or sponge tip, dab 99% alcohol (or Adhesive Release) at the hairline while slowly peeling back the lace. As the lace begins to lift dab the alcohol under the lace so that it releases from your scalp.
CLEANING YOUR HAIR SYSTEM:
Always remember that the best way to clean your hair system is while it is off your head. When you wear a bonded hair system you will have to shower with it on but you should be extremely gentle, as this is not the ideal way to clean the unit.
The irst thing you need to do is remove all the tape or glue residue from the foundation. After a period of time it gets embedded in the lace and must be removed before you can shampoo the hair. Simply soak the lace areas where there is residue in a shallow dish filled with Adhesive Release or 99% alcohol for approximately 15 minutes. If you use adhesive release be sure to flush the lace with alcohol after soaking it.
SHAMPOOING A HUMAN HAIR WIG OR HAIR SYSTEM:
1) Using a rinse sprayer like you might have in your shower or at your kitchen sink, rinse the hair from about an inch away from the knot in the direction of the hair towards the ends and in the same direction the hair falls. Do this with cold water to avoid getting the foundation of the wig or the knots wet, which causes them to unravel and the hair to fall out more quickly.
2) Pin the wig to a wig head, pinning it all the way around the base so that it will keep its shape while drying.
Taking 1/2" thick sections about 3" wide between your fingers apply shampoo to the hair working from 1" above the knot and work the shampoo towards the ends of the hair. Do this until all the hair is shampoo. ONLY USE A SHAMPOO DESIGNED FOR COLOR-TREATED HAIR AND DILUTE IT WITH WATER.
3) Let the shampoo sit for no more than 60 seconds and repeat the rinse process being careful to remove all the shampoo.
4) Once all the shampoo is rinsed out, blot the excess water away from the hair with a towel.
5) Lightly wipe the inside of the base of the wig with a towel and then again with a sponge or cloth soaked in 99% alcohol. The alcohol will draw out any excess water or shampoo that has reached the knots, allowing them to dry quickly.
6) Put the wig on your head while it is still wet, making sure that the hairline is the width of the four fingers from the top of your eyebrows and that the temples are approximately three fingers' width from the corner of your eyes. Then slowly comb through the hair starting at tha ends and working towards the roots. Comb and style as you normally would. These steps will insure your wig will come out as you desire without any surprises. It is easiest to part the hair while it is wet to get the desired look.
WHEN THE HAIR SYSTEM IS NOT BEING WORN:
Always keep the wig or hair system pinned to a canvas block and/or wig head when not in use in order to maintain its shape. Make sure the block is the same size as the wig. If too small or too large it can cause the foundation material to stretch and the unit will start to fit improperly on your own head over time.
STYLING TIP:
To get the hair at the hairline to lay back, use a 1/2" strip of cardboard pinned on top of the back front while the hair is wet and allow the hair system to dry overnight. When the cardboard is removed you will see that it is much easier to style the hair back away from your hair line. |
Posted By: sexibeach
Date Posted: March 10 2008 at 2:35pm
|
this is a post i did b/c of too much product build up and its helpful for your natural hair to be able to hold moisture while wearing these units.. so:
there are many clarifying shampoo's on the market in the drugs store i even think suave has one that's very inexpensive.. with the ACV i use it straight on my natural hair, my momma use to use it as a rise when i was growing up... some dilute it with water.. i use 1/2 cup and pour it on massage it in and rise it out, and the secret is to rise it with cool water b/c it seals the cuticles...no shampooing afterwards..
the ACV is really deeper than you think for your own hair care, b/c it restores the porosity which is the measure of the hair's ability to absorb moisture...this is determined by the condition of the hair's cuticle layer (the overlapping scales of the hair shaft), and is rated as low, normal, and high. In normal, healthy hair, the cuticle is compact and inhibits the penetration of the hair shaft by moisture both moisture going in, and moisture coming out...when the cuticle is overly compact and prevents the penetration of the hair by moisture it has low porosity..to determine the porosity of your hair, simply feel it both when wet and when dry...if the hair feels straw like and rough when dry, or if it feels gummy or slightly rubbery when wet, then you probably have a problem with overly porous hair... if your hair is taking days to airdry. then your hair is good...No...it's Great, that means it's in really good condition....think of a sponge with holes in it...these holes would be called pores..when the sponge is fresh and new, it is able to absorb a good amount of water and hold the moisture inside very well..as the sponge ages, the pores (holes) become distorted, widen, and lose shape...these changes make the sponge super absorbent, yet less able hold the moisture it once could...the older sponge is said to be more porous or have greater porosity than the new sponge..
porous means that your your cuticles are raised, allowing more product to enter...cuticles raised is a bad thing, it makes your hair tangly, it makes your hair frizzy.. and it makes your hair act badly..hair mats up like dog fur when it's like this...what I read is that your hair's PH balance is out of wack, i think your hair becoming more acid, therefore raising the cuticle. Porosity control by Roux is a Ph balancing conditioner.... so anyone at any point can use it if their hair's Ph goes off, just by using daily styling products...even shampoo will throw your hair's Ph off...anyway...if your hair holds water, and dries evenly hours later, your hair is in great condition...my hair is now soaking up water and holding it like a sponge and that's what we really need wearing these units for weeks at a time.. i use porosity control conditioner by roux and they have a shampoo as well you can find at the BSS... you could use these products on both the unit and your natural hair.. after my AVC rise i use the porosity control conditioner so i dont' smell like vinger..lol we need to be able to keep our hair and the units hair moist, for our natural hair the only way to obtain length and stop breakage is by being able to keep our hair moist so its very important... my journey is really for my natural hair treatments, and thinking of the lf's along the way.. when i posted about the silicon mix, its not in replacement of the bleach bath.. altho i'm still testing..
but the hair on the lf's need moisture more than anything thing else in the world, b/c its no longer attached to a human follicle to receive the natural oils that come from a follicle.. that's why when it gets dried up its a problem, and the hair can break too, not to mention the tangling issues we have with the lf hair too.. and the silicon mix is the da bomb and does improve the hair greatly, one of the ingredients in the silicon mix is Ceramide which is very important, it is produced in human hair..
i started looking into the products for this particular ingredient b/c its produced in human hair.. so its very much needed to keep the hair in great condition..
Ceramide is a lipid (fat) found naturally in the hair. It is what keeps the hair shiny, strong and healthy.
I am not sure how it is produced by the body, but I would imagine that since lf hair is not attached to the body and cannot be replenished of lost proteins, vitamins and lipids, a good Ceramide treatment would bring the hair right back to life.
All hair types (curly, straight, wavy, and coarse) can benefit from their hair process. Due to the history of the Dominican Republic the population is pretty much mixed. Some are white like their European ancestors while others resemble their African antecedents. Then there are many that have mixed traits such as coarse hair and light skin or dark skinned with curly/wavy hair. This means that the products are fabricated maintaining everyone in mind.
So with that in mind, they have a few product b/c of the science and what human hair produces while attached to a follicle, i think would be great for the lf's one in particular is called Kan Kanechomn Ceramidas
The ceramids are the main lipides of the capillary structure, acting as a basis between the cuticle and the cortex, offering to the hair threads more resistance against external aggressions including frequent wash. The Capillary Renewer with Ceramids Kan Kanechomn has a formulation with a special combination of ingredients, giving your hair a complete restoring treatment for the damaged hair threads, offering conditioning, softness and nutrition to the hair. http://store.sickbay.biz/kankacedecoc.html">http://store.sickbay.biz/kankacedecoc.html
This product promotes hydration, conditioning and malleability to the hair giving back the natural oil to the hair threads and recuperating the shine, softness and vitality. Directions: Upon washing your hair, apply this product with a smooth massage during 2 minutes. Then rinse the hair taking the excess off. In case of a bath cream, cover your hair with a tepid towel for 30 minutes. Using a thermal cap let the cream ... This product was elaborated with medulla and silicone and acts as an hydrating cream forming a protecting pellicle, reducing the hair electrostatic load besides nourishing and regenerating granting smoothness, shine and softness to the crisp hair. Directions: Upon washing your hair, apply this product with a smooth massage during 2 minutes. Then rinse the hair taking the excess off. In case of a bath cream, cover your hair with a tepid I think its the science of what a lf needs that will work well with either of these products to mix with the silicon mix. and of course b/c i have a little product junkie problems i've ordered everything and lots of other stuff i've not even posted about..lol
http://search.store.yahoo.com/cgi-bin/nsearch?catalog=yhst-2926993581959&query=Kan+Kanechomn+products&.autodone=http%3A%2F%2Fstore.sickbay.biz%2Fnsearch.html - http://search.store.yahoo.com/cgi-bin/nsearch?catalog=yhst-2926993581959&query=Kan+Kanechomn+products&.autodone=http%3A%2F%2Fstore.sickbay.biz%2Fnsearch.html
Silicon Intense Treatment Mix is restoring old lf units and maybe removing the need for the bleach bath or as a preventive measure to avoid tangling units. I am working on finding a comparable product that will work with the silicon mix or just for lf's so that we can have a long life span with proper care of the hair. I recommend this additional treatment when doing the bleach bath to give a deep conditioning.. it can be used as a monthly treatment, but be sure to rinse a very long time to be sure to get all the conditioner out of the hair..
http://store.sickbay.biz/risimixcatr6.html - http://store.sickbay.biz/risimixcatr6.html
http://store.sickbay.biz/kankacedecoc.html - |
Posted By: charron08
Date Posted: March 10 2008 at 4:18pm
| Wow thanks sexi!..that was very helpful. Especially the part about the silicone mix !..thanks girl! |
Posted By: Koffee Brown
Date Posted: March 12 2008 at 4:49pm
|
Dayummm.. The Sexi-ONE in da house dropping knowledge. Get your pens and pads ladies and start taking notes lol. Or for 2008-- get to copying/pasting in Word docs. LOL. Thanks for sharing SexiBeach! |
Posted By: Koffee Brown
Date Posted: March 12 2008 at 4:50pm
| Hey! Charron! |
Posted By: sexibeach
Date Posted: March 12 2008 at 5:36pm
|
TWO ADDITIONAL VENDORS: Name:CHUNHAI DIAO
email: mailto:info@goldenwigs.com - info@goldenwigs.com
website: http://www.goldenwigs.com/ - www.goldenwigs.com - slow site but he is good with email
Holly zhang
http://www.wigsandclosures.com/ - http://www.wigsandclosures.com/
|
Posted By: sexibeach
Date Posted: March 12 2008 at 5:51pm
|
i found two new products...i've found some steri strips which is what i used when i had my full tummy tuck, yes i have a flat tummy LOL but they have improved them since then.. they are now called Steri-Strip S surgical skin closure.. i thought it thru brought some and put it in the part of my chinese virgin remy.. i will post pictures tomorrow to show you, its very realistic.. the down fall is they have skin tone, but it won't match everybody's skin tone unfortunately.. maybe they will make darker colors but they have clear, or you might be able to utilize them by blotting some bare minerals makeup on top the skin tone colors to make it match your skin tone..
i added a little Mr. C's on the sticky side of the steri strip so that it will stick to the lace, and it looks like scalp, its extremely thin and has a little fuzzy side on the back so it won't stick to your hair once you place it in the cap.. and it stayed in place and then i put it back on the wig head.. i only placed it close to the edge and left the lace remaining where i knew i was on to adhere the lace to my natural skin so it will blend.. here's some information on the steri strips and what they are used for.. also i found some dry powder shampoo that sprays powder that can not only assist in dulling the shine on the virgin units, but also clean it at the same time and not harm the hair..
3M announces the addition of the Steri-Strip S surgical skin closure, a primary wound closure device, to its family of skin and wound care products. The Steri-Strip S surgical skin closure is a non-invasive, adhesive-based wound closure device designed to treat low-tension lacerations and surgical incisions painlessly and without the use of needles. Faster and easier to apply than sutures, the Steri-Strip S surgical skin closure is designed to provide a time-saving option for surgeons and other medical specialists.
This innovative technology creates a new skin closure option with multiple benefits, including minimizing scarring, which is important to many patients who undergo various surgical procedures each year," said Craig DiLorenzo, business director of 3M Skin Health. "We are pleased to introduce the Steri-Strip S surgical skin closure as part of our ongoing dedication to providing dependable, easy-to-use, skin-friendly solutions to the health care community."
The Steri-Strip S surgical skin closure is simple for clinicians to apply quickly and is available in assorted sizes to accommodate various wounds. In addition to a primary wound closure, it also can be used with suture or staple closures, or as reinforcement for wounds after early suture or staple removal. The device is constructed of soft polyurethane pads and interlaced polyester filaments to provide strong, secure skin closure on most any length of wound. The Steri-Strip S surgical skin closure can be worn for up to seven to 10 days, during which patients can take brief showers without any additional covering. The Steri-Strip S surgical skin closure, formerly distributed as ClozeX wound closures, was added to the 3M line of skin closure products in April 2006. A variety of surgeons and physicians in different medical specialties have already experienced the dependable outcomes associated with the Steri-Strip S surgical skin closure after surgery. These health care professionals include physicians specializing in plastic and reconstructive, cardiothoracic, vascular, OB-GYN, general, orthopedic, dermatologic, and emergency surgeries. http://www.allegromedical.com/wound-care-c541/steri-strip-tan-1-2-x-4-p548944.html - http://www.allegromedical.com/wound-care-c541/steri-strip-tan-1-2-x-4-p548944.html
 here's the dry powder shampoo:
Algemarin Shampoo "Dry-Powder Spray"
 oh yea forgot to say if your knots are bleached, the grid completely disappears, you don't see it anymore... UPDATE: here are the pictures, i must say this works, the skin tone color is a little bit loud, but i found using the bare minerals blotting in the part did tone it down.. i did use Mr. C's to apply the strip to make sure it sticks to the lace, the strip is a blunt cut on the end, so i clipped it with pinking shears to have a zig zag end.. at the end of the zig zag and where the lace was left out, i used the bare minerals to make it blend together so you can't see where it starts are ends period.. for my dark skins sista's i'm going to keep thinking this thru, i do think that the darker powder makeup will work but you'll probably need to add this as soon as you apply the strip to the unit, while its still sticky.. b/c its applies sticky side up, in order for the powder to stay stuck.. altho i still want to think it thru to perfect it for them.. altho if your willing to do your own experimenting i would suggest that you buy one pack of skin tone and one of clear and get to work...however this is working the grids are gone.. so i'm pretty satisfied for the first try, but you know me i'll keep thinking of ways to make sure it never fails for all of us..
http://public.fotki.com/sexibeach/lace-fronts/3m-steri-strip-s-su/3m-steri-strip-s-su/ - http://public.fotki.com/sexibeach/lace-fronts/3m-steri-strip-s-su/3m-steri-strip-s-su/ no password but you must be signed in to view
 I mean you can experiment for what suits you, but i found that once i brush the Mr. C's adhesive on the strip i immediately apply it to the unit the grid disappears then.. then place it on the wig head.. i think for the more brown complexion its important immediately once its pinned back on the wig to begin to blot with the darker powder makeup and it will change the color.. i did test last night with the darkest powder i have which is tan, and did it that way.. i blotted as soon as the mr. c's was applied and was wet tackyness and the powder stuck and changed the color of the skin tone strip. this is the darkest powder i have, so it not really a dark shade, but it did change it.. once you do the first blotting when its in a tacky wet stage after applying to the lace and then the wig head.. then once you do you actual application, you should be able to add more if needed..
 |
Posted By: MsMahoganyRed
Date Posted: March 13 2008 at 7:47am
| Work it Sexi!! You are so helpful!! Those strips are tha bizness!!! |
Posted By: ladyk
Date Posted: March 13 2008 at 10:04am
| Can you use the strips at the nape with Mr.C's adhesive? |
Posted By: ladyk
Date Posted: March 13 2008 at 10:25am
| How long does your application last using this method before you need to do it again? |
Posted By: Koffee Brown
Date Posted: March 13 2008 at 12:51pm
|
BAm! look at that app! that part! that SCALP! Lovely |
Posted By: kalenjin
Date Posted: March 13 2008 at 1:25pm
|
Sexi ...
can you make this thread an informational one only?
nothing against the ladies questions but it would be easier to read without the back and forth
|
Posted By: Divavocals
Date Posted: March 13 2008 at 4:24pm
|
Posted By: sexibeach
Date Posted: March 13 2008 at 4:46pm
| diva i'm not done adding information but if she could just hide stuff that would be great until i've completed it.. |
Posted By: Divavocals
Date Posted: March 13 2008 at 5:52pm
Got it Sexi.. I'll let her know.. I'll let her know..
|
Posted By: kalenjin
Date Posted: March 13 2008 at 7:13pm
| YAY! |
Posted By: sexibeach
Date Posted: March 14 2008 at 6:50am
|
how to wrap your hair underneath if its too long for braiding:
http://www.youtube.com/watch?v=zJgFQXMA_C0 - http://www.youtube.com/watch?v=zJgFQXMA_C0
how to cornrow:
http://www.youtube.com/watch?v=7IlHSEf9BHo - http://www.youtube.com/watch?v=7IlHSEf9BHo
different types of braiding:
http://www.youtube.com/results?search_query=how+to+braid+hair+black+hair&search_type - http://www.youtube.com/results?search_query=how+to+braid+hair+black+hair&search_type =
|
Posted By: sexibeach
Date Posted: March 14 2008 at 4:48pm
|
PERMING A LACE FRONT: http://forum.blackhairmedia.com/forum_posts.asp?TID=110642 -
go to sally's and get a natural apple perm its not a professional strength since its already been processed it won't be harsh.. get the rod size you want, follow the directions in the box.. wash it first and rod while wet, then apply the perming lotion, cover with plastic cap.. rinse out after the required time, which you can reduce if your scurred.. at some BSS you can get a perm for white hair like the professional strength quantum perm, but you have to ask them if they have perms for white hair, and they usually do way back in a corner if its a large BSS store.. they will allow you to buy professional strength perms curly and straight for white hair if you ask without a license to do hair...in sally's they will not allow you to buy those professional strength unless you have a license, that's why the natural apple perm is the only one you can purchase without a license and its less harsh for re-perming a lf that's already been processed b4.. i have different sizes of rods, i don't like small rods, but the smaller the rod the more curly and kinky the perm.. the larger or medium sizes like the white or the pupple are medium, the pupple being the bigger of the two.. i have the orange but they are very large and you will definitely get a big water wave, barely curly at all..
http://images.google.com/imgres?imgurl=http://www.hairfinder.com/hairstyling/permwrap2thumb.jpg&imgrefurl=http://www.hairfinder.com/hairstyling/how_to_wrap_perm.htm&h=120&w=107&sz=9&hl=en&start=2&um=1&tbnid=EJz_Y2r7gyUHIM:&tbnh=88&tbnw=78&prev=/images%3Fq%3Ddiagram%2Bof%2Brodding%2Bpermed%2Bhair%26um%3D1%26hl%3Den">
 http://images.google.com/imgres?imgurl=http://www.hairfinder.com/hairstyling/permwrap1thumb.jpg&imgrefurl=http://www.hairfinder.com/hairstyling/how_to_wrap_perm.htm&h=120&w=108&sz=9&hl=en&start=3&um=1&tbnid=GPEuW7Tgy_dIvM:&tbnh=88&tbnw=79&prev=/images%3Fq%3Ddiagram%2Bof%2Brodding%2Bpermed%2Bhair%26um%3D1%26hl%3Den"> http://images.google.com/imgres?imgurl=http://www.hairfinder.com/hairstyling/permwrap1thumb.jpg&imgrefurl=http://www.hairfinder.com/hairstyling/how_to_wrap_perm.htm&h=120&w=108&sz=9&hl=en&start=3&um=1&tbnid=GPEuW7Tgy_dIvM:&tbnh=88&tbnw=79&prev=/images%3Fq%3Ddiagram%2Bof%2Brodding%2Bpermed%2Bhair%26um%3D1%26hl%3Den"> http://images.google.com/imgres?imgurl=http://www.hairfinder.com/hairstyling/permwrap3thumb.jpg&imgrefurl=http://www.hairfinder.com/hairstyling/how_to_wrap_perm.htm&h=120&w=105&sz=9&hl=en&start=4&um=1&tbnid=uBu3R3Du_m6A3M:&tbnh=88&tbnw=77&prev=/images%3Fq%3Ddiagram%2Bof%2Brodding%2Bpermed%2Bhair%26um%3D1%26hl%3Den"> http://images.google.com/imgres?imgurl=http://www.hairfinder.com/hairstyling/permwrap3thumb.jpg&imgrefurl=http://www.hairfinder.com/hairstyling/how_to_wrap_perm.htm&h=120&w=105&sz=9&hl=en&start=4&um=1&tbnid=uBu3R3Du_m6A3M:&tbnh=88&tbnw=77&prev=/images%3Fq%3Ddiagram%2Bof%2Brodding%2Bpermed%2Bhair%26um%3D1%26hl%3Den"> |
Posted By: sexibeach
Date Posted: March 15 2008 at 7:50am
|
RECOMMENDED AMERICAN VENDORS: http://www.immaculatewigs.com/ - http://www.ImmaculateWigs.com http://www.brehshouseoflacewigs.com/ - http://www.brehshouseoflacewigs.com/ http://www.ynobecouturewigs.com/ - http://www.ynobecouturewigs.com/ http://www.californialacewigs.com/cart/ - http://www.californialacewigs.com/cart/ |
Posted By: sexibeach
Date Posted: March 15 2008 at 4:59pm
|
SUMMERTIME TIPS:
when summer comes you'll be hard pressed with adhesives and wearing your lf.. some that sweat alot this is a tip for you.. Some us certain dri for your scalp you're supposed to put it on overnight before you plan to go out because it actually closes your sweat glands up. usually take your lf off in the evening, apply certain dri and moisturize hair if needed, then get up in the morning and reapply. It helps a lot cause being a heavy sweater! But it does itch if you put it on freshly washed skin, so you have to be careful to wait awhile after you clean your adhesive before using it. I also use Desolve-it + alcohol to remove my lace.
The ingredients in Certain Dri is Aluminum Chloride, sodium bicarbonate, & water. Certain Dry works by closing off the pores. Any sweat that would normally be release from that area will be safely redistributed to other areas of the body's skin surfaces (Reading from the pamplet inside the box). Ms. YahYah's Grandmother came up with this Tip: For one week I applied it around my hairline at night (the box says to use it at night since that is when it works to shrink the pores) After the week was up I just applied it once a week, any time of day, whenever I reapplied my LF. I applied in this order - certain dri (let dry completely)-scalp protector-glue/tape. I believe the scalp protector made the hold weaken and some said it made it stronger so I guess it depends on the person body chemistry. |
Posted By: BooBoo
Date Posted: March 16 2008 at 12:57pm
|
hey people!!! I just ordered my first custom lace wig from Rex...I'm so excited!!! Have any of you guys ordered from him before? I found the information in the newbie thread.... Just wanted to express my gratitude for this site being here! You've saved me an awful lot of money!! |
Posted By: sexibeach
Date Posted: March 16 2008 at 3:23pm
|
HOW TO THIN A LF BY BREH:
Okay, here's what you all have been waiting for. I've taken a few pics to give you all an understanding of what I am talking about. If you follow the steps that I’ve laid out you should be able to thin a hairline on any lf. You will need hair clips, a rat tail comb, thinning shears, and tweezers. 1. With the rat tail comb part the hair. Include the baby hair and a little bit of the hair from the hairline. (Do this across the whole front section of the hairline; although it is not shown in the pics). 2. Braid the parted hair to separate the hair from the rest of the hair. Place a clip on the hair to keep the hair out of the way. 3. Part a small section about 1/8" to 1/4" in size directly behind the braided hair. This should be about 15 to 20 strands of hair. You will start at the back of the small section of 15 to 20 strands of hair. 4. Holding the small section in one hand and the thinning shears in the other, sparsely separate about 5 to 6 strands of hair with the flat surface of the thinning shears. (Remember you are working at the back of the small section, not the front. The flat surface of the thinning shears should be as close to the knots as possible.) 5. Close the shears so that the sharp teeth cut the 5 to 6 strands that were separated. 6. Tweeze any short hairs that are sticking up. 7. Take the section that has just been thinned and place a clip on it. (Do this so you do not thin this section again) 8. Repeat the process starting at step 3 for the whole front hairline, and temples. 9. After you are done comb the hair to determine whether you like the result. If the density is to your liking then stop, if not, then continue. Remember move very slowly until you have your desired density for the hairline. Move to sections of hair that have not been thinned yet. Do not continue to thin the same sections or you will have bald spots. Do not thin too much. Remember your unit may thin out a little later. This process is tedious, takes hours to complete, but if you take your time the end result will be great. http://public.fotki.com/brehanne/instuctional/how-to-thin-a-hairline/ - http://public.fotki.com/brehanne/instuctional/how-to-thin-a-hairline/ No pw required |
Posted By: sexibeach
Date Posted: March 16 2008 at 3:27pm
|
BREH'S INSTRUCTION ON CREATING A NEW HAIRLINE:
Hi Ladies,
I know it's late, but I'm up playing beauty shop with one of my new lfs. It is absolutely beautiful, except once again the hairline is all wrong. Why does this happen? You email a picture to the vendor, and they still get it wrong. I didn't want to send it back because I just got it and I sent it back the first time to be remade. So, I have learned that somethings you just have to fix things yourself. I have some very simple steps that anyone can do to create a new hairline. I haven't gotten on the same level as Bless yet(the girl is talented)
Follow these simple steps and you'll have a customized hairline everytime.
1. Gather your supplies. You will need scissors, a colored eye liner pencil(something bright that can be seen through the lace), and a rat tail comb.
2. Trace the outer perimter of your natural hairline with the colored eye liner pencil.
3. Place the lf on your head, and part the hair so that you can see the colored pencil through the lace. Part the hair in the desired hairline shape that you want(using the colored pencil as a guide. )
4.Seperate the parted hair that you want to be cut away by loose braids.
5. Cut along the parted sections.
6. Place the lf back on your head and check out your new hairline. Make any adjustments that you see fit.
7. Create babyhairs (optional). IMO, it always looks better.
***Update*****
Just thought I would share a few pics of how new hairline looked applied.
Nevermind the breakouts on my face.
 |
Posted By: sexibeach
Date Posted: March 16 2008 at 3:29pm
|
BREH'S INSTRUCTION ON DYING THE LACE:
Hi Ladies,
I went to the fabric store last week looking for Rit Dye to dye the lace of my lf. I wanted to dye my lace from a light brown which blended very well with my skin to a brown shade. While looking for the Rit Dye I stumbled upon these permanent fabric dyeing pens, called FabricMate. I was skeptical so I purchased the Rit Dye along with the pen. I tried the pen out on a left over piece of lace that I had, and I must say that it worked pretty well. I just got around to trying the pen on my lf, a few minutes ago and it works very well. I took the pen and lightly colored the inside and outside perimeter of my cap to see what it looks like and it looks great. The lace blends so well with my skin that it disappers with no adhseive applied. This is a great product, the color is permanent, and you don't have to worry about getting any dye on the knots.
 http://softexpressions.com/software/paint/FabMateChisel.php - http://softexpressions.com/software/paint/FabMateChisel.php
This is the exact pen that I used to dye my lace from a light brown to a brown shade. |
Posted By: sexibeach
Date Posted: March 16 2008 at 7:27pm
|
how to make silky hair yaki step by step:
pw: silkyhair
|
Posted By: sexibeach
Date Posted: March 18 2008 at 1:02pm
|
Nair Baby Hair Tip:
you can use the nair tips:
Nair My Babyhairs- put a lil Nair on my baby hairs on the middle/ends not close to the knots and/or cap construction cuz you don't want the hair to fall out, and only for a few seconds. It makes the http://talk.hairboutique.com//forum_posts.asp?TID=59795&PN=1# -
|
Posted By: sexibeach
Date Posted: March 18 2008 at 1:05pm
|
Some of you asked, and I hope the tips are going to help about resizing/modifiying the size of lacewigs The pics are in my fotki: http://public.fotki.com/Yildiz/resizing/ - http://public.fotki.com/Yildiz/resizing/ pw: tips
This is how I proceed:
1. turn the unit inside out, place on yourhead in exact position for applying
2. determine the area where the unit needs resizing. To make a unit smaller, I usually do any modifying behind the ears
3. seize the superfluous part of the http://talk.hairboutique.com//pm_message.asp?ID=48164# - 4. use pins to fix this part of lace first on one side, then on the other side of the unit with the http://talk.hairboutique.com//pm_message.asp?ID=48164# - Take care to make corrections until the unit fits you perfectly! Probably you're going to have to try several times pic1
5. start sewing with transparent thread along the lines marked by the pins, both sides of the unit pic2
6. cut open the lace in the middle of the part that's sectioned off by sewing pic 3
7. the two parts of lace that are left from cutting are placed on the right and left side of the sewing line and fixed again with transparent thread pic 4
8. cut off the http://talk.hairboutique.com//pm_message.asp?ID=48164# - pic 5
Pic 6 shows a piece of stocking sewed in the area of where I'm creating a part.
The last two pics are of the unit applied without using adhesives
here's a step by step
http://www.wikihow.com/Layer-Cut-Your-Own-Hair - http://www.wikihow.com/Layer-Cut-Your-Own-Hair
just got an email from Hair Direct about cleaning the hairline on lace units so they remain undetectable. U know we love our http://talk.hairboutique.com//pm_message.asp?ID=48164# - Mirror Slide variations from Coolpiece
Mirror Slide
It's one of the easiest ways to safely remove glue residue from those holes on the lace. Just push the bottom of the lace firmly against a mirror and slide it down the glass. The glue gets pulled out of the lace and deposits itself on the glass leaving the lace clean and clear. (This idea came from Robert in Colorado but we named it The Mirror Slide). Even better than glass is Saran Wrap , also known as cling film. Put this on the mirror or work-surface first for a great mirror-slide clean up, and then throw it away, leaving the mirror clean. But wait, there's more. The mirror slide also works on wax-paper and it even works on those clean brown paper bags they give you at the supermarket. (Thanks to Jeff in Michigan). Basically, rubbing the lace firmly down any of these surfaces will pull out all the residue. Who would have imagined that? We like the cling food wrap the best.
There is always more than one way to do anything, but here is our recommended method:
|
Posted By: sexibeach
Date Posted: March 19 2008 at 4:37pm
|
HOW TO LAYER CUT YOUR HAIR YOURSELF: http://www.youtube.com/watch?v=gNzLZ7H7FfI%5b/QUOTE - http://www.youtube.com/watch?v=gNzLZ7H7FfI%5b/QUOTE http://www.essortment.com/all/howtocutyou_reij.htm - http://www.essortment.com/all/howtocutyou_reij.htm
http://www.wikihow.com/Layer-Cut-Your-Own-Hair - http://www.wikihow.com/Layer-Cut-Your-Own-Hair
|
Posted By: sexibeach
Date Posted: March 19 2008 at 7:01pm
How To Measure Your Head For Your Custom Lace Front WigYou will need a soft measure tape for this task. Before you start we highly recommend that you style your hair as it will be when you wear the wig. To achieve the best results you should either:
Try to eliminate any bulges by getting your hair as flat and tight as possible. It is very important that your head measurements are accurate. Your wig may not fit if you do not measure properly. Be sure to take your measurements several times to be on the safe side. Measurements are recorded in whole and half inches so please round your measurements up. For Example: 21 3/4 should be rounded up to 22 and 11 1/4 should be rounded up to 11 1/2. Always round the measurements up and not down. Once again, it is very important that you take the measurements several times to insure accuracy.
|
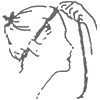
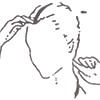


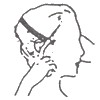

Posted By: sexibeach
Date Posted: March 19 2008 at 7:15pm
|
FACTS AND ANSWERS ON LACE WIGS:
What Is a Lace Front Wig and Full Lace Wig? The term "lace front wig" and "full lace wig" are virtually the same; A lace front wig, or other known as a full lace wig has a very natural front hair line and is constructed with fine lace in the front and a variety of materials in the back of the head. A full lace system is the ultimate system since it will look natural from every angle regardless of how the hair is brushed or styled. The object of a lace front wig or a full lace wig is to look beautiful and natural! You do not want anyone to ever think you are wearing a wig. A full lace system is usually preferred and is the ultimate in style, design, beauty and naturalness. What Lace Cap Choice Is Best For Me - French Lace or Swiss Lace? There are many types of lace that can be used for the base, we prefer the French lace. French lace is more durable than Swiss lace and it is the best choice for new lace wig wearers. The french lace tends to last longer and is virtually tear resistant during the application process when using tougher glues and bonds. The French Lace is thin, delicate and natural looking. The Swiss Lace is more undetectable but the main concern is that the lace breaks down faster and can rip much easier; if the lace rips this will make your lace wig system unusable. Again! - The Swiss lace is the most undetectable of the laces, but the most fragile. The swiss lace cap choice is best for experienced lace wig users. Overall , both french and swiss lace look extremely natural and as the lace seems to disappear into your scalp when applied with our special surgical bonds and lace tape. Your unit will come with extra lace extending from the hairline, which you will trim off to custom fit your hairline and then bond with your choice of adhesive. A lace wig unit can last for many months or even years depending on your usage and upkeep. The types of glues that are used during the application method also applies to the life span of your unit. For example, the lace wig can be compared to the tires on car; of course the more you drive your car, the more worn down the tires become and the need for replacement tires becomes greater. The idea remains that if you plan to wear your wig more often, the natural need for a new unit will become greater as the hair naturally degrades due to extended periods of use. Can I wear this wig even if I have my own hair? Yes. You will have to make your own hair as flat as possible, by wrapping or braiding it. Then apply a flesh toned stocking cap over your natural hair to simulate your scalp color. Absolutely! I highly recommend this system for anyone with any kind of hair loss or undergoing Chemotherapy. If you suffer from a medical condition where you have experienced sever hair loss, it's recommended to proceed with full french or full swiss lace. This will ensure the most comfortable "perfect" fit. |
Posted By: sexibeach
Date Posted: March 19 2008 at 7:21pm
Foundation SelectionWe have over 50 different Foundation Materials available. The following are the most popular. Fine Mono: The most popular foundation used today. Very durable closely woven Fine Nylon mesh material. Also known as M Mesh, E-3 Soft Fine Mono, Micro Screen and B-1
Super Fine Mono: A thinner version of Fine Mono. Very natural in appearance, soft and light weight. Not recommended for permanent wear or very active clients. Mono Silk: Soft, fine, very closely woven polyester material. Looks like silk. Not recommended for large areas in the foundation due to the difficulty in shaping this fabric. Excellent for smaller areas in the foundations. Welded Mono: P Mesh-XL Very popular Foundation. Made from clear nylon threads woven like window screen. Sonic welded to join the Threads permanently together. Made in single or double layer. Extremely natural. Pu and Class Silk: Clear Polyurethane reinforced with very thin gauze material. A very durable transparent material that is natural in appearance. PU thin skin: Clear polyurethane with no gauze. Beautiful but short lived. A very popular foundation. PE Mesh: Nylite Mesh, PE Mesh, Poly Mesh. Flexible and durable four sided Polyester Mesh similar to Window Screen but with smaller holes. May be ordered in soft or firm finish. Small Hole Fusion: F Mesh. Woven material with six sided Pencil size Ľ" holes. Large Hole Fusion: Woven material same as Small Hole Fusion Material but with ˝" holes. Integration Material: Braided Nylon sewing thread used to construct a foundation with any size holes desired. Illusion Front Materials:Welded Mono Lace: Same as Welded Mono using finer more closely woven threads. Used for Welded Mono Fronts and total Foundations. Also known as E Z On Material, Viper Front Material and All Star Front Material.French Lace: Theatrical Lace used to create a very natural front hairline. May be used for the entire foundation. Skin Lace: Very thin PU plus Gauze material. Natural looking but very delicate. May be ordered without the Glass Silk then becoming Thin Skin making it Extremely Delicate and short lived. Ventilation Options:Single hair Vent: A single hair is vented at a time. For gentle daily wear customers who want the open look. Very natural. This is the most convincing but also the most delicate venting. Not recommended for hard usage. May also be ordered in specific areas only. Front, Part, Crown or as desired.V Loop Stitch: Extremely natural. No knots at all. Must be Polyurethane sealed. No durability. Half knot: Used in Polyurethane areas. Is also sealed after venting. As durable as single hair venting and is similar to loop stitch in finished appearance. Standard venting - 2 to 3 hairs at a time. Good looking and durable. The knots are more noticeable if styled strongly open. This is the recommended knotting for longer lasting results on the permanent wear clients. It may also be ordered for specific areas only. Top, Sides, Back or as desired.
|


Posted By: sexibeach
Date Posted: March 19 2008 at 7:43pm
|
This might get a little technical but I think Its essential to learn about the human hair inorder to take good and proper care of the lacefront human hair. This is some information I found very interesting. Because I found in the winter time, my hair has tactic electricity which is quite annoying and something I'm totally not use too. And its different in the summertime. So here's what I found, it might be some helpful information: Consumers evaluate the cosmetic properties of human hair according to combing ease, strength and elasticity. We translate these attributes into single fiber evaluations of friction and tensile properties. Human hair is an elastic substance that is subject to strain (deformation) and stress (recovery). The usual procedure for evaluating the strength and elasticity properties of human hair is via tensile strain/stress tests. A fiber of known length and diameter are stretched at a fixed rate and a fixed relative humidity and temperature on an automated instrument. The procedures for testing the strength and elasticity involves setting the temperature in the testing room to approximately 21 degrees Celsius (70 degrees Fahrenheit) and the humidity between 40%-63%, the higher the humidity the stronger the hair will appear, which can guarantee results that do not represent reality. X length of hair will be mounted on clamps that will be zeroed, meaning we have to make sure that there is no tension or slack on the hair. Tensile properties have shown to have little to do with the surface properties (cuticles), but the cortical properties where the stretching occurs. The cuticle does not contribute to the tensile properties, but can be damaged by excessive stretching as the scales lift and separate from the fiber. Cuticle damage is the first to occur. Much like stretching a rubber band that has printing on the surface. When you stretch it beyond the normal relaxation point, the ink will crack and eventually shed off the surface long before the rubber band will break. The cortex is a major part of the fiber mass. Within the cortex are microfibrils that make up a large part of the cortical cells. And these consist of intermediate filaments and the matrix. This causes a loss of structure that is usually recovered on relaxation. Unfortunately, recovery occurs with normal healthy hair and not over-processed or non-cuticle hair. Both combing and friction are considered the most perilous factors when discussing the maintenance of human hair. While combing our hair, we apply a significant amount of force upon the hair fibers and it is stretched in various degrees. The force applied during combing also creates friction that results in cuticles breaking and detaching from the strand, which increases the hair’s vulnerability. Each time we run into a small tangle in our hair, we have to remember to be more patient. Essentially, when we apply combing and stretch our hair, the hair is supposed to bounce back. In scientific values, if we stretch the hair 5%-10% beyond it’s original length, the hair will usually perform a complete recovery and will bounce back to the Zero point. If we stretch the hair 14%-17% beyond it’s original length, the percentage of relaxation (the mechanism of bouncing back) will not recover to zero. And there is now irreversible damage, although, we may not feel it. Stretching the hair beyond 17% will cause irreversible damage that we will notice. The hair will snap back into a curl, almost like a snake recoiling. With non-cuticle hair, the percentage values are much less as the cortex has suffered massive chemical damage and many of the bonds have been broken and cannot withstand applications of high force. And the non-cuticle strand will not snap back when stretched beyond the recovery point. Usually it will either fracture and immediately break or the hair will lay lifeless because it didn’t even have the elasticity to stretch in 5%-10%. What can you do to prevent further loss of tensile properties? Understand the limitations of the hair type you purchase and maintain it accordingly. Avoid excessive combing and styling, especially when the hair is wet. If the hair is tangled, use a warm conditioner bath to relax the hair. It will greatly reduce friction and allow you to slowly work out the tangles. Do not scrub wet hair with a towel, pat and gently squeeze to remove the excess moisture. If you have had no choice but to tackle a tangled dry wig with nothing but a brush and determination, wet it down when you are finished and let it air dry. As the water evaporates the fibers will have a greater chance to recover and reform as much as possible to its original structure. Allowing the hair time to recover is highly important. |
Posted By: sexibeach
Date Posted: March 19 2008 at 8:10pm
|
ADDITIONAL CHINESE VENDOR'S FOR THOSE SEEKING NEW CONTACT: I've not personally had any units made by these vendors, I am not recommending them b/c i've had no experience with them. But these are just options for those that might be risk taker's that want to venture out with a new vendor: http://public.fotki.com/lacefrontwig/ - http://public.fotki.com/lacefrontwig/ mailto:wigsupplier@yahoo.com - wigsupplier@yahoo.com if interested in
our partner web: http://www.chinawigsupplier.com - www.chinawigsupplier.com http://public.fotki.com/richwigs/ - http://public.fotki.com/richwigs/
http://www.angel-wigs.com/ - http://www.angel-wigs.com/
http://www.sunnyhairworld.com/ - http://www.sunnyhairworld.com/
http://www.doubleleafwig.com/ - http://www.doubleleafwig.com/
http://www.bestlacewigs.com/productList.asp?catalogID=37&typeid=106 - http://www.bestlacewigs.com/productList.asp?catalogID=37&typeid=106
http://www.wigspretty.com/ - http://www.wigspretty.com/
http://www.xinyiwigs.com/ - http://www.xinyiwigs.com/
|
Posted By: sexibeach
Date Posted: March 20 2008 at 7:34pm
|
HOW TO BLEACH KNOTS; i use the loreal super blonde lightening kit.. i use more of the blue powder and the lotion as the mixture in a small bowl so i can save the rest for later, there's no need in using the whole kit.. there is a tube that is yellow that's the blonde lighten part, i only add like a little bitty dab of that b/c if you use too much it can be more blonde and turn the knots/lace orange.. don't push to hard, just brush lightly across the top of the lace, b/c if you push too hard it can push thru the holes to the other side, if that happens then you can bleach the roots.. altho it can be fixed by dying the roots with a small applicator brush, but best not to do that to begin with so skim lightly across the surface of the lace cap only making sure there's coverage of the knots you want bleached.. the LSBLK takes about 30 min.. i usually only leave it on for about 15 to 20 minutes checking it at 15 mins.. now if the hair has been colored by clothing dye which it could be, you need to do the rits dye remover first and then bleach the knots.. usually the no. 1 and 1b's colors are dyed with clothing dye.. do a test patch to be sure if the knots are not going to bleach then you know where to go from there...the instructions for the rits dye DIP is in the newbie thread.. if by chance you do color the lace then you need to do a slight rits dye dip (meaning only 2 or 3 dips) to try to remove the excess orange color from the lace, and/or resort to the rits dye pen to make sure your color matches your skin.. |
Posted By: sexibeach
Date Posted: March 21 2008 at 8:23am
|
HOW TO MAINTAIN CURLY HAIR: http://www.healthmad.com/Beauty/How-to-Maintain-Healthy-Curly-Hair.45538 - http://www.healthmad.com/Beauty/How-to-Maintain-Healthy-Curly-Hair.45538 http://alagio.com/ - http://alagio.com/
Also, recommended products to tame curly units-- care free curl, curl activator, along with the Luster's S curl texturizer styling gel TIGI Catwalk--Curls Rock glycerin and water mixed with a bit of jojoba oil (next staple) Redken Fresh Curls, Curl Boost Beyond the Zone Noodle Head Aveda Universal Brilliant Styling Creme Salerm 21 Silky Sexy Hair leave-in Curlkeeper dove curly products Garnier soft curl crčme Infusium leave in conditioner garnier fructis soft curl cream- TIGI curls rock amplifier Sunsilk DeFrizz 24/7 (green bottle) Aveda Be Curly
John Freida frizz ease dream curls & other products John freda's frizz ease hair serum John Freida perfect curls (in the spray bottle) styling butter cream and curly frizz pudding from http://www.blendedbeauty.net/ - Mane and Tail World of curls (basically any type of curl activator) Soft n free ISO BouncyCream and Farouk Silk Therpy combo Combing frizzy hair
|
Posted By: sexibeach
Date Posted: March 21 2008 at 8:33am
|
THIS IS HOW TO MAKE A LF, BUT I ALSO THINK IT CAN SHOW YOU HOW TO MAKE A TEMPLATE AS WELL.. How To Make A Lace Front Wig & The Art of Lace Wig MakingThroughout history wigs were status symbols, hence the term lace wig. One early wig making technique was to use goatskin to simulate a scalp and then poke hair into it with an embroidery needle. Today, animal skin is no longer used. These days’ wigs can look so real, no one would notice. To make a custom wig, a lace wig master measures a client’s head for http://www.lace-front-wig.com/custom_wig_size.html - lace front wig measurements from all angles because heads come in many shapes and sizes. The wig master wraps the client’s head in cellophane twisting it just under the ear lobes. Next, the wig master sticks filament tape over the cellophane wrap; he layers it four separate times to make a sculpting cast. He lifts the tape and cellophane cast from the client’s head and places it on a wig block; a head shape made from canvas or wood. Using a grease pencil, the wig master traces around the cast making a pattern of the client’s hairline on the wig block. The wig master then cuts pieces of plain blue paper and pins it on the wig block within the pattern lines. The paper will prevent light from reflecting into his eyes as he works. Now he places a large size polyester cotton lace on the wig block, and cuts it to the penciled outline. The wig master then pins a finer lace from front to back while leading the edges with pins. The Art of Lace Wig Making
He pulls open a draw with real remy human hair and synthetic hair; it’s hard to tell the difference between them. He uses a tail of 100% Indian remy http://en.wikipedia.org/wiki/Human_hair#Human_hair - human hair labeled golden ash blonde. This next step is stripping down and blending the hair to achieve the best quality hairs for making the wig. The tool that is used for this process is called the hackle. The hackle is a giant comb with rows of sharp steel teeth. The wig master first places the golden ash blonde hair between the teeth of the hackle and then places the colored synthetic hair on top. Now, he repeatedly drags the hair through the hackle. He looses some strands in the comb, but those are usually the weaker ones. This process is called hackling and the action gets progressively more vigorous. He twists and turns the tail as he pulls it through the hackle, this is actually dangerous work, and one wrong move and he can pierce his hand on the sharp steel comb. Once the hair is blended the wig master then cuts the excess ends off to get the best quality hairs. Next, he presses the hair into little metal pins on a leather holding card, the pins on the top card interlock with the bottom one. He pulls hair out of the holding card a few strands at time, with a small needle that looks like a fishing hook. He then knocks the strands into the lace beginning at the nape; this process is known as ventilating, it’s very similar to rug hooking. In fact, this may be a way toupee and wigs are often referred to as rugs. Ventilating is labor intensive; the wig master spends a minimum of 50 hours knotting the hairs it takes to make a lace wig. Partway into the job, the wig master combs out any tangles and louses the hair to make sure it moves naturally. Custom lace front wigs for film and television are usually made by hand, rather than machine because the result is more authentic looking. Because the camera tells all, the custom lace wig needs to look as real as possible. The wig master then weaves the front of the lace wig one hair at a time because the frontal hairline always gets the most scrutiny. Now it’s time for the fitting and transformation. The lace wig needs a little styling and trimming the ends is usually needed. Finally, the extra lace is cut away from the perimeter and magic! She’s ready to let her hair down and get into her new role. |


Posted By: sexibeach
Date Posted: March 21 2008 at 10:37am
|
STOP FOKTI PICTURE THEFT:
Quick tip to deter picture collectors.
I know we haven't' had many run-ins with picture thieves as of late, but I figured I'd share this tip anyhow. Ok so after logging onto your own personal fotki account. Underneath a photo album you have the option of selecting "Edit properties" After clicking on that link a new page should load. Underneath the "Viewer Discretion Advised" box there is another link for "Advanced Properties" click on this link. After that page has fully loaded scroll down until you read "Originals available to:" Under the drop box select "Myself only." This prevents visitors from right clicking to save your photos. You also have to change "Sharing photos allowed for (also enable right-click saving)" to "Myself Only". This is what keeps them from right clicking. When they right click they will get an message that says "Protected". They can right click on thumbnails, but when you resize it, the picture will be distorted.
Here's a screen shot of the fotki settings. I place a yellow box around the ones that you need to change to "Myself Only" to deter therft.  WATERMARK YOUR PICTURES AS WELL:
HOW TO WATERMARK YOUR PICTURES & VARIOUS WATERMARKING SOFTWARE LINKS (compliments of various members. Special thanks to DivaVocals) uMark is available by clicking here: http://www.freedownloadscenter.com/Authors/Uconomix_Technologies_Private_Limited.html - Uconomix Technologies Private Limited Software If you want to see what you can really do with uMark, checkout Mahogany814's fotki (I hope you don't mind me spotlighting you Mahogany!  ) Notice the MULTIPLE watermarks.. It took only 10-20 minutes to process ALL the pictures you see in the 9 albums in her fotki. uMark is FAST and easy to use, and it is CHEAP!!! ) Notice the MULTIPLE watermarks.. It took only 10-20 minutes to process ALL the pictures you see in the 9 albums in her fotki. uMark is FAST and easy to use, and it is CHEAP!!!Yes you can use Paint or Gimp. However remember that you must edit each photo individually. This is a tedious and time consuming task for most of us very busy ladies. For example, my last fotki album contained over 20 images, and adding watermarks one at a time to each photo is NOT the move!!! IMO, you need to use a program that will allow you to process a BATCH of photos at once. Photoshop is a great tool if you have LEGAL access to it. However unless you are familiar with the advanced features of Photoshop which allows you to edit batches of photos (AKA the "Actions" function) you will still find yourself editing 1 photo at a time in Photoshop. PLUS IMO Photoshop is a professional level photo and graphic editing program and IS NOT for the casual user.. (Too much money, & too many features for the "average" user) Phototshop is a HUGE complex program and even understanding the "basic" features of it takes a little more than a notion.. I KNOW some of you HATE the idea of HAVING to watermark your pictures, but fortunately or unfortunately it is what it is.. If you post your images on the internet, they are subject to being taken and used for purposes other than what you actually intended.. I could go into LONG technical details of ALL the ways to steal web content, and ALL the ways IP logging doesn't stop (or even identify) content/picture thieves, but that REALLY is a different discussion. The ONE SURE way to DISCOURAGE thieves from stealing your photos and PREVENT them from using them if they do is to WATERMARK your photos.. Like it or not that's just the way it is.. (Sorry!  ) )This is because people who want to use others’ images want an image that can be easily modified, so a watermarked image is useless for them because no software can remove the watermark!
The trick here is to cover the entire image with some markings so that people can still view the images but they can not modify them using any image editing software. Here's the links to some various watermarking programs:
http://www.freedownloadscenter.com/Best/free-watermark.html - http://www.freedownloadscenter.com/Best/free-watermark.html While most of these programs are pretty cheap, this program is free.. It's pretty decent for a free program.. The full version is like $24.. http://www.freedownloadscenter.com/Multimedia_and_Graphics/Misc__Graphics_Tools/uMark_Lite.html - uMark Lite |
Posted By: sexibeach
Date Posted: March 21 2008 at 7:14pm
|
HAIR CARE INSTUCTIONS - PROPER CARE CAN PROLONG THE LIFESPAN OF YOUR UNIT:
Cleanliness Shampoo/Conditioning With Unit Removed Remove unit and place on a styrofoam mannequin. Rinse hair in the same direction as the flow of the water. Apply shampoo/conditioner in hands, lather and pat on the hair. Use a large tooth comb or wig brush and distribute shampoo/conditioner on the hair. Rinse the hair in the same direction of the water. NEVER RUB THE HAIR TOGETHER this will cause tangles and matting. Allow the hair to dry and style as usual. With Unit On Dilute shampoo with water (50/50) into a spray bottle. Spray shampoo onto scalp. Press and slide shampoo into the Full Lace Wig from the root to the ends with a large tooth comb or wig brush; press with palms and squeeze the shampoo through the ends. For best results use moisturizing shampoo. NEVER RUB or RUFFLE the hair or tangling will result. Lean backward with the hair flowing in the direction of the shower water and rinse with lukewarm (not hot) water. Use a deep penetrating moisture and conditioner. Leave on for 3-5 minutes. Avoid using conditioners near attachment site as adhesive may detach prematurely. Or use a dry shampoo. Detangling
Make sure you comb the hair after each wash and daily. When detangling the hair, please start from the ends and work up little by little to the scalp. Hold the base with the other hand to keep it from shedding or causing root tension. We recommend a large tooth comb or wig brush. Avoid using shine products on the root area as it may prematurely detach your Hair Grafting Sleeping Make a couple of big braids in your hair when going to sleep, swimming or exercising. You MUST untangle your hair prior to braiding. NEVER sleep on wet hair, your hair must be completely dry before going to sleep as sleeping on wet Full Lace Wigs WILL cause hair to be very matted. Or wear up in a very high pony tail which works for most curly or wavy units. Chlorine and Salt Water Chlorine and salt water have been known to damage hair used in Full Lace Wigs. Please understand that chlorinated pools, Jacuzzis, saunas and ocean water can cause irreparable damage to the hair that you have purchased and/or wearing and that a Full Lace Wig Specialist can not be held responsible if you decide to ignore such warnings. Also you have been advised not to expose your my Full Lace Wig excessively to chlorinated and/or salt waters and do so at your own risk.
Chemical Usage
It would be advisable NOT to chemically treat this hair yourself. Chemically treating the Full Lace Wig hair yourself may cause irreparable damage to your own and your Full Lace Wig. Shedding Some hair will shed out of some Full Lace Wigs easier than others. Curly and longer hair will commonly shed hair more rapidly than a short Lace Front Wig. Shedding of hair is considered very normal. Slippage
During the life of your Full Lace Wig hairstyle, your Full Lace Wig may slip. To help avoid this, constantly apply firm pressure on the attachment site, especially after showering. This will help the attachment stay firmly attached to the scalp area. In the event of your Full Lace Wig slipping or lifting, you can successfully re attach using a small amount of “Retouch Adhesive”, wait 4 minutes for it to cure, and then press firmly. Wavy Hair/Curly Hair For wavy or curly hair, we recommend you wet the hair every morning with water and Protein Leave-in Detangler.
Dry Ends To keep hair from dryness, please apply olive oil two to three times weekly prior to shampooing. Olive oil left on the hair overnight on the ends only is very effective. Remember Lace Front Wig hair does not have the benefit of your own natural scalp oils, so olive oil will help to replace those necessary oils in the hair shaft. All of the Following Can Cause Premature and Excessive Hair Loss:
Excessive Combing or Brushing This will ultimately break off hair and cause premature thinning of the hair replacement. Unattended Matting And Tangling Left uncorrected, excessive matting and tangling that is then removed forcefully will tighten the matted hair and tear out the hair. Friction From pillows or overly aggressive shampooing will break off the hair and thin and tear out the hair.
Over Perming/Incorrect Perming This will damage the integrity of the hair, especially in lighter colored hair replacements, and will lead to accelerated hair breakage and thinning.
Conditioners Remaining In The Root Area Probably the single largest factor creating major, ongoing, irreversible hair loss. Conditioners that are allowed to be absorbed onto the base and gather around the root system will ultimately prevent the root system from pivoting 360 degrees allowing for hair loss in your hair replacement. Conditioners must be rinsed out completely to avoid the breakage of the root system. Read your care instructions carefully to learn the proper application and removal for conditioning If tangling from excessive friction occurs, comb it out immediately and gently with our rotating tooth comb, using a small amount of our Detangler or conditioner. Try using a silk or satin pillow case to avoid the friction of cotton pillowcases. If you must go swimming in chlorinated water, immediately rinse your hair when leaving the pool, then gently shampoo and condition with recommended products. For coloring and perming, try using “Semi Permanent” colors that use little or no peroxide. Always use perms designed for processed hair and to always air oxidize. Avoid using too much conditioner, apply it onto your palms and fingertips first, then apply it to your hair keeping the conditioner away form the root and base area of your hair, and then rinse the conditioner thoroughly.
The following information is offered to help you understand the causes of matting and tangling in human hair wigs and hair replacements and the simple answers for minimizing these problems. In the vast majority of hand made hair replacements, the hair is knotted to a mesh base. This means the same hair is going out from the knot in two different directions. This also means the cuticles are going in two different directions. These types of products have had the hair chemically “smoothed” or “sealed”, (typically known as decuticlization) to minimize hair tangling. Products that have implanted hair (all going in the same direction) Have all of their cuticles in-tact, but will also be prone the matting and tangling.
|
Posted By: sexibeach
Date Posted: March 21 2008 at 7:16pm
|
HAIR CARE INSTUCTIONS - PROPER CARE CAN PROLONG THE LIFESPAN OF YOUR UNIT:
Cleanliness Keep the hair Clean. It is recommended that the hair be washed at least once every two weeks with warm or cold water. Please wash the hair right after swimming and comb the hair after spa activities and exercising etc… When dirt accumulates, including sweating, hair tangles!
Shampoo/Conditioning It is best to wash the hair with the unit removed, this will prevent premature slippage.
With Unit Removed Remove unit and place on a styrofoam mannequin. Rinse hair in the same direction as the flow of the water. Apply shampoo/conditioner in hands, lather and pat on the hair. Use a large tooth comb or wig brush and distribute shampoo/conditioner on the hair. Rinse the hair in the same direction of the water. NEVER RUB THE HAIR TOGETHER this will cause tangles and matting. Allow the hair to dry and style as usual. With Unit On Dilute shampoo with water (50/50) into a spray bottle. Spray shampoo onto scalp. Press and slide shampoo into the Full Lace Wig from the root to the ends with a large tooth comb or wig brush; press with palms and squeeze the shampoo through the ends. For best results use moisturizing shampoo. NEVER RUB or RUFFLE the hair or tangling will result. Lean backward with the hair flowing in the direction of the shower water and rinse with lukewarm (not hot) water. Use a deep penetrating moisture and conditioner. Leave on for 3-5 minutes. Avoid using conditioners near attachment site as adhesive may detach prematurely. Or use a dry shampoo. Detangling
Make sure you comb the hair after each wash and daily. When detangling the hair, please start from the ends and work up little by little to the scalp. Hold the base with the other hand to keep it from shedding or causing root tension. We recommend a large tooth comb or wig brush. Avoid using shine products on the root area as it may prematurely detach your Hair Grafting Sleeping
Make a couple of big braids in your hair when going to sleep, swimming or exercising. You MUST untangle your hair prior to braiding. NEVER sleep on wet hair, your hair must be completely dry before going to sleep as sleeping on wet Full Lace Wigs WILL cause hair to be very matted. Or wear up in a very high pony tail which works for most curly or wavy units. Chlorine and Salt Water Chlorine and salt water have been known to damage hair used in Full Lace Wigs. Please understand that chlorinated pools, Jacuzzis, saunas and ocean water can cause irreparable damage to the hair that you have purchased and/or wearing and that a Full Lace Wig Specialist can not be held responsible if you decide to ignore such warnings. Also you have been advised not to expose your my Full Lace Wig excessively to chlorinated and/or salt waters and do so at your own risk.
Chemical Usage
It would be advisable NOT to chemically treat this hair yourself. Chemically treating the Full Lace Wig hair yourself may cause irreparable damage to your own and your Full Lace Wig. But if you do decide to re-perm and re-rod you can find a lesser strength perm designed for this type of hair at sally's called the apple perm which is not at professional strength. Shedding Some hair will shed out of some Full Lace Wigs easier than others. Curly and longer hair will commonly shed hair more rapidly than a short Lace Front Wig. Shedding of hair is considered very normal. Slippage
During the life of your Full Lace Wig hairstyle, your Full Lace Wig may slip. To help avoid this, constantly apply firm pressure on the attachment site, especially after showering. This will help the attachment stay firmly attached to the scalp area. In the event of your Full Lace Wig slipping or lifting, you can successfully re attach using a small amount of “Retouch Adhesive”, wait 4 minutes for it to cure, and then press firmly. Wavy Hair/Curly Hair For wavy or curly hair, we recommend you wet the hair every morning with water and Protein Leave-in Detangler.
Dry Ends To keep hair from dryness, please apply olive oil two to three times weekly prior to shampooing. Olive oil left on the hair overnight on the ends only is very effective. Remember Lace Front Wig hair does not have the benefit of your own natural scalp oils, so olive oil will help to replace those necessary oils in the hair shaft. All of the Following Can Cause Premature and Excessive Hair Loss:
Excessive Combing or Brushing This will ultimately break off hair and cause premature thinning of the hair replacement. Unattended Matting And Tangling Left uncorrected, excessive matting and tangling that is then removed forcefully will tighten the matted hair and tear out the hair. Friction From pillows or overly aggressive shampooing will break off the hair and thin and tear out the hair.
Over Perming/Incorrect Perming This will damage the integrity of the hair, especially in lighter colored hair replacements, and will lead to accelerated hair breakage and thinning.
Conditioners Remaining In The Root Area Probably the single largest factor creating major, ongoing, irreversible hair loss. Conditioners that are allowed to be absorbed onto the base and gather around the root system will ultimately prevent the root system from pivoting 360 degrees allowing for hair loss in your hair replacement. Conditioners must be rinsed out completely to avoid the breakage of the root system. Read your care instructions carefully to learn the proper application and removal for conditioning If tangling from excessive friction occurs, comb it out immediately and gently with our rotating tooth comb, using a small amount of our Detangler or conditioner. Try using a silk or satin pillow case to avoid the friction of cotton pillowcases. If you must go swimming in chlorinated water, immediately rinse your hair when leaving the pool, then gently shampoo and condition with recommended products. For coloring and perming, try using “Semi Permanent” colors that use little or no peroxide. Always use perms designed for processed hair and to always air oxidize. Avoid using too much conditioner, apply it onto your palms and fingertips first, then apply it to your hair keeping the conditioner away form the root and base area of your hair, and then rinse the conditioner thoroughly.
The following information is offered to help you understand the causes of matting and tangling in human hair wigs and hair replacements and the simple answers for minimizing these problems. In the vast majority of hand made hair replacements, the hair is knotted to a mesh base. This means the same hair is going out from the knot in two different directions. This also means the cuticles are going in two different directions. These types of products have had the hair chemically “smoothed” or “sealed”, (typically known as decuticlization) to minimize hair tangling. Products that have implanted hair (all going in the same direction) Have all of their cuticles in-tact, but will also be prone the matting and tangling.
|
Posted By: sexibeach
Date Posted: March 21 2008 at 8:07pm
|
THINNING AND CUTTING TECHNIQUE'S:
Cutting and Styling hair systems can be challenging. Special thinning techniques are needed to reduce density.
http://hairreplacementtutor.com/index.htm - home
|


Posted By: sexibeach
Date Posted: March 22 2008 at 6:19pm
|
||||||


Posted By: sexibeach
Date Posted: March 22 2008 at 6:29pm
Finished Hair Length: Finished hair length is from the knot to the end of hair before curling. No extra charge for lengths up to 6". Long hair charges will apply to length 8" and longer. See price list. Undervent: Undervent is a row of hair vented into the bottom of base along the outside perimeter. Used at the front hairline it helps to conceal the edge of base material that is not scalloped or made of lace. Light is 1 row, Medium is 2 rows and Heavy is 3 rows of underventing. We do not recommend underventing on lace units, scallop fronts, or Micro thin Poly skin (graft material) fronts. Doing this would show too heavy of a solid line on these materials and defeat the purpose of using that material. Part Appearance: Some type of hair direction must be given on the order. This indicates to the factory how to ventilate the hair to give it stylability. If you want a definite whorl in the crown, check the location on order form. If you want a definite or diffused part, check location on form. Freestyle is vented forward from the crown position, and can be combed or parted anywhere. On the picture “Draw Hair Direction” you may want to draw how the client wishes to comb their hair. Density: Many things such as base material, hair length and type of hair/fiber used will affect the finished appearance of Density. The Density chart shows how thick the hair will come on the unit. Example: Medium Density is 100% thickness of a normally full head of hair. Light Density is 80% thickness on a normally full head of hair, etc. Waves & Curls: Any amount of curl can be chosen for Synthetic hair. Human hair can only be curled at the factory. Generally curl appears to hold well. Blondes and longer lengths do not respond well to a curl. It may over process the hair and is not recommended. Due to many variables (length, density, color, organic origin) each human hair reacts differently during curling procedure. We cannot guarantee a consistent exact curl. We give it our best try, without a guarantee of results. This is a professional perm rod size guide: Red/yellow 3/16" 4-5mm Afro Blue 5/16" 6 mm loose afro Pink 3/8" 10-13mm tight curl Grey/white 7/16" 13-15mm loose curl Lavender ˝" 18-20mm tight wave Peach/black 9/16" 22mm medium wave Orange 3/4" 25mm light wave Green 1" 30mm Slight body 40mm Straight Hair DensityHair density is simply how many hairs are added to your hair system base. In the old days, high density was necessary because the base materials were usually made of thicker materials and would be easily exposed if hair density were low. With the advance of thinner base materials such as lace and thin skin low density tends to look more natural especially with the see through look along the hairlines. You can chose different hair density in different areas of the base.
|
Posted By: sexibeach
Date Posted: March 22 2008 at 8:18pm
|
HAIR PRODUCTS FOR LACE FRONTS: (remember Oils don’t need to be soaked into the cap b/c you don’t want the knots to become lose but they do wonders for the hair with a deep heating.) Dabur Amla Oil http://store.asianfoodcompany.com/63180.html - http://store.asianfoodcompany.com/63180.html Parachute Oil and Other Indian Oils for Hair Use: http://search.store.yahoo.com/cgi-bin/nsearch?follow-pro=1&catalog=theoriginalstore&vwcatalog=theoriginalstore&query=parachute%20oil - http://search.store.yahoo.com/cgi-bin/nsearch?follow-pro=1&catalog=theoriginalstore&vwcatalog=theoriginalstore&query=parachute%20oil Dominican Hair Products (Silicon Intense Treatment Mix) http://store.sickbay.biz/risimixcatr6.html - http://store.sickbay.biz/risimixcatr6.html Miss Key’s 10 en 1 Shampoo http://store.sickbay.biz/risimixcatr6.html - http://store.sickbay.biz/risimixcatr6.html http://store.sickbay.biz/kankacedecoc.html - http://store.sickbay.biz/kankacedecoc.html Tresemme smooth & silky shampoo and conditioner http://www.tresemme.com/sleek/products/smooth-silky-conditioner.aspx - Ayurvedic Indian Oil http://www.indianhairoil.com/ - http://www.indianhairoil.com/ Love that Tail a Horse Product good for detangling and shine http://www.lovethattail.com/shimmer_shine.shtml - http://www.lovethattail.com/shimmer_shine.shtml Cowboy Magic Detangler and Shine http://cowboymagic.com/products-detangler-shine.html - http://cowboymagic.com/products-detangler-shine.html This is a list that is not yet completed but will be continued.
|
Posted By: mslady
Date Posted: March 23 2008 at 5:23am
|
Here's what I will add, however, if you already have this posted. Please feel free to remove. ADHESIVES
White Glue: Goes
on white dries clear. Apply to scalp and while still wet apply hair piece and
press down with brush, then quickly remove hair piece and let dry for 5 minutes
for extra hold apply second coating, scalp and hairpiece must be free from oil
and clean. "I" Glue: Use
on lace or poly gives a hold of 3 days to 1 week on lace and up to 4 weeks on
poly. Apply to scalp and while still wet apply hair piece and press down with
brush, then quickly remove hair piece and let dry for 5 minutes for extra hold
apply second coating, scalp and hairpiece must be free from oil and clean. Ultra-hold:
Excellent medical grade formulated acrylic adhesive. Used mostly on poly and is
regarded as the strongest adhesive available holding up to 4 weeks. Can also be
used on lace for a strong hold, but does give a little shine through the lace. Mity
Tite: Medical grade formulated acrylic adhesive. It is
a soft bond extended wear adhesive not as strong as Ultra-Hold but does hold
for up to 3-4 weeks on poly. Again, can be used on lace but again gives a
little shine through lace. Kryolan Mastix "P" Spirit Gum Adhesive & Remover:
Gives
ultimate hold. This is a super-stick adhesive is especially useful in cases of
extreme perspiration. Because it is a sealor type of adhesive, it dries
quickly, so please use sparingly! Lace units must be positioned carefully
as it is difficult to reposition them. This handly little travel size
spirit gum fits right in your carry on or in your purse. Can also
be handy to take to work incase you are ever in need of a quick touch
up! Kryolan Spirit Gum P Remover is part of the set and is
highly recommended to disconnect appliance from skin when using the Mastix
"P" Adhesive. Super
Grip Adhesive: Goes on white and dries clear, can be used to
reactivate tape, for use with lace, first apply Scalp Protector, let dry, than
apply Super Grip Tapes: You can tape your unit. Non-shiny tape good
for front or back of unit. C-22 Solvent Citrus
Adhesive Remover: Easy
to Use - Quickly Removes Adhesive and Residue from hair, scalp, lace or any
bonded areas of wig or toupee. Lace Release Adhésive Glue Remover : Lace Release is a glue
remover. It helps to avoid damaging the lace when you are removing the
unit. It helps to release the glue from the unit and your scalp. PROTECTORS: Liquid bandage Knot Sealers- TDI Lace Wig Knot Sealer : he sealer is a product for use in sealing the knot in Lace Wigs and other hairpieces. The knots may loosen with normal wear and maintenance. This product will greatly reduce shedding and extend the life of your unit. The sealer should be sprayed on the cap side of the wig. DO NOT SPRAY SEALER ON THE HAIR. The wig should be cleaned as a part of normal maintenance and sealer re-applied after cleaning. Hair Spray-- get a one that states superhold. |
Posted By: sexibeach
Date Posted: March 23 2008 at 7:41am
|
AMERICAN LACE FRONT VENDORS: as always do your homework and research on vendors before you purchase at your own risk:
AMERICAN VENDORS
Arotreasures (ebay seller) http://www.zarawigs.com/ - www.zarawigs.com http://stores.ladydislocks.com/ - http://stores.ladydislocks.com http://www.thehairnetwork.com/ - www.thehairnetwork.com http://www.mymaneattractions.com/ - www.mymaneattractions.com http://www.divacherrylacewigs.com/ - www.divacherrylacewigs.com http://www.realmane.com/ - www.realmane.com http://www.ynobecouturewigs.com/ - http://www.ynobecouturewigs.com/ http://www.californialacewigs.com/cart/ - http://www.californialacewigs.com/cart/ http://www.wigzandbeyond.com%20%20/ - - wigzandbeyond.com http://www.denovohair.com/ - http://www.denovohair.com/
|
Posted By: sexibeach
Date Posted: March 23 2008 at 7:59am
|
BREH'S TIPS FOR CURLY UNITS AND NATURAL PART: Cowboy Magic Rose Water Conditioner, Shampoo, and Detangler Shine serum.
Here is my recipe for my curlies/wavys
32 oz spray bottle (fill to the 25 oz line with water)
4 oz bottle of glycerin (pour in the bottle of water)
Biolage Detangling Solution (Fill to the 31 oz line, so you have room to shake the bottle)
Shake well to dissolve the BDS, and that's it. This stuff works great for curly/wavy units.
You don't need to spray the solution on your curly or wavy unit everyday. After washing, conditioning, and applying a dime size amount of the Cowboy Magic shine serum, spray your unit down. Then I spray with water in the morning, and spray with the solution maybe every few days if it needs it. The curls/waves will stay http://talk.hairboutique.com//forum_posts.asp?TID=59920# -
NATURAL PART:
I have a fool proof way to create a natural part. I believe it has been posted before, but I wanted to share again. The only supplies you will need is transparent bandage tape, foundation powder brush, and powder foundation. Here are the steps: (Optional) Apply your wig cap. (I am wearing a black wig cap in the pictures. ) 1.Dip your powder brush into your shade of foundation. (You can also use your finger, or q-tips). I found that using the foundation powder brush was much easier, and less messy. 2. Lightly brush the back of the bandage tape (Not the sticky side). 3. Tear or cut the tape, and apply to the inside of the lf cap, where the part will be. Apply the tape about 1/4" away from the hairline (just behind the baby hairs). Do not apply the tape directly on the edge of the lace. 4. Apply the lf , and style as usual. You should have a fantastic looking part, that looks totally natural, that you wont have to worry about touching up until it's time to remove your lf. The tape is not shiny, so you won't have to worry about that. http://www.walgreens.com/store/product.jsp?CATID=100957&navAction=jump&navCount=0&id=prod16193 - http://www.walgreens.com/store/product.jsp?CATID=100957&navAction=jump&navCount=0&id=prod16193 - http://www.walgreens.com/store/product.jsp?CATID=100957&navAction=jump&navCount=0&id=prod16193 This is the exact same brand that I used, it can be found at CVS, Walgreens, or any medical supply store. COOLAZFEMALE'S TIP FOR CURLY UNITS:
This is the one that I washed with 10 en 1, nuked with Silicon Mix, moisturized with Silicon Leave-In & Whale Sperm Oil, and sealed with Coconut Oil! |
Posted By: sexibeach
Date Posted: March 23 2008 at 2:48pm
|
TWO TIPS FROM MRS. JONES:
I just washed my unit last night and implemented all of the great tips you guys posted and somehow discovered one of my own. I had a problem of adhesive stuck on my lace and in the hair. I am make-up artist so I used an http://talk.hairboutique.com//forum_posts.asp?TID=59899# - - brush /lash comb that came in a walmart brush set and it worked even better than the toothbrush. It is a little more firm than a toothbrush so you have to be a little careful but it worked miracles for my dilemma. I didn't even have to use goo gone that much because it brushed the adhesive out of the hair easily.
And a way that I use to get great body wafter a wash is to pin curl the hair while it is still damp and then when it gets mostly dry, cross wrap it, then put saran wrap around it and http://talk.hairboutique.com//forum_posts.asp?TID=59899# - - dry the wrap to seal in moisture and leave it wrapped all night. |
Posted By: sexibeach
Date Posted: March 23 2008 at 3:29pm
|
WHAT DO I HAVE TO KNOW BEFORE BUYING A LACEFRONT? The major issues to be concerned with are your head size and face shape, the wig color, and wig style. The average women’s head is between 21.5 and 22.5 and petite head size are under 21 and large wigs or over 22.5 inches. HOW DO I DETERMINE MY HEAD SIZE? This is how to determine your head size. 1. flatten your hair 2. use a cloth tape 3. measure around your head at the hairline. The tape should be just above the ear and around the natural hairline. 4. measure your head from the nape over the crown to the top of your forehead where your natural hairline is. 5. measure your head from the top of one ear over the crown to the top of the other ear. 6. What sizes do wigs come in? Petite 21” 13 Ľ 13” Petite/Average 21 Ľ “ 13 ľ “ 13 Ľ “ Average 21 ˝ “ 14 Ľ “ 13 ˝ “ Avg/Lgr. 22 Ľ “ 14 ľ “ 13 Ľ “ Large 23” 14 ľ “ 14” · Oval-shaped face · Round face · Heart-shaped face · Rectangular, Long face · Square face · Triangle face · Full forehead, long chin · Large features · Long or short neck  |
Posted By: sexibeach
Date Posted: March 23 2008 at 6:47pm
|
DIFFERENCES IN HAIR AND WHY OIL WORKS FOR BOTH HAIR TYPES, BUT FOR DIFFERENT REASONS: The question came to mind in the Tip for Dry Ends thread. So i need to address this. With our natural hair care, there are definitely differences in how we approach it, b/c our hair is can be bittle and dry b/c of the tight coils in our hair pattern.. Not to mention years of over processing with perms and coloring that has caused our hair nothing but damage, breakage and shedding producing poor hair growth patterns..Oil is great for sealing in moisture to retain length after using moisturing products such as shea butter to moisturize and sealing with oils such as jamaican black castor oil mixed with wild growth oil. Not to mention protein treatments constant tender loving care. And it works great to stop breakage. Another thing we've learned is that certain ingredient filler's aren't good for our hair that we've used for years, I found an article that explains this: From the time we are little kids, our mom’s would have us sit down so she could “grease our scalp” but is this actually healthy for our hair or is this an old tradition carried down from our ancestors to our own children? Oils From Within
The oils within your hair shaft account for 3% of it. They are made within your bair bulb and are part of the "intercellular cement" in the cortex (the place where you hair produces its color) and the cuticle (the outside of your hair shaft that acts like a coat of armour). These oils are a protective coating for your hair to prevent it from absorbing too much water and they help "cement" the components of your hair together. Therefore you can see how the oil within your hair is very useful. Oils From Without Then there is the oil on the outside of your hair that is produced by the sebaceous glands. These sit right next to the hair follicle and form a film on the surface of your skin and they lubricate your hair. This allows your hair to be flexible (to bend) and to shine. Hormones The amount of lipids that you produce is determined by your hormones. If your hormones tell your hair bulbs and sebaceous glands to kick into high gear, your hair will become greasy faster - and there isn't a thing you can do about it. The grease in your hair will attract impurities from the surrounding air and make your hair dirty. On the other hand, if your hormones decide to produce only a small amount of lipids, your hair will become damaged, dry, and dull. You need the pilids (oils) in your hair for protection, flexibility, and shine. Even though it may be a pain to have to wash your hair as often as you do, the oils in your hair are a blessing in disguise. Imagine if you didn't have it - your hair would be a real mess. (end of article) So basically there is a need for the oils in our natural hair to retain moisture and length and avoid breakage.. But also as well in the asian hair we have in our lacefronts to restore the oil that this hair no longer recieves which is a protective coating to this type of hair texture.. We must always be able to seperate the two differences when taking care of our lacefront units b/c there is science behind the differences in the follicles alone and therefore the difference in hair care needs to be an awareness for us.. that's why i always say no black hair care products for this hair, not to mention the differences in Hair Follicle Pigmentation and the production of the sebaceous gland of oil from the follicle is different and the difference is in the Hair shaft melanin components. Here's an article on the differences between white, african american and asian hair follicle pigmentation..
Data pertaining to structural and functional differences within ethnic skin types support the assumption that hair follicles in the various skin types are not equal. Thus, the need to investigate follicular morphology in non-Caucasian skin types becomes more than apparent. The aim of the present study was to determine the potential reservoir of vellus hair follicles in non-Caucasian skin types in order to estimate their contribution to the penetration of topically applied substances. Cyanoacrylate skin surface biopsies were taken from seven body sites of Asians and African-Americans. To determine the follicular reservoir, the samples were evaluated under the light microscope. Follicular parameters were measured with the help of a digital imaging software program. In the evaluation and comparison of the results with those of Caucasians, significant differences were detected. Compared with Whites, follicular density on the forehead is significantly lower in Asians and African-Americans. Smaller values were detected for volume, surface, follicular orifice and hair shaft diameter on the thigh and in calf regions in Asians and African-Americans. Furthermore, the follicular reservoir, characterized by follicular volume, is generally higher in Caucasians. In comparison to African-Americans, larger follicular volumes on the forehead, back and on the upper arm were determined in Asians. The fairly similar density in these sites revealed that Asians have a higher follicular reservoir in these sites. Due to significant ethnic differences in the follicular reservoir, particularly on the calf and forehead, prospective skin absorption experiments need to be performed on different skin types in order to be representative. (end of article) Just trying to keep us educated and in rememberance of what our hair needs and what the hair in the lacefront units needs from us..
|
Posted By: sexibeach
Date Posted: March 25 2008 at 5:02pm
|
THE SILK, LADIES JUST MEANS "FINE SILK MONOFILAMENT", IT A MATERIAL VERY STRONG AND THIN, COMES IN MANY COLORS, SKIN SHADES,
THATS WHAT SILK MEANS, IT JUST THE TYPE OF BASE MATERIAL YOU CHOSE
YOU CAN CHOSE FRENCH LACE OR SWISS LACE OF WHAT EVER
Fine Mono - This is the most popular foundation used today. It is a very durable, closely woven fine nylon mesh material. All Star Lace/Mono Graft Welded Mono - This is the same as fine mono, but uses finer, more closely-woven threads. It is used for welded mono front and mono graft hair systems. Mono Silk - A silky, fine, very closely woven polyester material, but looks like silk. It is not recommended for large areas in the foundation due to the difficulty in shaping this fabric, but is excellent for smaller areas. Welded Mono - A very popular foundation. It is made from clear nylon threads woven like window screen. It is sonic welded to join the threads permanently together. It can be made in a single or double layers and is extremely natural looking. Skin Graft - PU and Glass Silk - Clear polyurethane, soft-scalloped front. The rest of the base is reinforced with a very thin gauze material. It is a totally natural appearing see-through foundation. PU Thin Skin - Clear polyurethane with no gauze. A beautiful material, but extremely delicate. PE Mesh - A flexible and durable, four-sided polyester mesh similar to window screen, but with smaller holes. It may be ordered with a soft or firm finish. Small Hole Fusion - Woven material with six-sided, 1/4 inch holes. Large Hole Fusion - Woven material with six-sided 1/2 inch holes. Integration Material - A braided nylon sewing thread used to construct a foundation with any size holes. Scallop Front - This front is designed to be slightly wavy along the hairline giving a realistic look. This type of front lasts the longest. Underventing cannot be done with this front. Smooth Line Front - Underventing (hair coming from the underneath side of the system) is recommended for front hairlines that go in a smooth line. All Star Lace/Mono Graft Welded Mono - This is the same material as fine mono, but uses finer, more closely-woven threads. It is used for welded mono lace fronts and mono graft systems. Underventing cannot be done with this front. French Lace - A "theatrical" lace material used to create a very natural front hairline. It may also be used for the entire foundation. Underventing cannot be done with this front. Skin Lace - A very thin polyurethane plus gauze material. It is very natural looking, but very delicate and short-lived. Underventing cannot be done with this front. Single Hair Vent - One hair is vented at a time. This is good for daily-wear customers who want an open look. This is the most convincing, but also the most delicate venting and is not recommended for hard usage. This venting may also be ordered in specific areas only, for example, front, part, crown or as desired. Skin Graft V Loop Stitch - This is extremely natural with no knots at all. It must be polyurethane sealed and is not long-lasting. Skin Graft Half Knot - This is used in polyurethane areas and is sealed after venting. It is as durable as single hair venting and is close to loop stitch for the finished appearance. Standard Venting - The hair is vented 2 to 3 hairs at a time. It is good-looking and durable. The knots are more noticeable if styled strongly open. This is the recommended knotting for longer lasting results for permanent-wear customers. It may be ordered in specific areas only if requested. |
Posted By: LatinJuliet
Date Posted: March 25 2008 at 9:34pm
You obviously know your stuff, it's great to have someone so knowledgeable on this forum. I have never worn a lace wig but I am interested in purchasing one. I've looked through all the links you've posted but I can't seem to find one I like at a reasonable price. I want long black wavy, silky straight and human. I agree, chinese vendors are great but none seem to have what I'm looking for...any suggestions? I'm a little nervous about this purchase but excited as well...luckily you're on here to guide me  Also, I have very long hair - too long to braid, will my hair get full of odor if I swim with my unit on? I'm planning on getting it for my wedding. Thank you for all your help - , D |
Posted By: sexibeach
Date Posted: March 26 2008 at 6:33pm
|
NEW TIP AND PRODUCT BY http://talk.hairboutique.com//member_profile.asp?PF=53218&FID=83 - Countessrim Ok ya'll I found that miracle product that makes my unit as fresh, soft, silky and a new as it was when it first popped out it's bag! This little jewel call Simply Stylin' is a gift from God! It's a pure silicone serum that is used on hair. I found it's website while searching for other Silicone products as an alternative to Silicon Mix. I bought the samples ($2) on Monday and they showed up in my mail box today. So, since my week old unit was looking rough (by rough I mean, stiff, matted, dry, dull, and tangled) I descided to go to the lab! Here are my steps: 1) Bleach Bath my unit (seriously use Clorox I know others will debate on this but, it's the only bleach that actually works for my Holly units) 2) Shampoo with Dove Intensive Moisturizer Shampoo 3) Condition with a mix of Extra Virgin Coconut Oil, and Dove Intensive Conditioner. Nuke in the micorwave for a minute in 30 sec interavals. Let sit in bag for 3 minutes. FULLY rinse out with luke warm water. 4) Spritz on some Shine Pearl Intive leave in Serum ($1 at Dollar Genral)
5) Evenly distribute about 2 oz. (The whole sample bottle) of the Simply Stylin’ Silk Serum through out the hair.
6) Blow dry on Med. Low heat. And if a straight unit run the flat iron over it and BAM! It'll look like you just bought a new unit.
And Ladies I'm being for real with this stuff. At first I didn't think it would be that great because as I was putting it on, I didn't see much difference, but baby when I ran my regular old flat iron across it that hair was looking so kinda good! I was like DAMN! I couldn't stop smile and running my fingers through it. It has a very polished finished and it's not greasy feeling either!
So I hope this helps some of ya'll!
Here's the site: https://www.simplystylinhair.com/ -
|
Posted By: sexibeach
Date Posted: March 26 2008 at 6:54pm
|
NATURAL PART TIP WITH STERI STRIPS FOR THE BROWN SKIN SISTA'S BY JADEVETTI STEP BY STEP HOW SHE DID THE TIP: Ok, First, depending on what type of parting I want (one part or double parts) I correlate my strips to it. For a wide part, I used the wide Steri Strip. I dabbed the strip with my foundation using a thin applicator brush, then attached the clean sticky side onto my wig cap. So sticky side=down, http://talk.hairboutique.com//forum_posts.asp?TID=59884&PN=2# - through the lace, for extra blending (to match my complexion even more, no need to really do this if you are lighter toned).
And voila! That's it. I have the thin strips as well to use for any double part tricks I may want to try. I will keep you updated if and when I do that. I was very pleased with how convenient it was to apply. I made the mistake the first time around trying to attach the strip to the lace, which means I'd have to color in the sticky part. That didn't work so well, the strip wouldn't stick at all anymore.
|
Posted By: sexibeach
Date Posted: March 28 2008 at 4:50pm
|
|||||||||||||||||||||||||||||||||||||||||||||||||||||||||||||||||||

 Whose hair color is lighter? What color is their hair? Is one Strawberry Blonde and one Light Auburn? They are exactly the same color hair. You see my dilemma.
  I do my best to accurately describe each color since there is no way for me to know what color skin the hair is going on (and since everyone has their own ideas of what "blonde" or "brown" is.) Being in the hair styling profession for 25 years, my most natural choice was to base the color names on professional hair tint color charts.
  these 2 colors are more of a "formerly grey and tinted blonde" color that doesn't have much gold in it. It is a wonderful color on a wig for a mature person because of the soft tones, but does not make a good hairpiece match for natural or tinted (non-greyish) hair.
 Is great for a wig if you want a lightest brown-- almost blonde color, but not good for a long hair piece, fall, or ponytail. It is too ashy for most natural "blonde/brown" hair. For a ponytail, it is better to go with a lighter shade if your hair is a blonde/brown since lighter ends are quite common in blonde/brown color of hair. Works fine for a scrunchie or a short piece such as Becky or Hayley. If you have blonde/brown hair, you might like the 10t19 (only in the Jewel).
 similar to the above but a shade darker. It s a good color for a wig on a cooler darker skinned person, but doesn't match very many people's hair. Once again, I do not suggest it for a long hair piece, fall, or ponytail unless your hair is tinted. Since most natural light brown hair has a warm tone and is lighter toward the ends, this color tends to look flat and "greenish" next to most light brown hair. Might be fine for a scrunchie or a short piece such as Becky or Hayley.


Posted By: NOT W8N
Date Posted: March 29 2008 at 5:04pm
Sexi - i being the studious newbie that i am - found that the link for the how to wrap your hair to be incorrect... here is the right one... i guess you can just edit the link above
http://www.youtube.com/watch?v=_0ZuPj3898Y&feature=related - http://www.youtube.com/watch?v=_0ZuPj3898Y&feature=related
|
Posted By: sexibeach
Date Posted: March 29 2008 at 7:30pm
| thanks sometimes those youtubes move alot.. |
Posted By: sexibeach
Date Posted: April 03 2008 at 6:35pm
|
by QUEENBEE: Buying LF Wigs Online
Thank you for taking the time to read our guide. We hope that we can provide you with tips on purchasing the best lace front wig and help you avoid disappointments, scams and costly mistakes. The 10 Commandments to Follow When Buying Lace Front Wigs Online 1. Thou shall find out how long the seller has been in business and if they do indeed make or order their wigs elsewhere. Many sellers purchase their wigs overseas from mass produced shops. They gather your measurements and then ship them off to the foreign shops to be created. This can be a bit risky since most foreign suppliers focus on quantity and not quality which could result in a poorly made unit that only last for a few weeks to a month. Also if there is a mistake with your custom unit then the wig will have to be sent back for repairs which will take even longer. Make sure you know what your sellers policies are in the event that your wig comes back with defects or errors. 2. Thou shall ask the seller for references Many lace front sellers keep a compiled list of references for potential customers interested in purchasing a unit but would like to contact past customers first. Ebay feedback is great for viewing customers remarks about the sellers wigs. 3. Thou shall be leary of 0 and private feedbacks. Zero feedback doesn't mean that the seller is not legit. To be on the safe side request references or ask if they have any sample photos of their actual work. A lot of sellers use private feedbacks which means no one can view what is being said about their items. This is a red flag for most when ordering such a personal, costly item. 4. Thou shall do your own research. Make sure that you are fully educated on lace front wigs before making the decision to purchase one. Talk with others who wear & sell lace front wigs.Applying a lace front wig is an art within itself so get educated on the pros and cons of these wigs. 5. Thou shall ask thyself if the price is reasonable A decent price for a lace front is hard to determine since people value their products at different levels. If the seller makes their own lace fronts and does not order wholesale then the price will be higher usually ranging from $500-$1,000 depending on length. It takes 40-60 hours for highly experienced wig makers to create a full hand-tied wig. Find out what others are paying for their wigs and the quality of the wig. 6. Thou shall request photos of the actual wig or photos of the sellers work Don't settle for celebrity photos on stock units. Matter of fact, don't settle for celebrity photos at all, not unless they are being used to compare their actual wig against a celebrities to show similarities. Reputable sellers do not use copyrighted celebrity photos to solely endorse their product. 1.) The celebrity in the photo may not even be wearing a lace front 2.) If they are, it is theft and misrepresentation of someone elses work and not that of the seller (unless noted that it is indeed their work) If you want to view the wig from a different angle ask the seller for a photo of the wig from that angle. Don't be hesitant to request the pictures you will need in order to make a decision to purchase. Most sellers will be more than happy to accomodate your wishes. 7. Thou shall be sure the seller will offer after-purchase customer service. Customer service is big when purchasing a lace front wig. You may need help after you recieve your wig. Be sure to order from a seller that will offer you after service support and responds fast and professionally to all your request. 8. Thou shall know the sellers policy. Be sure to read the entire ebay listing and make yourself familiar with their return policy and the way unsatisfactory is handled. If you are not confident the wig will fit, either ask for assistance on measuring your head or don't purchase the unit. Most sellers do not offer a refund which means you may get stuck with a unit that doesn't fit. 9. Thou shall make sure the lace front wig comes with a guide Any product should come with a guide of use and care. Lace front wigs are no exception. Make sure that your wig comes with a guide that tells you how to apply, remove and take basic care of your unit. 10. Thou shall remember the signs of danger. Be leary of sellers who do not respond to messages, stress immediate payment over and over again in their listing, does not have photos of their actual products or uses photos stolen from other sellers, has private, negative and or 0 feedback, does not offer after-purchase customer service, use celebrity photos to solely sell their products, has unorganized unprofessional listings, constantly uses 1 day listings. Also check the sellers completed listing in search of self-bidding. These are just a few basic things to consider when purchasing a lace front wig online. If a seller has a few of these signs it doesn't mean that they are automatically a bad seller or scammer. Every seller has a way that they do business so what it comes down to is your personal choice. Do your research & choose a seller that you feel comfortable with. Happy Lace Front Buying!! BUYING USED LF FROM MEMBERS BY PRINCESSLF AND CHARMED:
I'm starting this topic as an etiquette type of thing. I'm a member of several hair boards and recently purchased a used unit from one of the members, who that person is is not important. However, what is important are basic etiquette things that should be done when selling a used unit:
1. Remove all adhesive from the unit. If you can't remove all the adhesive after at least making the attempt to do so, make the buyer aware of this beforehand.
2. WASH and CONDITION the unit before you mail it out. Don't take the unit off your head, stuff it in a package as is with all the hair products you had on it, grease, dirt etc and ship it out.
3. Make some attempt to package the unit nicely. When you received the unit brand new, it came to you with the hair netting and a plastic bag. Comb the unit or at least show that you wanted to send a good product.
Even if the unit is a beater, there is no excuse to send a nasty, dirty unit to someone. What's nasty and dirty is reaching into the package and grabbing hold of a greasy mess that you have to immediately drop and wash and sanitize your hands.
1. dont mis communciate the condition of the unit (hair length, condition, cap condition etc.)
2. dont charge an arm and a leg when you know it is worth $50 and actually you should be giving it away.
I bought a unit from someone and when I received the wig there were holes in the lace, the hair was coming out, it had been dyed (that was not mentioned) it was much shorter than described and she charged me $185 for a very used wig vs a gently used item. I was steaming mad and I addressed her behind the scenes.
Ladies beware that there are people that are selling units cause they are trying to get up some bill money. I don't have issue with that BUT if it's crap dont try to jerk me |
Posted By: sexibeach
Date Posted: April 03 2008 at 6:42pm
Compare Hair System Bases
Use the comparison chart below to decide which base design would be the best fit for you. Want to learn more about http://www.hairdirect.com/hair/systems/base-guide.aspx - appearance vs. durability ?
|
||||||||||||||||||||||||||||||||||||||||||||||||||||||||||||||||||||||||||||||||||||||||||||||||||||||||||||||||||||||||||||||||||||||||||||||||||||||||||||
 How does it look? How does it feel? How long does it last? Choosing the right hair system base can seem tricky, but we're here to help.


Posted By: sexibeach
Date Posted: April 13 2008 at 12:04pm
|
TRANSITIONING FROM RELAXER TO NATURAL WHILE WEARING LF'S: During the time you are transitioning, there are really two key things to focus on: 1) you will need to keep your hair moisturized, and 2) the point where your relaxed hair meets your natural hair is very fragile. You want to wear the simplest styles possible with as little manipulation as possible. Something "tied down" like a bun or cornrows, or protective style like lace front wigs are good options. Styles that disguise the two textures and don't require combing like a wet set are also good. Insert Lf's here! Braids are fine during your transition. If you are planning to use extensions, it's probably best to go to a natural hair stylist to have them done versus a braiding salon. Theoretically, a natural hair care salon will understand what you are trying to accomplish and give more consideration to the overall health of your hair. When you get braids done improperly, unfortunately they can cause scalp damage and hair loss.
Use a moisturizing shampoo, moisturizing conditioner, leave in conditioner, moisturizing styling products, and seal with Oil to lock moisture in...there is really no such thing as hair that is too moist for a transitioner. Here's product that is especially designed for black hair that is for curly coiled hair:
http://www.curlmart.com/store/home.php?cat=9&gclid=CPKEvuy72JICFQm6PAodqRIsmA - http://www.curlmart.com/store/home.php?cat=9&gclid=CPKEvuy72JICFQm6PAodqRIsmA
|
Posted By: sexibeach
Date Posted: April 13 2008 at 7:34pm
|
TIP BY LOVEANGIE ON ADHESIVE REMOVAL: I posted this in another thread but I think it deserves a thread of it's own. To remove tapes (yes blue liner tape too!) and glues from your lace without alcohol and without oil (goo gone, etc.), try this: http://www.alconeco.com/products/tools/brush_cleaner/cinema_secret_s_brush_cleaner - Cinema Secrets Brush Cleaner , along with this: http://www.alconeco.com/products/tools/brushes/hair_coloring/rcma_hair_coloring_brush - natural bristle brush . |
Posted By: sexibeach
Date Posted: April 13 2008 at 8:30pm
|
The Cinema Secrets http://talk.hairboutique.com//forum_posts.asp?TID=60439&PID=479997# - - cleaner is here: http://www.alconeco.com/products/tools/brush_cleaner/cinema_secret_s_brush_cleaner - http://www.alconeco.com/products/tools/brush_cleaner/cinema_secret_s_brush_cleaner The Natural Brushes are here: http://www.alconeco.com/products/tools/brushes/hair_coloring/rcma_hair_coloring_brush - http://www.alconeco.com/products/tools/brushes/hair_coloring/rcma_hair_coloring_brush the brushes are dye brushes but they are used to clean lace wigs too |
Posted By: mslady
Date Posted: April 15 2008 at 5:03am
|
Tips by meechie2cute-- Well for all yall Mastix P sprit gum users...I use Stridex to remove the glue from skin AND lace. It cleanses it well and get all those flaky bits off the skin. This also works for silicon based glues, this prevent excess "boogies" and just gets rid of them. Stridex are alcohol free. They are awesome and  super affordable.
|
Posted By: mslady
Date Posted: April 15 2008 at 5:46am
|
UPDATED: HOW TO APPLY LACE WIG USING TAPE-- http://video.aol.com/video-detail/front-lace-wig-application/101159560 - http://video.aol.com/video-detail/front-lace-wig-application/101159560 |
Posted By: sexibeach
Date Posted: April 17 2008 at 5:50pm
|
AMERICAN VENDOR: http://www.contagioushair.com/ - www.contagioushair.com http://www.bargainlacewigs.co.uk/ -
|
Posted By: sexibeach
Date Posted: April 18 2008 at 7:12am
|
HAIR TYPES AND TEXTURES:
Lighty Yaki - Freshly Permed AA hair
Yaki - Kinky straight or appears like you might need a perm
Virgin Unprocessed - Hair in its natural state, no chemical processes
Curly - Kinky Curls, Smooth Silky Curls, all done by chemical process
Wavy - loose wave, water wave, deep wave done by chemical process
Chinese Virgin - Thicker coarse hair shaft not as shiny as indian
Indian Virgin - more shiny and thinner hair shaft
Malaysian Virgin - in between the thickness of chinese and indian, some natural unprocessed malaysian is wavy, curly and even straight more expensive hair
Please refer to page one on the other different types of virgin unprocessed hair..
|
Posted By: sexibeach
Date Posted: April 23 2008 at 6:26pm
|
Curlygirl11's tip:
Custom Colored Lace & Wig Caps Tutorial
http://talk.hairboutique.com//forum_posts.asp?TID=60607 - http://talk.hairboutique.com//forum_posts.asp?TID=60607
Countessim tips on Hiding Grids:
which can also refresh the steri strips and Johnson & Johnson bandage tip while applied and when it needs a refreshing.
Trick to Hide Grids in Parts
http://talk.hairboutique.com//forum_posts.asp?TID=60640 - http://talk.hairboutique.com//forum_posts.asp?TID=60640
|
Posted By: hairmad
Date Posted: April 29 2008 at 6:36am
|
no one has ever made me shut up so easily! respect girl....i am going to take my time read this and get intelligent about lace hair! with knowledge and research like this...girl you gotta be rich! |
Posted By: sexibeach
Date Posted: May 09 2008 at 2:29pm
|
Jacksun's website:
http://www.shuangyewig.com/ - http://www.shuangyewig.com/
|
Posted By: reggie54
Date Posted: May 18 2008 at 1:53pm
|
i am 54 yrs. old i was given a new lace front wig but i find it is to thick. i would like to know what would be an apporiate density for me the one i have is 100% or medium density i find that very full. i want it to look as natural as possible.
i also have transparent lace, even though i lost most of my hair to lupus i still feel its to light. my skin tone is close to toni braxton what color lace do you recommend. i plan on buying another one for my birthday next month
and i need help i dont kknow much about vendors also i can't afford to waste the money
|
Posted By: sexibeach
Date Posted: May 30 2008 at 5:15am
| http://www.shuangyewig.com - www.shuangyewig.com |
Posted By: keedielove
Date Posted: June 17 2008 at 8:35pm
| i just used GOO GONE to get some invisibond glue off my skin and i swear it works so well! |
Posted By: sexibeach
Date Posted: June 19 2008 at 5:04pm
|
CUTICLE ALIGNED AND NON CUTICLED ALIGNED HUMAN HAIR "The cuticle: The outermost surface of the hair shaft and is composed of a very hard keratin. It consists of flattened platelets of amphorous keratin, wrapped around the hair shaft in several layers, each layer overlapping the adjacent one progressing from the root of the hair to its tip. The cuticle scale is sub-divided into three further layers, the endocuticle (third layer), exocuticle (middle layer) and epicuticle (the outermost layer) respectively. The cuticle is the outermost part of the hair structure and its function is to reduce nutrition loss and block the invasion of foreign matter. It is the most important part to keep your hair looking healthy." Most commercially processed hair is from In the long run it takes more time for quality work, but is well worth it. The amount of companies who are offering custom hand tied wefts are diminishing quickly. Assembly line hair is made on industrial sewing machines and will always be less expensive, sacrificing quality for profit. Some companies claim their hair is the same cuticle direction but they strip the hair anyway. This doesn't make sense, and is counterproductive. If the hair is truly all in one direction why strip it? The only reason is poor quality control. Removing cuticle will make the hair useable for a few weeks although the process to remove cuticle makes the hair lose its luster, and compromises the hairs natural beauty. |
Posted By: sexibeach
Date Posted: June 19 2008 at 5:07pm
Human Hair
Human hair extensions are made from genuine human hair that is paid for and harvested from people, usually young women, all over the world. Human hair extensions can vary broadly in quality. On the low-medium end of the scale, hair is chemically stripped of its cuticle so that it can be machine processed without regard for direction or root-tip alignment. If the cuticle were left in but the root-tip alignment mixed up, the microscopic scales that form the cuticle would be opposed and snag on each other causing tangling. The negative effects of stripping the cuticle are brittleness, reduced protection from sunlight, dryness, salt, chlorine and pollution as well as a tendency to absorb liquids and swell or matt. It is not advisable to colour or heat-style this hair. Remi [AKA Remy] hair refers to hair that has not had its cuticle stripped and has at least been partially hand-processed to maintain root-tip alignment. This hair is more expensive but will remain in good condition for much longer than stripped hair. It can also be heat styled and coloured. The other main scale of measurement of hair quality is the ‘percentage full length’ Hanks or Wefts of hair are often made of differing lengths of hair strands. Average quality hair that is 18 inches [45cm] long may have 20% of the strands measuring 18 inches [45cm] a further 40% measuring from 14-16 inches [35-40cm] and the other 40% measuring 6-12 inches [15-30cm] A few of the superior grades [e.g. Bohyme Remi] are in fact full length, meaning each strand is exactly the stated length. Colours of human hair are usually described by a colour scale which varies from manufacturer to manufacturer but they are available in a very wide range of natural and psychedelic colours. Outside of these, there is a third type of hair. Virgin hair is hair that has not been chemically treated. It is harvested, sanitised and sold as bulk hair in hanks. The colour remains the same and the quality is completely dependant on the donor. Having said that, hair that is in poor condition [Split ends, chlorine/salt/UV damage etc.] rarely finds it way into this market as the buyers are quite discriminating. Texture & Style Human hair is generally processed and sold in two textures; Silky, also called European and Yaki sometimes spelt Yaky. Silky (European) hair is pretty much exactly as it sounds, straight and silky. Yaki (Yaky) hair has more volume, it feels coarser to touch than Silky (European) hair. This effect is created by imparting a very slight crimp to the hair strands during processing. Under a microscope, one can see a wave in each strand even though they appear straight to the naked eye. Yaki (Yaky) textured hair is a good match for relaxed African hair. It is also used by people who want a fuller style. Yaki (Yaky) textured hair tends to be sold only in straight styles but Silky (European) textured hair is curled and waved into a myriad of styles of hair extensions. These are named according to their curl/wave and include styles such as: French Wave, French Refined, Italian Wave, Body Wave, Spanish Wave, Brazilian wave, French Curl, Spring Curl, Corkscrew, Afro-Kinky, Tight Curl, Deep Wave, Deep Curl, Wet Look, Natural Wave and Body Wave. To test human hair for quality, perform the following; Scrunch Test: Holding the hair by the top [tied] part, place your other hand under the tips and push the tips up until your hands meet. Rub briefly and release. Run your fingers through the hair, your fingers should slide freely through the hair. The more it snags, the lower the quality. Grip Test (AKA Length Test) Grip the hair at the top, near the weft or band securing the hair if it is bulk hair. Slide your hand down and grip it about a quarter of the way down, repeat it for halfway and three quarters and finally grip it just before the tips. . Poor quality hair will be significantly thinner at each step of this test. Most good quality hair will be the same thickness for the first three steps only thinning in the final quarter of its length. Great quality hair is made from hair strands that are all approximately the same length so the thickness of the hair should be the same all the way down its length. This is rare and expensive, such hair is called ‘full length’. Dye Test Dye a sample of the hair. If it is 100% cuticle-intact human hair it will change colour uniformly. If it develops streaks, highlights or lowlights, it has probably been mixed with low-grade human hair or even synthetic hair (usually high temperature fibre, see Synthetic hair section) The type of hair you use for your extensions will be the most important factor in your final look. If you buy cheaper hair it will look good for the first month or so but after that it will start to deteriorate and shed. Shedding is one of the most embarrassing things about low quality weaves. Leaving a trail of hair behind you is the last thing you want.
Different Types of Human Hair
The quality and type of human hair used will dictate how natural wefts look and feel.
|
Posted By: sexibeach
Date Posted: June 26 2008 at 4:12pm
|
DIVAVOCALS TIP ON BLEACHING: This is very true.. It's a common mistake that newbies to bleaching make.. They see the hair going through the color transition, panic and rinse the bleach out too soon.. When bleaching dark hair, the color transformation goes through a few color transformation stages.. Orange is ONE level on the way to the blonde end of the color spectrum (which is what you want to achieve when you bleach knots)
Bleaching hair effectively strips what appears to be our "natural" hair color, exposing the underlying pigment lurking beneath the surface.
Depending on how dark your hair is naturally, your underlying pigment could range from rusty orange to pale yellow. Hair Coloring Formula
Step One - Identify Natural Haircolor LevelAn international system is used to identify the level of darkness of your hair http://www.style-hair-magazine.com/hair-coloring.html# - darkness of your haircolor...not necessarily the Step Two - Identify Your Underlying Pigment A hair coloring http://www.style-hair-magazine.com/hair-coloring.html# - - process that involves any amount of hydrogen peroxide (which can include some semi-permanent formulas) will bring out the natural underlying pigment of your hair. The "natural looking" tone that's visible as your hair color http://www.style-hair-magazine.com/hair-coloring.html# - - is not the true tone when it comes to the chemistry of hair coloring. Think of it as a surface layer that's stripped away, and laying in wait underneath are the bold and brassy tones of your underlying pigment. The chart above clearly illustrates which color of underlying pigment corresponds with the natural level you identified in step one. So now you know what you're dealing with. |
Posted By: Raquek
Date Posted: September 04 2008 at 12:35pm
|
I been buying my lace wig from Styling Wigs - http://www.stylingwigs.com/ - http://www.stylingwigs.com Their prices seem reasonable to me plus the hair they use seems pretty good.
|
Posted By: nbrooks
Date Posted: November 04 2008 at 7:38am
|
hello my name is nikki. i was reading a thread and i was wondering if you could help me. i purchased a lace front wig and it is too big. i think i cut the lace too short becase it won't stay down and its extreemly loose in the back which i also think messed up the fit. is their anything i could do ------------- nikki |
Posted By: sheeya
Date Posted: November 14 2008 at 1:25pm
|
for those who need a visual on how to measure your hairline to customize your wig go to this link for the diagram
http://www.fabulouslacewigs.net/measurements.html - http://www.fabulouslacewigs.net/measurements.html ------------- love conquers all |
Posted By: Msplaygurl
Date Posted: November 28 2008 at 5:31pm
|
I've searched for reviews but cannot find anything, but has anyone purchased a custom unit from Hairaffairs on ebay??? If so, how did it turn out? |
Posted By: lacewignewbee
Date Posted: March 26 2009 at 8:27pm
| im a 16 year old. and i had gotten my first lace wig on tuesday. and the lady that did it had sewed it to my braids. so far i do like it. But problems im having is the parting & the grid. where can i buy the strips(sallys?) tips? cause its indian remy curly hair. maybe next time ill go ahead and do the tape instead cause the sewed in isnt really looking natural. |
Posted By: sexibeach
Date Posted: May 15 2009 at 5:26am
|
UP GRADED VERSION OF THE BLEACH BATH, ITS MORE AFFECTIVE B/C WE ARE NOW DEALING WITH HAIR THAT IS UNRULY..
COMB THAT UNIT OUT COMPLETELY B4 IT TOUCHES THE WATER..Ok mircowave the hot tap water only for 2 min. YOU ADD THE BLEACH TO THE WATER AFTER YOU HEATED THE WATER NOT BEFORE. you should fix a big mixing bowl with shampoo and conditioner b/c you will dip the unit in that shampoo/conditoner solution in between the 2 parts.. the bleach a little MORE THAN THE 1/4TH A CUP BUT less than 1/2 cup + one gallon of water, put in the bleach and water for 3 minutes lift it up every now DURING THAT 3 MIN., and then with a wide tooth comb attempt to comb thru starting at the ends.. its not necessary to get it detangled in this part, just start it and let it soak in that bleach for the full 3 min.s use a timer..
dip in the shampoo/conditioner, while you prepare A NEW BATCH OF WATER FOR THE AMMONIA SOLUTION (NEVER MIX AMMONIA AND BLEACH TOGETHER)(mircowave the water 2 mins) (AGAIN NEVER HEAT THE WATER WITH THE AMMONIA IN IT, ADD IT AFTER THE WATER IS HEATED NOT BEFORE) for the ammonia a little MORE THAN THE 1/4TH A CUP but a little less than 1/2 cup + 3 CUPS OF WATER (not a gallon) the extra percentage of bleach and ammonia amounts are for a unit that has already matted b4 ONLY, not one that's trying to prevent matting. You need to stick with the 1/4 th cup measurement for prevention.. when you put it in the ammonia mix, put it all the way down in there for 3 min's use a timer. lift it up and being the combing again, and comb it all the way thru then lay it back down in the solution to soak, do a comb thru a couple of times during the 3 min process.. you'll see the tangles come out completely easy in the ammonia.. the ammonia part is the truth for detangle. then put back in the shampoo/conditioner solution.. then squeeze the excess water out, and begin to saturate it completely with conditioner comb it thru again, it should be silky smooth and tangle free now. and put it in a zip lock baggie UNLOCKED, just fold it over, and nuke it for 30 SECONDS ONLY.. and then just let it sit in the conditioner a little bit.. then remove from the baggie, (don't rinse yet) and place it back on the wig head and pin it down.. then begin the rinse of the conditioner out of the hair running your finger thru the hair in a downward direction.. and finish the rinse and let it air dry.. |
Posted By: natural hair
Date Posted: May 20 2009 at 1:19am
|
Hi sexi,I read all the info you posted in one breath, so useful they are! Thanks! To tell the truth,I am a lf wigs manufacturer from China,but I do not want to advertise here,I want to become another “sexi” to show useful info to let more users know more. For lace front wigs,cap is very important,so I want to provide some cap styles for all your choice. Material: french lace,swiss lace,mono,thin skin(PU) Styles:stretch from ear to ear,stretch only at crown,perimeter 3cm thin skin,silk top hidden knots,glueless cap,etc,I don’t know how to post pictures,so please find the pics there: http://www.qdwigs.com/newsshow.asp?id=286 - http://www.qdwigs.com/newsshow.asp?id=286 |
Posted By: ilnaij
Date Posted: July 07 2009 at 11:10pm
|
AMERICAN VENDORS http://www.californialacewigs.com - www.californialacewigs.com http://www.mywigsandweaves.com - www.mywigsandweaves.com http://www.mymaneattractions.com - www.mymaneattractions.com
IVY Website: http://www.visionremyhair.com - http://www.visionremyhair.com Email: mailto:visionhaircn@gmail.com - visionhaircn@gmail.com or mailto:ivy-hair@hotmail.com - ivy-hair@hotmail.com |
Posted By: hottipsfashion
Date Posted: September 28 2009 at 6:29pm
| Girl,you are right!But some american vendors do ventilate their wigs,even their cheap full lace wigs, |
Posted By: hottipsfashion
Date Posted: September 28 2009 at 6:35pm
|
This is a big mistake to sew a full lace wig,because you damage the lace,and the parting of the hir doesn't look natural. You should use adhesives to attach your full lace wigs. Hope this will help you,Girl!
|