Please note that her hair only reaches just below her neck so it
doesn't drape as well as the girl in the book. But I managed to get it
in place. :) For the front pieces I did not use a curling iron. I just
used a round brush's "Round Handle" as a roller and rolled up the hair
and held it for a few seconds rolled up. I then unrolled about a 1/2 a
turn or so and then turned the handle straight up and down and pulled
the handle carefully out of the curlled up hair. That made the curl
stretch kinda like a spiral would look (or one of those party favors on
a stick that you flick and it unravels). That was it. I'm not saying
that you should do this if you want those curls to stay.
This is Sequoia from a few days ago. She is wearing a regular ponytail but with 2 scrunchies.
The blue scrunchie was placed on the tail to secure it. Then the white
beaded scrunchie was placed above the blue scrunchie loosely. then in
the same manner as using it to secure a tail I twisted it and put the
tail through again. But I left the second loop below the blue
schrunchie. I made sure that when I twisted the white one that the X
was close to the head. I got these two scrunchies with my book
Hair : A Book of Braiding and Styles / Book and 3 Scrunchies
-------------------------
By- Anne Akers Johnson (Klutz Books Pub)
http://www.amazon.com/exec/obidos/ASIN/1570540187
You can also find it in stores, but be sure to look in the kids section
if you can't find it. Most Klutz books are for kids. I found mine there
at Barnes n Noble.
Hanna
This is the new head with a shorter neck.
Hair: 28 -28.5 inches long. (about 11 inches below neck)
Currently cut into a deeper U using Feye's instructions with the head
held straight up, not tilted. Some of her hair is already shorter than
than the U so its not perfect. The hair on the sides was originally 2
shorter tails of hair that reached a bit below her neck. They needed a
trim so I decided to cut some neck framing layers using the chin as a
guide and going down from there. Oh and as far as making the decision
to cut the layers, Her hair was not going to grow anyway so I figured I
would cut them and use them to challenge myself a bit more when I do
try updos and such.
Hanna
Front View - Hair in back is in the bun shown in the next picture.
Bun - Same style 2 pics, to show color and clarity. ;)
I was attempting to do the Bee Butt Bun and this bun came as a result
of twisting the tale in the first step. Then right near the ends of the
tail I made a little (donut, flat bun, insert your own description?)
and then I began flipping the little bun up and into the tail like I
was folding a sheet. When I got it to the head I held it there and
slipped in one of the two colored pencils as a hairstick since I didn't
have them. While I do like how this turned out this was actually the
second little bun I made and the first one looked like a heart. But
when I went to adjust one of the pencils it started coming loose so I
tried to do it again. So if I figure out how to do the Heart I will
post it. Those are 2 colored pencils that are both Violet. PS: If you know what this bun is called let me know. To me it
kinda looks like a beetle or a lady bug. I guess I made a Beetle Butt
Bun.
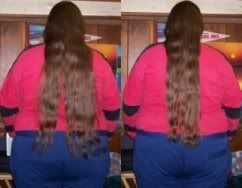
Down Back View before trim (see above for explanation)
This was just a picture I took with the camera to see how it would come
out. This was on the old head just before I had my bright idea to
shorten the head a few days ago. Do not put Model glue on styrofoam.
Unless you like styrofoam to have craters.
Pictures from 2000 - Old Head
Regular Braid
Rope Braid
Please forgive the sloppiness. I did not have anything except that
board to mount the head on and its really hard to comb through when the
only thing holding it to the board is a couple of screws that barely go
into the bottom of the green part. The only other option I had back
then was to hold it in my lap. So it's as good as I could do with the
skills and equipment I had at the time. These were probably my first
two somewhat succesful attempts to do any braid. By the way, this hair
tangles easily. Back then I tried using Suave For Kids detangling
spray, Awesome Apple and it seemed like it made the hair more sticky
than anything else. The other day when I got the manikins out I dumped
out the suave stuff because I needed a spray bottle to put my new stuff
in,
a dab of my Aussie - Knot Forgotten into the bottle and then fill with
water and shake. and just used that. Although the bottle does say it's
a rinse out conditioner so I don't know if it should be left on Our
hair. It does work great on the manikins though. Just think if you had
fishing line for hair. Note: Its the same picture 2 times. These
were scanned from regular pictures and I was trying to show them with
both the right color and clarity. These are about as close as I can
get. Her hair has this dark red almost purple tone and I love it. It
reminds me of all the henna pictures I'm seeing. I did not color this
hair so either its a natural color (if its human hair) or the
manufacturer colored it.
Veronica
Veronica
Hair: 15 inches long.
Currently cut into a one length blunt cut bob
Veronica joined the family to try out new haircuts. This left her
sister Sequoia with longer hair that can still be made into updos as
seen above. Veronica has her hair cut into a bob, by me. I personally
like it in this style and will not cut it again until its required for
an assignment. Note: I am using 2 bobby pins to hold hair off to the
side so you can see her face better. I don't have any barrettes or
other stuff yet so bobby pins for the bob it is. ;)
I do plan to show some short hair updos on Veronica as well as braids and other stuff.
Note: to those who have read my cosmetology journal, I let the
school adopt Sonya. The junior room hardly had any manikins to work
with so I let her stay behind.
You cannot post new topics in this forum You cannot reply to topics in this forum You cannot delete your posts in this forum You cannot edit your posts in this forum You cannot create polls in this forum You cannot vote in polls in this forum


 Topic Options

 Post Options
") Thanks(0)
Thanks(0)