Nair My Babyhairs- put a lil Nair on my baby hairs on the middle/ends not close to the knots and/or cap construction cuz you don't want the hair to fall out, and only for a few seconds. It makes the baby hair real flimsy and fine just like my natural baby hair. the nair just makes the baby hair super fine to the point where it lays down by itself without gel, more like real babyhair. I practiced this on my old unit and it made the hair elastic because I left it on to long, that's you can't leave it on too long. Use only the original nair, none of the scented, improved stuff and leave it on only like two seconds and rinse.
sexibeach
Members Profile
Send Private Message
Find Members Posts
Add to Buddy List
Senior Member
Joined: March 15 2006
Location: United States
Status: Offline
Points: 1569
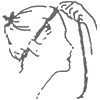
1. turn the unit inside out, place on yourhead in exact position for applying
2. determine the area where the unit needs resizing. To make a unit smaller, I usually do any modifying behind the ears
3. seize the superfluous part of the lace you want to remove to make the unit smaller or better fitting
4. use pins to fix this part of lace first on one side, then on the other side of the unit with the wig still on your head.
Take care to make corrections until the unit fits you perfectly! Probably you're going to have to try several times pic1
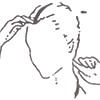
5. start sewing with transparent thread along the lines marked by the pins, both sides of the unit pic2
6. cut open the lace in the middle of the part that's sectioned off by sewing pic 3
7. the two parts of lace that are left from cutting are placed on the right and left side of the sewing line and fixed again with transparent thread pic 4
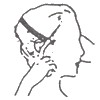
8. cut off the hair from the inside part of the unit pic 5
Pic 6 shows a piece of stocking sewed in the area of where I'm creating a part.
The last two pics are of the unit applied without using adhesives
just got an email from Hair Direct about cleaning the hairline on lace units so they remain undetectable. U know we love our makeup so I thought u all would find it useful.
It's one of the easiest ways to safely remove glue residue from those holes on the lace. Just push the bottom of the lace firmly against a mirror and slide it down the glass. The glue gets pulled out of the lace and deposits itself on the glass leaving the lace clean and clear. (This idea came from Robert in Colorado but we named it The Mirror Slide).
Even better than glass is Saran Wrap , also known as cling film. Put this on the mirror or work-surface first for a great mirror-slide clean up, and then throw it away, leaving the mirror clean.
But wait, there's more. The mirror slide also works on wax-paper and it even works on those clean brown paper bags they give you at the supermarket. (Thanks to Jeff in Michigan). Basically, rubbing the lace firmly down any of these surfaces will pull out all the residue. Who would have imagined that?
We like the cling food wrap the best.
There is always more than one way to do anything, but here is our recommended method:
REMOVE
Tie a bandana around your head or slip on a sports headband to protect the eyes from the alcohol in the lace release or the ingredients of the solvents that you use.
If its a lace unit, spray Lace Release or alcohol through the lace from a very close distance to the head, then wait for it to work and then lift off the unit
If it's a non-porous base, such as polyskin, raise an edge and spray under the unit, progressively peeling back the base until it's off.
CLEANING YOUR HEAD
Spray adhesive remover all over glue area on your head.
Wait for it to work, then use a subway card (or any soft flexible plastic card) as a scraper to get all the glue to the front and lift off the big ball with paper towel
Repeat if necessary until it's all gone.
Use adhesive remover and a fine-toothed comb to remove any residue from your real hair
When all the glue and residue are gone, use lace release to remove most of adhesive remover
In the shower, stage one: apricot facial scrub on the scalp and through your real perimeter hair (optional)
In the shower, stage two: Clearasil face wash or equivalent to thoroughly cleanse the skin and hair (optional)
Apply some plastic food wrap to a mirror or marble surface or similar
Place the bottom of the hairpiece onto the wrap and firmly rub it along. The plastic wrap pulls all of the glue and residue right out of the lace or off the bottom of the polyurethane.
If the base is polyskin, there may be too much friction and the wrap may come up, so spray a little lace release or adhesive remover down to reduce friction a bit.
To remove glue from the hair on the piece. spray adhesive remover and gently comb it out using a wide toothed comb, then a fine toothed comb second, unless you have tight curls.
If it's a real glued up mess, use less glue next time, but for now place the unit in a plastic bag or container and shake it up in some adhesive remover to break down all that excess adhesive.
Squeeze out as much adhesive remover as possible, then flush it out with lace release or alcohol.
Neutralize the alcohol with water.
Shampoo the unit in a sink of cool water, making the water flow from bottom to top, through the lace, so that hairs do not get washed through to the wrong side.
Rinse under cold tap
Repeat until the lather becomes rich, indicating clean hair.
Condition as necessary
Dry without heat. Clip the unit to a room fan and let air flow through from the bottom. This drys the piece very quickly without the use of warm air.
sexibeach
Members Profile
Send Private Message
Find Members Posts
Add to Buddy List
Senior Member
Joined: March 15 2006
Location: United States
Status: Offline
Points: 1569
How To Measure Your Head For Your Custom Lace Front Wig
You will need a soft measure tape for this task. Before you start we highly recommend that you style your hair as it will be when you wear the wig. To achieve the best results you should either:
Style your hair in a flat beehive
Braid it straight back in flat cornrows
Wrap it flat back
Try to eliminate any bulges by getting your hair as flat and tight as possible. It is very important that your head measurements are accurate.Your wig may not fit if you do not measure properly. Be sure to take your measurements several times to be on the safe side. Measurements are recorded in whole and half inches so please round your measurements up. For Example: 21 3/4 should be rounded up to 22 and 11 1/4 should be rounded up to 11 1/2. Always round the measurements up and not down. Once again, it is very important that you take the measurements several times to insure accuracy.
1.
Head Circumference
Measure all around the head. Position tape measure so its edge follows the hair line around the head and nape of the neck.
Head Circumference = ____ in.
(Average measurement is 22 inches).
2.
Front to Nape
(From Forehead to Nape)
Front to Nape: This measures the length of your head from the front to the nape of your neck. To determine where the nape of your neck is, tilt your head back and look up. Where your neck bends and may even develop a skin fold, is where your nape is. You want the bottom of the wig to sit right above this area so that when you do tilt your head back that far, your wig will not shift on your head. This area is often right at the occipital bone, but be sure to take the measurement with your neck bent down so that you are looking at your shoes. Starting at the front hairline, measure directly across the middle top of your head to the area that you have determined is your nape.
Front to Nape = ____ inches. (Average measurement is 13.5 inches).
3.
Front Hairline
( From Ear to Ear)
At front of ear, measure from hairline at base of sideburn, up across the hair line along forehead to same point in front of other ear.
Front Hairline = _____ inches.
(Average measurement is 11.5 inches).
4.
Over Top of Head
(From Ear to Ear)
Ear to Ear Across Top of Head: This measures your head for the top of the wig base. Place tape against your head at the top edge of your ear and go directly across the top of your head to the top edge of the opposite ear.
Over Top of Head = _____ inches.
(Average measurement is 11 inches).
5.
Point to Point
(From Temple to Temple)
From temple to temple across the back of head. Note: Place the tape measure at your temple to temple point on each side of your head as shown in the picture.
Point to Point = _____ inches. (Average measurement is 14 inches).
6.
Nape of Neck
The measures the width of the hair at the nape of your neck. Place tape at the end of your hairline at the nape and measure across the width of the hair. If you want more room at the nape, you may want to consider adding a half inch to your nape measurement.
Nape of Neck = _____ inches. (Average measurement is 6 inches
sexibeach
Members Profile
Send Private Message
Find Members Posts
Add to Buddy List
Senior Member
Joined: March 15 2006
Location: United States
Status: Offline
Points: 1569
The term "lace front wig" and "full lace wig" are virtually the same; A lace front wig, or other known as a full lace wig has a very natural front hair line and is constructed with fine lace in the front and a variety of materials in the back of the head. A full lace system is the ultimate system since it will look natural from every angle regardless of how the hair is brushed or styled. The object of a lace front wig or a full lace wig is to look beautiful and natural! You do not want anyone to ever think you are wearing a wig. A full lace system is usually preferred and is the ultimate in style, design, beauty and naturalness.
What Lace Cap Choice Is Best For Me - French Lace or Swiss Lace?
There are many types of lace that can be used for the base, we prefer the French lace. French lace is more durable than Swiss lace and it is the best choice for new lace wig wearers. The french lace tends to last longer and is virtually tear resistant during the application process when using tougher glues and bonds. The French Lace is thin, delicate and natural looking.
The Swiss Lace is more undetectable but the main concern is that the lace breaks down faster and can rip much easier; if the lace rips this will make your lace wig system unusable. Again! - The Swiss lace is the most undetectable of the laces, but the most fragile. The swiss lace cap choice is best for experienced lace wig users.
Overall , both french and swiss lace look extremely natural and as the lace seems to disappear into your scalp when applied with our special surgical bonds and lace tape. Your unit will come with extra lace extending from the hairline, which you will trim off to custom fit your hairline and then bond with your choice of adhesive.
How Long will My Wig Last?
A lace wig unit can last for many months or even years depending on your usage and upkeep. The types of glues that are used during the application method also applies to the life span of your unit. For example, the lace wig can be compared to the tires on car; of course the more you drive your car, the more worn down the tires become and the need for replacement tires becomes greater. The idea remains that if you plan to wear your wig more often, the natural need for a new unit will become greater as the hair naturally degrades due to extended periods of use.
Can I wear this wig even if I have my own hair?
Yes. You will have to make your own hair as flat as possible, by wrapping or braiding it. Then apply a flesh toned stocking cap over your natural hair to simulate your scalp color.
What If I have Experienced severe hair loss due to an illness or chemical damage? Is this type of wig right for me?
Absolutely! I highly recommend this system for anyone with any kind of hair loss or undergoing Chemotherapy. If you suffer from a medical condition where you have experienced sever hair loss, it's recommended to proceed with full french or full swiss lace. This will ensure the most comfortable "perfect" fit.
What is Remy/Remi Indian hair?
Remy hair, also called virgin, cuticle or cut hair; is the highest quality human hair you can find on the market. The hair is in the most natural state, free from chemical processing of any kind.
Remy hair is special because each bundle comes directly from a single donors head. This allows each bundle to keep the consistency of texture, color, and length. It is then cleaned and sorted to be packaged. The cuticles of the hair are all intact and facing in the same direction. This eliminates the worrisome pain of tangles and matting. This is what makes Remy hair a step above the rest!
sexibeach
Members Profile
Send Private Message
Find Members Posts
Add to Buddy List
Senior Member
Joined: March 15 2006
Location: United States
Status: Offline
Points: 1569
We have over 50 different Foundation Materials available. The following are the most popular.
Fine Mono: The most popular foundation used today. Very durable closely woven Fine Nylon mesh material. Also known as M Mesh, E-3 Soft Fine Mono, Micro Screen and B-1
Super Fine Mono: A thinner version of Fine Mono. Very natural in appearance, soft and light weight. Not recommended for permanent wear or very active clients.
Mono Silk: Soft, fine, very closely woven polyester material. Looks like silk. Not recommended for large areas in the foundation due to the difficulty in shaping this fabric. Excellent for smaller areas in the foundations.
Welded Mono: P Mesh-XL Very popular Foundation. Made from clear nylon threads woven like window screen. Sonic welded to join the Threads permanently together. Made in single or double layer. Extremely natural.
Pu and Class Silk: Clear Polyurethane reinforced with very thin gauze material. A very durable transparent material that is natural in appearance.
PU thin skin: Clear polyurethane with no gauze. Beautiful but short lived. A very popular foundation.
PE Mesh: Nylite Mesh, PE Mesh, Poly Mesh. Flexible and durable four sided Polyester Mesh similar to Window Screen but with smaller holes. May be ordered in soft or firm finish.
Small Hole Fusion: F Mesh. Woven material with six sided Pencil size �" holes.
Large Hole Fusion: Woven material same as Small Hole Fusion Material but with �" holes.
Integration Material: Braided Nylon sewing thread used to construct a foundation with any size holes desired.
Illusion Front Materials:
Welded Mono Lace: Same as Welded Mono using finer more closely woven threads. Used for Welded Mono Fronts and total Foundations. Also known as E Z On Material, Viper Front Material and All Star Front Material.
French Lace: Theatrical Lace used to create a very natural front hairline. May be used for the entire foundation.
Skin Lace: Very thin PU plus Gauze material. Natural looking but very delicate. May be ordered without the Glass Silk then becoming Thin Skin making it Extremely Delicate and short lived.
Ventilation Options:
Single hair Vent: A single hair is vented at a time. For gentle daily wear customers who want the open look. Very natural. This is the most convincing but also the most delicate venting. Not recommended for hard usage. May also be ordered in specific areas only. Front, Part, Crown or as desired.
V Loop Stitch: Extremely natural. No knots at all. Must be Polyurethane sealed. No durability.
Half knot: Used in Polyurethane areas. Is also sealed after venting. As durable as single hair venting and is similar to loop stitch in finished appearance.
Standard venting - 2 to 3 hairs at a time. Good looking and durable. The knots are more noticeable if styled strongly open. This is the recommended knotting for longer lasting results on the permanent wear clients. It may also be ordered for specific areas only. Top, Sides, Back or as desired.
sexibeach
Members Profile
Send Private Message
Find Members Posts
Add to Buddy List
Senior Member
Joined: March 15 2006
Location: United States
Status: Offline
Points: 1569
This might get a little technical but I think Its essential to learn about the human hair inorder to take good and proper care of the lacefront human hair. This is some information I found very interesting. Because I found in the winter time, my hair has tactic electricity which is quite annoying and something I'm totally not use too. And its different in the summertime. So here's what I found, it might be some helpful information:
Consumers evaluate the cosmetic properties of human hair according to combing ease, strength and elasticity. We translate these attributes into single fiber evaluations of friction and tensile properties. Human hair is an elastic substance that is subject to strain (deformation) and stress (recovery). The usual procedure for evaluating the strength and elasticity properties of human hair is via tensile strain/stress tests. A fiber of known length and diameter are stretched at a fixed rate and a fixed relative humidity and temperature on an automated instrument.
The procedures for testing the strength and elasticity involves setting the temperature in the testing room to approximately 21 degrees Celsius (70 degrees Fahrenheit) and the humidity between 40%-63%, the higher the humidity the stronger the hair will appear, which can guarantee results that do not represent reality. X length of hair will be mounted on clamps that will be zeroed, meaning we have to make sure that there is no tension or slack on the hair.
Tensile properties have shown to have little to do with the surface properties (cuticles), but the cortical properties where the stretching occurs. The cuticle does not contribute to the tensile properties, but can be damaged by excessive stretching as the scales lift and separate from the fiber. Cuticle damage is the first to occur. Much like stretching a rubber band that has printing on the surface. When you stretch it beyond the normal relaxation point, the ink will crack and eventually shed off the surface long before the rubber band will break.
The cortex is a major part of the fiber mass. Within the cortex are microfibrils that make up a large part of the cortical cells. And these consist of intermediate filaments and the matrix. This causes a loss of structure that is usually recovered on relaxation. Unfortunately, recovery occurs with normal healthy hair and not over-processed or non-cuticle hair.
Both combing and friction are considered the most perilous factors when discussing the maintenance of human hair. While combing our hair, we apply a significant amount of force upon the hair fibers and it is stretched in various degrees. The force applied during combing also creates friction that results in cuticles breaking and detaching from the strand, which increases the hair�s vulnerability. Each time we run into a small tangle in our hair, we have to remember to be more patient. Essentially, when we apply combing and stretch our hair, the hair is supposed to bounce back. In scientific values, if we stretch the hair 5%-10% beyond it�s original length, the hair will usually perform a complete recovery and will bounce back to the Zero point. If we stretch the hair 14%-17% beyond it�s original length, the percentage of relaxation (the mechanism of bouncing back) will not recover to zero. And there is now irreversible damage, although, we may not feel it.
Stretching the hair beyond 17% will cause irreversible damage that we will notice. The hair will snap back into a curl, almost like a snake recoiling.
With non-cuticle hair, the percentage values are much less as the cortex has suffered massive chemical damage and many of the bonds have been broken and cannot withstand applications of high force. And the non-cuticle strand will not snap back when stretched beyond the recovery point. Usually it will either fracture and immediately break or the hair will lay lifeless because it didn�t even have the elasticity to stretch in 5%-10%.
What can you do to prevent further loss of tensile properties? Understand the limitations of the hair type you purchase and maintain it accordingly. Avoid excessive combing and styling, especially when the hair is wet. If the hair is tangled, use a warm conditioner bath to relax the hair. It will greatly reduce friction and allow you to slowly work out the tangles. Do not scrub wet hair with a towel, pat and gently squeeze to remove the excess moisture. If you have had no choice but to tackle a tangled dry wig with nothing but a brush and determination, wet it down when you are finished and let it air dry. As the water evaporates the fibers will have a greater chance to recover and reform as much as possible to its original structure. Allowing the hair time to recover is highly important.
sexibeach
Members Profile
Send Private Message
Find Members Posts
Add to Buddy List
Senior Member
Joined: March 15 2006
Location: United States
Status: Offline
Points: 1569
ADDITIONAL CHINESE VENDOR'S FOR THOSE SEEKING NEW CONTACT:
I've not personally had any units made by these vendors, I am not recommending them b/c i've had no experience with them. But these are just options for those that might be risk taker's that want to venture out with a new vendor:
i use the loreal super blonde lightening kit.. i use more of the blue powder and the lotion as the mixture in a small bowl so i can save the rest for later, there's no need in using the whole kit.. there is a tube that is yellow that's the blonde lighten part, i only add like a little bitty dab of that b/c if you use too much it can be more blonde and turn the knots/lace orange.. don't push to hard, just brush lightly across the top of the lace, b/c if you push too hard it can push thru the holes to the other side, if that happens then you can bleach the roots.. altho it can be fixed by dying the roots with a small applicator brush, but best not to do that to begin with so skim lightly across the surface of the lace cap only making sure there's coverage of the knots you want bleached.. the LSBLK takes about 30 min.. i usually only leave it on for about 15 to 20 minutes checking it at 15 mins.. now if the hair has been colored by clothing dye which it could be, you need to do the rits dye remover first and then bleach the knots.. usually the no. 1 and 1b's colors are dyed with clothing dye.. do a test patch to be sure if the knots are not going to bleach then you know where to go from there...the instructions for the rits dye DIP is in the newbie thread.. if by chance you do color the lace then you need to do a slight rits dye dip (meaning only 2 or 3 dips) to try to remove the excess orange color from the lace, and/or resort to the rits dye pen to make sure your color matches your skin..
sexibeach
Members Profile
Send Private Message
Find Members Posts
Add to Buddy List
Senior Member
Joined: March 15 2006
Location: United States
Status: Offline
Points: 1569
Mane and Tail World of curls (basically any type of curl activator)
Soft n free
ISO BouncyCream and Farouk Silk Therpy combo
Combing frizzy hair
It is always advisable to use a wide-toothed comb or even fingers when necessary. It is better not to comb or scrunch the hair when wet. It is better to blow dry with a round natural-bristled brush.
Use a hair pick instead of a hairbrush. Using hair brush on thick hair and hair prone to frizziness will only cause split ends. Instead it is simple and safe to use a hair pick when hair is wet or finger comb when hair is dry.
Combating hair frizz
Hair shampoos, conditioners and moisturizers have to be chosen with special care. One should choose a hair product based on the thickness of the hair. For thin hair, too much moisturizer will get rid of frizziness, but it will tend to make the hair flat. For thicker hair, it would be wise to use a conditioner that is formulated to help smoothness.
Leave in conditioners are a good option for all types of hair no matter the thickness.
Shampoo hair to the minimum; restrict it to only twice a week. This is because shampooing can dry out hair and dry hair can cause frizz. If you need to wash hair daily to keep out the dirt, then it is better to dilute the shampoo, or use only the conditioner and lots of water.
It is always better to have hair rinsed in the coldest water after a shampoo and a conditioner for straight hair. The coldest water will help hair to look less frizzy as it locks down the hair cuticle and makes hair slicker and softer.
To combat the use of styling products that contribute to frizz, it is best to use a clarifying shampoo at least once a week.
For frizziness that is caused due to damaged hair, deep conditioning treatment once a week helps to smoothen and soften the hair frizz. Deep moisturing treatments every week helps to tame frizziness.
Heat helps the conditioner to penetrate deeply into the hair. It is suggested to sit under a warm hood dryer or wrap a towel around the head leaving the conditioner to work for atleast an hour or even overnight for best results.
Never rub the hair after hair wash. Instead gently squeeze out the excessive moisture with a towel.
If hair is very fine, it is better not to over-condition it. It is better to use a lighter styling produce like a mousse instead of a gel.
It would be ideal to use a hair mask. This is ideal for deep conditioning the hair.
Hair styling products for hair frizz
Nowadays the market is flooded with plenty of specialty products, frizz busters and frizz removers that tame unmanageable hair, reduce flyaway and increase shine. These claim to remove frizz permanently but it is left to every individual user to decide on the effectiveness of the product and whether at all hair frizz can be permanently tamed.
There are certain products available in the market, which are popularly used to control frizz to some extent. These products need to be used repeatedly and cannot be a one-time solution. Nevertheless they are found to effectively control if not permanently cure frizz:
Hair frizz can be controlled by use of 'pomade', which is designed and sold for especially for curly hair. This product is available in any drug store and it is inexpensive. The procedure is simple: After washing the hair a small quantity of pomade should be gently spread evenly throughout the hair. The curls should then be separated and individually twisted and this will give definition and volume to the hair that is otherwise frizzy.
Hair creams work best on frizzy hair and add control to the hair along with frizz relief properties. They work best on wet hair. They can also be worked into dry hair to provide a certain amount of hold.
Anti-frizz serums containing silicone work best on hair frizz. Silicon serums come with the strength of proteins. Proteins give hair strength and protect against humidity, and hence act as frizz fighters. Normally the ingredients are found in silicone products are dimethicone and cyclomethicone. There are very light silicone oils that can be used even on fine hair. Most of these products are extremely concentrated and so a few drops of the product is enough.
Oil-based conditioners can contribute to frizz. It is better to use cream-based conditioners. Avoid products that contain high degree of drying ingredients and alcohol. This will only increase hair frizz.
Hair gels can also be used in frizz control. These gels help to hold hair better and usually relieve frizz better than a mousse.
Home remedies for frizzy hair
Use of vinegar helps to smoothen the hair cuticles. Vinegar also corrects the pH balance in the hair.
Tropical coconut conditioner or castor oil conditioner can be effective in smoothing down frizz.
Natural vegetable glycerin can be added to the mousse or gel and used effectively on hair to control frizz.
Egg can be mixed with olive oil and this paste applied to hair directly. After about half an hour, rinse out with a shampoo and conditioner.
No hair product is a magic tool. Nothing can permanently change frizzy hair to a smooth flowing mane. If you have long curly hair, a stylist can cut angles inside the hair and add layers, which will help enhance the curls. On the other hand, if you have short frizzy hair, a hair stylist can help you get the right haircut to tone down frizz.
sexibeach
Members Profile
Send Private Message
Find Members Posts
Add to Buddy List
Senior Member
Joined: March 15 2006
Location: United States
Status: Offline
Points: 1569
THIS IS HOW TO MAKE A LF, BUT I ALSO THINK IT CAN SHOW YOU HOW TO MAKE A TEMPLATE AS WELL..
How To Make A Lace Front Wig & The Art of Lace Wig Making
Throughout history wigs were status symbols, hence the term lace wig. One early wig making technique was to use goatskin to simulate a scalp and then poke hair into it with an embroidery needle. Today, animal skin is no longer used. These days� wigs can look so real, no one would notice.
To make a custom wig, a lace wig master measures a client�s head for lace front wig measurements from all angles because heads come in many shapes and sizes. The wig master wraps the client�s head in cellophane twisting it just under the ear lobes. Next, the wig master sticks filament tape over the cellophane wrap; he layers it four separate times to make a sculpting cast. He lifts the tape and cellophane cast from the client�s head and places it on a wig block; a head shape made from canvas or wood. Using a grease pencil, the wig master traces around the cast making a pattern of the client�s hairline on the wig block. The wig master then cuts pieces of plain blue paper and pins it on the wig block within the pattern lines. The paper will prevent light from reflecting into his eyes as he works. Now he places a large size polyester cotton lace on the wig block, and cuts it to the penciled outline. The wig master then pins a finer lace from front to back while leading the edges with pins.
The Art of Lace Wig Making
He pulls open a draw with real remy human hair and synthetic hair; it�s hard to tell the difference between them. He uses a tail of 100% Indian remy human hair labeled golden ash blonde. This next step is stripping down and blending the hair to achieve the best quality hairs for making the wig. The tool that is used for this process is called the hackle. The hackle is a giant comb with rows of sharp steel teeth. The wig master first places the golden ash blonde hair between the teeth of the hackle and then places the colored synthetic hair on top. Now, he repeatedly drags the hair through the hackle. He looses some strands in the comb, but those are usually the weaker ones. This process is called hackling and the action gets progressively more vigorous. He twists and turns the tail as he pulls it through the hackle, this is actually dangerous work, and one wrong move and he can pierce his hand on the sharp steel comb.
Once the hair is blended the wig master then cuts the excess ends off to get the best quality hairs. Next, he presses the hair into little metal pins on a leather holding card, the pins on the top card interlock with the bottom one. He pulls hair out of the holding card a few strands at time, with a small needle that looks like a fishing hook. He then knocks the strands into the lace beginning at the nape; this process is known as ventilating, it�s very similar to rug hooking. In fact, this may be a way toupee and wigs are often referred to as rugs. Ventilating is labor intensive; the wig master spends a minimum of 50 hours knotting the hairs it takes to make a lace wig. Partway into the job, the wig master combs out any tangles and louses the hair to make sure it moves naturally.
Custom lace front wigs for film and television are usually made by hand, rather than machine because the result is more authentic looking. Because the camera tells all, the custom lace wig needs to look as real as possible. The wig master then weaves the front of the lace wig one hair at a time because the frontal hairline always gets the most scrutiny. Now it�s time for the fitting and transformation. The lace wig needs a little styling and trimming the ends is usually needed. Finally, the extra lace is cut away from the perimeter and magic! She�s ready to let her hair down and get into her new role.
sexibeach
Members Profile
Send Private Message
Find Members Posts
Add to Buddy List
Senior Member
Joined: March 15 2006
Location: United States
Status: Offline
Points: 1569
I know we haven't' had many run-ins with picture thieves as of late, but I figured I'd share this tip anyhow.
Ok so after logging onto your own personal fotki account. Underneath a photo album you have the option of selecting "Edit properties" After clicking on that link a new page should load. Underneath the "Viewer Discretion Advised" box there is another link for "Advanced Properties" click on this link. After that page has fully loaded scroll down until you read "Originals available to:" Under the drop box select "Myself only." This prevents visitors from right clicking to save your photos.
You also have to change "Sharing photos allowed for (also enable right-click saving)" to "Myself Only". This is what keeps them from right clicking. When they right click they will get an message that says "Protected". They can right click on thumbnails, but when you resize it, the picture will be distorted.
Here's a screen shot of the fotki settings. I place a yellow box around the ones that you need to change to "Myself Only" to deter therft.
WATERMARK YOUR PICTURES AS WELL:
HOW TO WATERMARK YOUR PICTURES & VARIOUS WATERMARKING SOFTWARE LINKS (compliments of various members. Special thanks to DivaVocals)
Some of you have asked me about watermarking tools and some of you are using the uMark tool I suggested.. The free version of uMark is okay, but if you REALLY wanna protect your pics you need multiple watermarks that go across the ENTIRE picture. (Please see my fotki for examples of what I mean by multiple watermarks) uMark's free version cannot do this. The full version however supports this feature and it's ONLY $14.99. Most importantly both versions of uMark will process BATCHES of photos in short order.
If you want to see what you can really do with uMark, checkout Mahogany814's fotki (I hope you don't mind me spotlighting you Mahogany!) Notice the MULTIPLE watermarks.. It took only 10-20 minutes to process ALL the pictures you see in the 9 albums in her fotki. uMark is FAST and easy to use, and it is CHEAP!!!
Yes you can use Paint or Gimp. However remember that you must edit each photo individually. This is a tedious and time consuming task for most of us very busy ladies. For example, my last fotki album contained over 20 images, and adding watermarks one at a time to each photo is NOT the move!!! IMO, you need to use a program that will allow you to process a BATCH of photos at once.
Photoshop is a great tool if you have LEGAL access to it. However unless you are familiar with the advanced features of Photoshop which allows you to edit batches of photos (AKA the "Actions" function) you will still find yourself editing 1 photo at a time in Photoshop. PLUS IMO Photoshop is a professional level photo and graphic editing program and IS NOT for the casual user.. (Too much money, & too many features for the "average" user) Phototshop is a HUGE complex program and even understanding the "basic" features of it takes a little more than a notion..
I KNOW some of you HATE the idea of HAVING to watermark your pictures, but fortunately or unfortunately it is what it is.. If you post your images on the internet, they are subject to being taken and used for purposes other than what you actually intended.. I could go into LONG technical details of ALL the ways to steal web content, and ALL the ways IP logging doesn't stop (or even identify) content/picture thieves, but that REALLY is a different discussion. The ONE SURE way to DISCOURAGE thieves from stealing your photos and PREVENT them from using them if they do is to WATERMARK your photos.. Like it or not that's just the way it is.. (Sorry!)
This is because people who want to use others� images want an image that can be easily modified, so a watermarked image is useless for them because no software can remove the watermark!
The trick here is to cover the entire image with some markings so that people can still view the images but they can not modify them using any image editing software.
While most of these programs are pretty cheap, this program is free.. It's pretty decent for a free program.. The full version is like $24.. uMark Lite
sexibeach
Members Profile
Send Private Message
Find Members Posts
Add to Buddy List
Senior Member
Joined: March 15 2006
Location: United States
Status: Offline
Points: 1569
HAIR CARE INSTUCTIONS - PROPER CARE CAN PROLONG THE LIFESPAN OF YOUR UNIT:
Cleanliness Keep the hair Clean. It is recommended that the hair be washed at least once every two weeks with warm or cold water. Please wash the hair right after swimming and comb the hair after spa activities and exercising etc� When dirt accumulates, including sweating, hair tangles!
Shampoo/Conditioning It is best to wash the hair with the unit removed, this will prevent premature slippage.
With Unit Removed
Remove unit and place on a styrofoam mannequin. Rinse hair in the same direction as the flow of the water. Apply shampoo/conditioner in hands, lather and pat on the hair. Use a large tooth comb or wig brush and distribute shampoo/conditioner on the hair. Rinse the hair in the same direction of the water. NEVER RUB THE HAIR TOGETHER this will cause tangles and matting. Allow the hair to dry and style as usual.
With Unit On
Dilute shampoo with water (50/50) into a spray bottle. Spray shampoo onto scalp. Press and slide shampoo into the Full Lace Wig from the root to the ends with a large tooth comb or wig brush; press with palms and squeeze the shampoo through the ends. For best results use moisturizing shampoo. NEVER RUB or RUFFLE the hair or tangling will result. Lean backward with the hair flowing in the direction of the shower water and rinse with lukewarm (not hot) water. Use a deep penetrating moisture and conditioner. Leave on for 3-5 minutes. Avoid using conditioners near attachment site as adhesive may detach prematurely. Or use a dry shampoo.
Detangling Make sure you comb the hair after each wash and daily. When detangling the hair, please start from the ends and work up little by little to the scalp. Hold the base with the other hand to keep it from shedding or causing root tension. We recommend a large tooth comb or wig brush. Avoid using shine products on the root area as it may prematurely detach your Hair Grafting
Sleeping Make a couple of big braids in your hair when going to sleep, swimming or exercising. You MUST untangle your hair prior to braiding. NEVER sleep on wet hair, your hair must be completely dry before going to sleep as sleeping on wet Full Lace Wigs WILL cause hair to be very matted. Or wear up in a very high pony tail which works for most curly or wavy units.
Chlorine and Salt Water
Chlorine and salt water have been known to damage hair used in Full Lace Wigs. Please understand that chlorinated pools, Jacuzzis, saunas and ocean water can cause irreparable damage to the hair that you have purchased and/or wearing and that a Full Lace Wig Specialist can not be held responsible if you decide to ignore such warnings. Also you have been advised not to expose your my Full Lace Wig excessively to chlorinated and/or salt waters and do so at your own risk.
Chemical Usage It would be advisable NOT to chemically treat this hair yourself. Chemically treating the Full Lace Wig hair yourself may cause irreparable damage to your own and your Full Lace Wig.
Shedding
Some hair will shed out of some Full Lace Wigs easier than others. Curly and longer hair will commonly shed hair more rapidly than a short Lace Front Wig. Shedding of hair is considered very normal.
Slippage
During the life of your Full Lace Wig hairstyle, your Full Lace Wig may slip. To help avoid this, constantly apply firm pressure on the attachment site, especially after showering. This will help the attachment stay firmly attached to the scalp area. In the event of your Full Lace Wig slipping or lifting, you can successfully re attach using a small amount of �Retouch Adhesive�, wait 4 minutes for it to cure, and then press firmly.
Wavy Hair/Curly Hair
For wavy or curly hair, we recommend you wet the hair every morning with water and Protein Leave-in Detangler.
Dry Ends
To keep hair from dryness, please apply olive oil two to three times weekly prior to shampooing. Olive oil left on the hair overnight on the ends only is very effective. Remember Lace Front Wig hair does not have the benefit of your own natural scalp oils, so olive oil will help to replace those necessary oils in the hair shaft.
All of the Following Can Cause Premature and Excessive Hair Loss:
Excessive Combing or Brushing
This will ultimately break off hair and cause premature thinning of the hair replacement.
Unattended Matting And Tangling
Left uncorrected, excessive matting and tangling that is then removed forcefully will tighten the matted hair and tear out the hair.
Friction
From pillows or overly aggressive shampooing will break off the hair and thin and tear out the hair.
Over Perming/Incorrect Perming
This will damage the integrity of the hair, especially in lighter colored hair replacements, and will lead to accelerated hair breakage and thinning.
Conditioners Remaining In The Root Area
Probably the single largest factor creating major, ongoing, irreversible hair loss. Conditioners that are allowed to be absorbed onto the base and gather around the root system will ultimately prevent the root system from pivoting 360 degrees allowing for hair loss in your hair replacement. Conditioners must be rinsed out completely to avoid the breakage of the root system. Read your care instructions carefully to learn the proper application and removal for conditioning
If tangling from excessive friction occurs, comb it out immediately and gently with our rotating tooth comb, using a small amount of our Detangler or conditioner. Try using a silk or satin pillow case to avoid the friction of cotton pillowcases. If you must go swimming in chlorinated water, immediately rinse your hair when leaving the pool, then gently shampoo and condition with recommended products. For coloring and perming, try using �Semi Permanent� colors that use little or no peroxide. Always use perms designed for processed hair and to always air oxidize. Avoid using too much conditioner, apply it onto your palms and fingertips first, then apply it to your hair keeping the conditioner away form the root and base area of your hair, and then rinse the conditioner thoroughly.
The following information is offered to help you understand the causes of matting and tangling in human hair wigs and hair replacements and the simple answers for minimizing these problems. In the vast majority of hand made hair replacements, the hair is knotted to a mesh base. This means the same hair is going out from the knot in two different directions. This also means the cuticles are going in two different directions. These types of products have had the hair chemically �smoothed� or �sealed�, (typically known as decuticlization) to minimize hair tangling. Products that have implanted hair (all going in the same direction) Have all of their cuticles in-tact, but will also be prone the matting and tangling.
sexibeach
Members Profile
Send Private Message
Find Members Posts
Add to Buddy List
Senior Member
Joined: March 15 2006
Location: United States
Status: Offline
Points: 1569
HAIR CARE INSTUCTIONS - PROPER CARE CAN PROLONG THE LIFESPAN OF YOUR UNIT:
Cleanliness
Keep the hair Clean. It is recommended that the hair be washed at least once every two weeks with warm or cold water. Please wash the hair right after swimming and comb the hair after spa activities and exercising etc� When dirt accumulates, including sweating, hair tangles!
Shampoo/Conditioning
It is best to wash the hair with the unit removed, this will prevent premature slippage.
With Unit Removed
Remove unit and place on a styrofoam mannequin. Rinse hair in the same direction as the flow of the water. Apply shampoo/conditioner in hands, lather and pat on the hair. Use a large tooth comb or wig brush and distribute shampoo/conditioner on the hair. Rinse the hair in the same direction of the water. NEVER RUB THE HAIR TOGETHER this will cause tangles and matting. Allow the hair to dry and style as usual.
With Unit On
Dilute shampoo with water (50/50) into a spray bottle. Spray shampoo onto scalp. Press and slide shampoo into the Full Lace Wig from the root to the ends with a large tooth comb or wig brush; press with palms and squeeze the shampoo through the ends. For best results use moisturizing shampoo. NEVER RUB or RUFFLE the hair or tangling will result. Lean backward with the hair flowing in the direction of the shower water and rinse with lukewarm (not hot) water. Use a deep penetrating moisture and conditioner. Leave on for 3-5 minutes. Avoid using conditioners near attachment site as adhesive may detach prematurely. Or use a dry shampoo.
Detangling
Make sure you comb the hair after each wash and daily. When detangling the hair, please start from the ends and work up little by little to the scalp. Hold the base with the other hand to keep it from shedding or causing root tension. We recommend a large tooth comb or wig brush. Avoid using shine products on the root area as it may prematurely detach your Hair Grafting
Sleeping
Make a couple of big braids in your hair when going to sleep, swimming or exercising. You MUST untangle your hair prior to braiding. NEVER sleep on wet hair, your hair must be completely dry before going to sleep as sleeping on wet Full Lace Wigs WILL cause hair to be very matted. Or wear up in a very high pony tail which works for most curly or wavy units.
Chlorine and Salt Water
Chlorine and salt water have been known to damage hair used in Full Lace Wigs. Please understand that chlorinated pools, Jacuzzis, saunas and ocean water can cause irreparable damage to the hair that you have purchased and/or wearing and that a Full Lace Wig Specialist can not be held responsible if you decide to ignore such warnings. Also you have been advised not to expose your my Full Lace Wig excessively to chlorinated and/or salt waters and do so at your own risk.
Chemical Usage
It would be advisable NOT to chemically treat this hair yourself. Chemically treating the Full Lace Wig hair yourself may cause irreparable damage to your own and your Full Lace Wig. But if you do decide to re-perm and re-rod you can find a lesser strength perm designed for this type of hair at sally's called the apple perm which is not at professional strength.
Shedding
Some hair will shed out of some Full Lace Wigs easier than others. Curly and longer hair will commonly shed hair more rapidly than a short Lace Front Wig. Shedding of hair is considered very normal.
Slippage
During the life of your Full Lace Wig hairstyle, your Full Lace Wig may slip. To help avoid this, constantly apply firm pressure on the attachment site, especially after showering. This will help the attachment stay firmly attached to the scalp area. In the event of your Full Lace Wig slipping or lifting, you can successfully re attach using a small amount of �Retouch Adhesive�, wait 4 minutes for it to cure, and then press firmly.
Wavy Hair/Curly Hair
For wavy or curly hair, we recommend you wet the hair every morning with water and Protein Leave-in Detangler.
Dry Ends
To keep hair from dryness, please apply olive oil two to three times weekly prior to shampooing. Olive oil left on the hair overnight on the ends only is very effective. Remember Lace Front Wig hair does not have the benefit of your own natural scalp oils, so olive oil will help to replace those necessary oils in the hair shaft.
All of the Following Can Cause Premature and Excessive Hair Loss:
Excessive Combing or Brushing
This will ultimately break off hair and cause premature thinning of the hair replacement.
Unattended Matting And Tangling
Left uncorrected, excessive matting and tangling that is then removed forcefully will tighten the matted hair and tear out the hair.
Friction
From pillows or overly aggressive shampooing will break off the hair and thin and tear out the hair.
Over Perming/Incorrect Perming
This will damage the integrity of the hair, especially in lighter colored hair replacements, and will lead to accelerated hair breakage and thinning.
Conditioners Remaining In The Root Area
Probably the single largest factor creating major, ongoing, irreversible hair loss. Conditioners that are allowed to be absorbed onto the base and gather around the root system will ultimately prevent the root system from pivoting 360 degrees allowing for hair loss in your hair replacement. Conditioners must be rinsed out completely to avoid the breakage of the root system. Read your care instructions carefully to learn the proper application and removal for conditioning
If tangling from excessive friction occurs, comb it out immediately and gently with our rotating tooth comb, using a small amount of our Detangler or conditioner. Try using a silk or satin pillow case to avoid the friction of cotton pillowcases. If you must go swimming in chlorinated water, immediately rinse your hair when leaving the pool, then gently shampoo and condition with recommended products. For coloring and perming, try using �Semi Permanent� colors that use little or no peroxide. Always use perms designed for processed hair and to always air oxidize. Avoid using too much conditioner, apply it onto your palms and fingertips first, then apply it to your hair keeping the conditioner away form the root and base area of your hair, and then rinse the conditioner thoroughly.
The following information is offered to help you understand the causes of matting and tangling in human hair wigs and hair replacements and the simple answers for minimizing these problems. In the vast majority of hand made hair replacements, the hair is knotted to a mesh base. This means the same hair is going out from the knot in two different directions. This also means the cuticles are going in two different directions. These types of products have had the hair chemically �smoothed� or �sealed�, (typically known as decuticlization) to minimize hair tangling. Products that have implanted hair (all going in the same direction) Have all of their cuticles in-tact, but will also be prone the matting and tangling.
sexibeach
Members Profile
Send Private Message
Find Members Posts
Add to Buddy List
Senior Member
Joined: March 15 2006
Location: United States
Status: Offline
Points: 1569
Step 1. Shampoo and condition system, pin on mannequin head. Section hair as shown and cut 1 inch longer than the desired finished length. Cut hair holding shears pointed out from center.
Step 2. Start at the highest point of the hair system cut your guide section down center.
Step 3. Continue cutting in pie shape always holding shears pointed out from center.
Step 4. When all pie sections are cut. Hold mannequin head upside down to see that all hair was cut evenly.
Step 5. Most hair systems come with to much hair on them. They need to be thinned to adjust the density and achieve a realistic look. Follow a circular pattern of � inch sections working toward the center. Be careful not to overlap sections.
Step 6. Hold thinning shears parallel and straight into the base using just the tip. It is important to thin the hair by cutting as close to the base as possible without cutting into it. This reduces short hair stubble that can cause problems.
Note: With this method you only cut 2-3 hairs at a time. This is the best way to remove unwanted density.
Step 7. Texturizing the ends is important to create softness and movement. Section out all hair 1 inch above above entire perimeter of hair system. This hair is cut in the final blending into the clients hair. Follow the same sectioning as for thinning. Hold hair straight up with a comb and cut into tips of hair.
Step 9. After attaching hair system to client, section the hair on the crown from the perimeter hair. This section is � to � inch up from the perimeter edge.
Step 10. Start by blending hair system into clients hair by taking thin sections and thinning and texturizing them. When entire perimeter is complete, blend in the remaining hair. Next, texturize and thin the hair in the front (bangs
sexibeach
Members Profile
Send Private Message
Find Members Posts
Add to Buddy List
Senior Member
Joined: March 15 2006
Location: United States
Status: Offline
Points: 1569
Bleaching of knots does not result in white or clear knots, but it does help to give the illusion of growing hair by camouflaging the knots. But what should you expect when you order bleached knots?
If your hair color is Black, 1B or 2, then knots that hold the hair onto the base will be changed from black to light brown and will be much less visible. Single knots such as those used at the front edge will be be very hard to spot.
If your hair color is between 3 and 6, the knots will be even harder to spot.
If your hair color is 7 or lighter, the bleaching will make hardly any difference, but we still do it if the completed unit has knots that can be seen against the skin during the manufacturing inspection stage.
For all-lace units where the density is such that there isn�t enough room on the lace for all single knots, you will inevitably be able to spot some knotting upon close inspection of the top lace. A 3# monofilament base will look more natural than lace in this area because 3# hides double knots and split knots and lace reveals them.
For extra light and light density units, the all lace base is less detectable than the 3# base because there is enough room on the lace to use all single knots and still arrive at a density of 65% or less.
The knots cannot be bleached in an area of the unit that is poly coated. The knots cannot be bleached in poly-skin base areas. Our hair is dyed with special chemicals made in Korea. They are designed to prevent sun-fading, but they also make it harder to bleach the knots.
Bleached knots, Lace Fronts, Single Knots.
Veteran hair wearers are always on a quest to get the most natural looking unit with the latest techniques and specifications. Sometimes the theory does not match the results.
For densities below 65% A Swiss lace or French lace base looks amazing, but if your hair density is higher, there is not enough room on the lace for all those single knots and so the knots get bigger as all that hair is tied in, resulting in a knotty, lumpy feel and look. Stick to 3# monofilament bases for higher densities and choose a lace front with a maximum of 65% density. We try to bleach knots as much as possible, but sometimes even this can't hide all of the knotted hair that you ask us to make your unit with.
To sum up:
Bleaching the knots is the best known method of making the hair appear as if it is growing from the scalp, but don't expect them to be invisible from an inch away. (Polyskin now rivals lace for undetectability)
Unless you wear an all lace base, only the front section needs to have bleached knots.
Depending upon your density, the best base material for your bleached knots is either French lace or 3# monofilament. You should not bleach the knots with a 3# base as they are concealed anyway.
Depending on your hair color, the bleached knots will be light brown or blonde.
Bleaching your own knots
If your unit is older and you have re-colored it to reverse sun-fading, you may have inadvertently dyed the knots dark again.
Bleaching your own knots is not too difficult, but it is attempted at your own risk. Don't forget to wear gloves and glasses and open a window. You can choose your favorite brand, but we get excellent results with Wella.
Basically you buy some Lightener and any 40% creme developer. Inside the box are packets of powder and a bottle of liquid. In a plastic bowl and with a nylon brush, mix 1/4 of the contents of the bottle with one sachet of the powder, then double the quantity with the 40% creme developer. The bowl now contains a thick blue gel-like paste. It's enough for four or five units, but this is very inexpensive so don't worry about having leftover mixture.
Keeping the hair out of the way, brush this thick paste on the underside of the lace. It's so thick it shouldn't seep through. Wait about half an hour (this time can vary according to how dark the hair is and what batch it's from etc). Then rise out the paste and shampoo the unit two or three times until it smells like it's free of all bleach.
Some experimenters have advised us that preparing the knots for bleaching using RIT fabric dye remover makes the process much easier. With Wellite this seems completely unneccessary. Some danger-seeking professionals instead risk a 10 second exposure with straight household bleach. Get this wrong and the precious hair will drop out in clumps! Stick to the safer method above instead.
Alternatives to bleached knots
You can order the hair at the front in very light blonde or human gray and then color the hair to match the rest of the unit once you have received the unit. This is not a popular option because it's a job that can be avoided by ordering bleached knots. The new polyskins offer less maintenance than bleached knots on lace and now riival lace for undetectability.
sexibeach
Members Profile
Send Private Message
Find Members Posts
Add to Buddy List
Senior Member
Joined: March 15 2006
Location: United States
Status: Offline
Points: 1569
French Lace is a barely visible polyester knitted material into which hair is knotted and the knots are bleached. Available in pink or yellow. Can be made brown upon special request.
Extra Fine Swiss Lace is the least visible lace, easier to tear than French lace. A knitted polyester, it comes in many colors. (see above for a revised opinion of Swiss lace)
3# monofilament is a hard to see, strong unwelded nylon fine knit that can be used anywhere except at an edge. Available in many colors.
0.12 monofilament, a strong lace alternative, is a woven and welded nylon mesh, similar to lace. Very strong and can be used at an edge. Available in many colors.
Polyskin is polyurethane available in various thicknesses from the extremely thin Polyskin 3 to a substantial edging material. It is non-porous and comes in many colors.
Poly-with-gauze is an untearable polyurethane edging material that is reasonably undetectable. Available in many colors.
Poly coating is a thicker and less popular alternative to poly-with-gauze but is better than poly-with-gauze if used on 0.12 mono. Available in many colors.
Injected polyskin is a multi-layer polyurethane that sandwiches in the ends of injected hairs without knotting. Starting in 2007, a new technique allows us to make these with a much thinner base than ever before, so for the first time, the front hairline edge will disappear sufficiently to be considered quite undetectable. This base method is still the best base for virgin hair (which the client supplies himself) that has the cuticle intact. Upon magnified close inspection, the slight bend at the "root" of each hair can spoil the illusion with these bases.
Finished Hair Length:
Finished hair length is from the knot to the end of hair before curling.
No extra charge for lengths up to 6".
Long hair charges will apply to length 8" and longer. See price list.
Undervent:
Undervent is a row of hair vented into the bottom of base along the outside perimeter. Used at the front hairline it helps to conceal the edge of base material that is not scalloped or made of lace. Light is 1 row, Medium is 2 rows and Heavy is 3 rows of underventing. We do not recommend underventing on lace units, scallop fronts, or Micro thin Poly skin (graft material) fronts. Doing this would show too heavy of a solid line on these materials and defeat the purpose of using that material.
Part Appearance:
Some type of hair direction must be given on the order. This indicates to the factory how to ventilate the hair to give it stylability. If you want a definite whorl in the crown, check the location on order form. If you want a definite or diffused part, check location on form. Freestyle is vented forward from the crown position, and can be combed or parted anywhere. On the picture �Draw Hair Direction� you may want to draw how the client wishes to comb their hair.
Density:
Many things such as base material, hair length and type of hair/fiber used will affect the finished appearance of Density. The Density chart shows how thick the hair will come on the unit. Example: Medium Density is 100% thickness of a normally full head of hair. Light Density is 80% thickness on a normally full head of hair, etc.
Waves & Curls:
Any amount of curl can be chosen for Synthetic hair. Human hair can only be curled at the factory. Generally curl appears to hold well. Blondes and longer lengths do not respond well to a curl. It may over process the hair and is not recommended. Due to many variables (length, density, color, organic origin) each human hair reacts differently during curling procedure. We cannot guarantee a consistent exact curl. We give it our best try, without a guarantee of results. This is a professional perm rod size guide:
Red/yellow3/16"4-5mmAfro
Blue5/16"6 mmloose afro
Pink3/8"10-13mmtight curl
Grey/white7/16"13-15mmloose curl
Lavender�"18-20mmtight wave
Peach/black9/16"22mmmedium wave
Orange3/4"25mmlight wave
Green1"30mmSlight body
40mmStraight
Hair Density
Hair density is simply how many hairs are added to your hair system base. In the old days, high density was necessary because the base materials were usually made of thicker materials and would be easily exposed if hair density were low. With the advance of thinner base materials such as lace and thin skin low density tends to look more natural especially with the see through look along the hairlines. You can chose different hair density in different areas of the base.
Extra light density is 45%
Very light density is 50%
Light density is 55% to 65%.
Medium light is 70% to 80%.
Medium is 90% to 100%.
100% and up (This is very, very thick).
sexibeach
Members Profile
Send Private Message
Find Members Posts
Add to Buddy List
Senior Member
Joined: March 15 2006
Location: United States
Status: Offline
Points: 1569
HAIR PRODUCTS FOR LACE FRONTS:(remember Oils don�t need to be soaked into the cap b/c you don�t want the knots to become lose but they do wonders for the hair with a deep heating.)
Kan Kanechomn Ceramids Deep Conditioning - The ceramids are the main lipides of the capillary structure, acting as a basis between the cuticle and the cortex, offering to the hair threads more resistance against external aggressions including frequent wash. The Capillary Renewer with CeramidsKan Kanechomn has a formulation with a special combination of ingredients, giving your hair a complete restoring treatment for the damaged hair threads, offering conditioning, softness and nutrition to the hair.
Here's what I will add, however, if you already have this posted. Please feel free to remove.
ADHESIVES
Top lace Flesh Glue:
A water-based white cream that dries clear and without shine. Used mostly on
the lace front and can give up to 7 days hold.
White Glue: Goes
on white dries clear. Apply to scalp and while still wet apply hair piece and
press down with brush, then quickly remove hair piece and let dry for 5 minutes
for extra hold apply second coating, scalp and hairpiece must be free from oil
and clean.
"I" Glue: Use
on lace or poly gives a hold of 3 days to 1 week on lace and up to 4 weeks on
poly. Apply to scalp and while still wet apply hair piece and press down with
brush, then quickly remove hair piece and let dry for 5 minutes for extra hold
apply second coating, scalp and hairpiece must be free from oil and clean.
Ultra-hold:
Excellent medical grade formulated acrylic adhesive. Used mostly on poly and is
regarded as the strongest adhesive available holding up to 4 weeks. Can also be
used on lace for a strong hold, but does give a little shine through the lace.
Mity
Tite: Medical grade formulated acrylic adhesive. It is
a soft bond extended wear adhesive not as strong as Ultra-Hold but does hold
for up to 3-4 weeks on poly. Again, can be used on lace but again gives a
little shine through lace.
Kryolan Mastix "P" Spirit Gum Adhesive & Remover:Gives
ultimate hold. This is a super-stick adhesive is especially useful in cases of
extreme perspiration. Because it is a sealor type of adhesive, it dries
quickly, so please use sparingly! Lace units must be positioned carefully
as it is difficult to reposition them. This handly little travel size
spirit gum fits right in your carry on or in your purse. Can also
be handy to take to work incase you are ever in need of a quick touch
up! Kryolan Spirit Gum P Remover is part of the set and is
highly recommended to disconnect appliance from skin when using the Mastix
"P" Adhesive.
Super
Grip Adhesive: Goes on white and dries clear, can be used to
reactivate tape, for use with lace, first apply Scalp Protector, let dry, than
apply Super Grip
Tapes: You can tape your unit. Non-shiny tape good
for front or back of unit.
REMOVERS:
C-22 Solvent Citrus
Adhesive Remover: Easy
to Use - Quickly Removes Adhesive and Residue from hair, scalp, lace or any
bonded areas of wig or toupee.
99% alcohol: which can be used to clean your
skin. It can also be used to clean your lace if using Spirit Gum.
Lace Release Adh�sive Glue Remover : Lace Release is a glue
remover. It helps to avoid damaging the lace when you are removing the
unit. It helps to release the glue from the unit and your scalp.
PROTECTORS:
Scalp protector: Prevents irritation from tape and adhesives.
Liquid
bandage
Knot Sealers-
TDI Lace Wig Knot Sealer : he sealer is a
product for use in sealing the knot in Lace Wigs and other hairpieces. The
knots may loosen with normal wear and maintenance. This product will greatly
reduce shedding and extend the life of your unit. The sealer should be sprayed
on the cap side of the wig. DO NOT SPRAY SEALER ON THE HAIR. The wig
should be cleaned as a part of normal maintenance and sealer re-applied after
cleaning.
You cannot post new topics in this forum You cannot reply to topics in this forum You cannot delete your posts in this forum You cannot edit your posts in this forum You cannot create polls in this forum You cannot vote in polls in this forum


 Topic Options

 Post Options
") Thanks(0)
Thanks(0)


 ) Notice the MULTIPLE
  )
)


